Gumi Save
When saving becomes fun
Kapag ang pagtitipid ay naging masaya
Kung ang pag-save mahimong makalingaw
v2.0.1
When saving becomes fun
Kapag ang pagtitipid ay naging masaya
Kung ang pag-save mahimong makalingaw
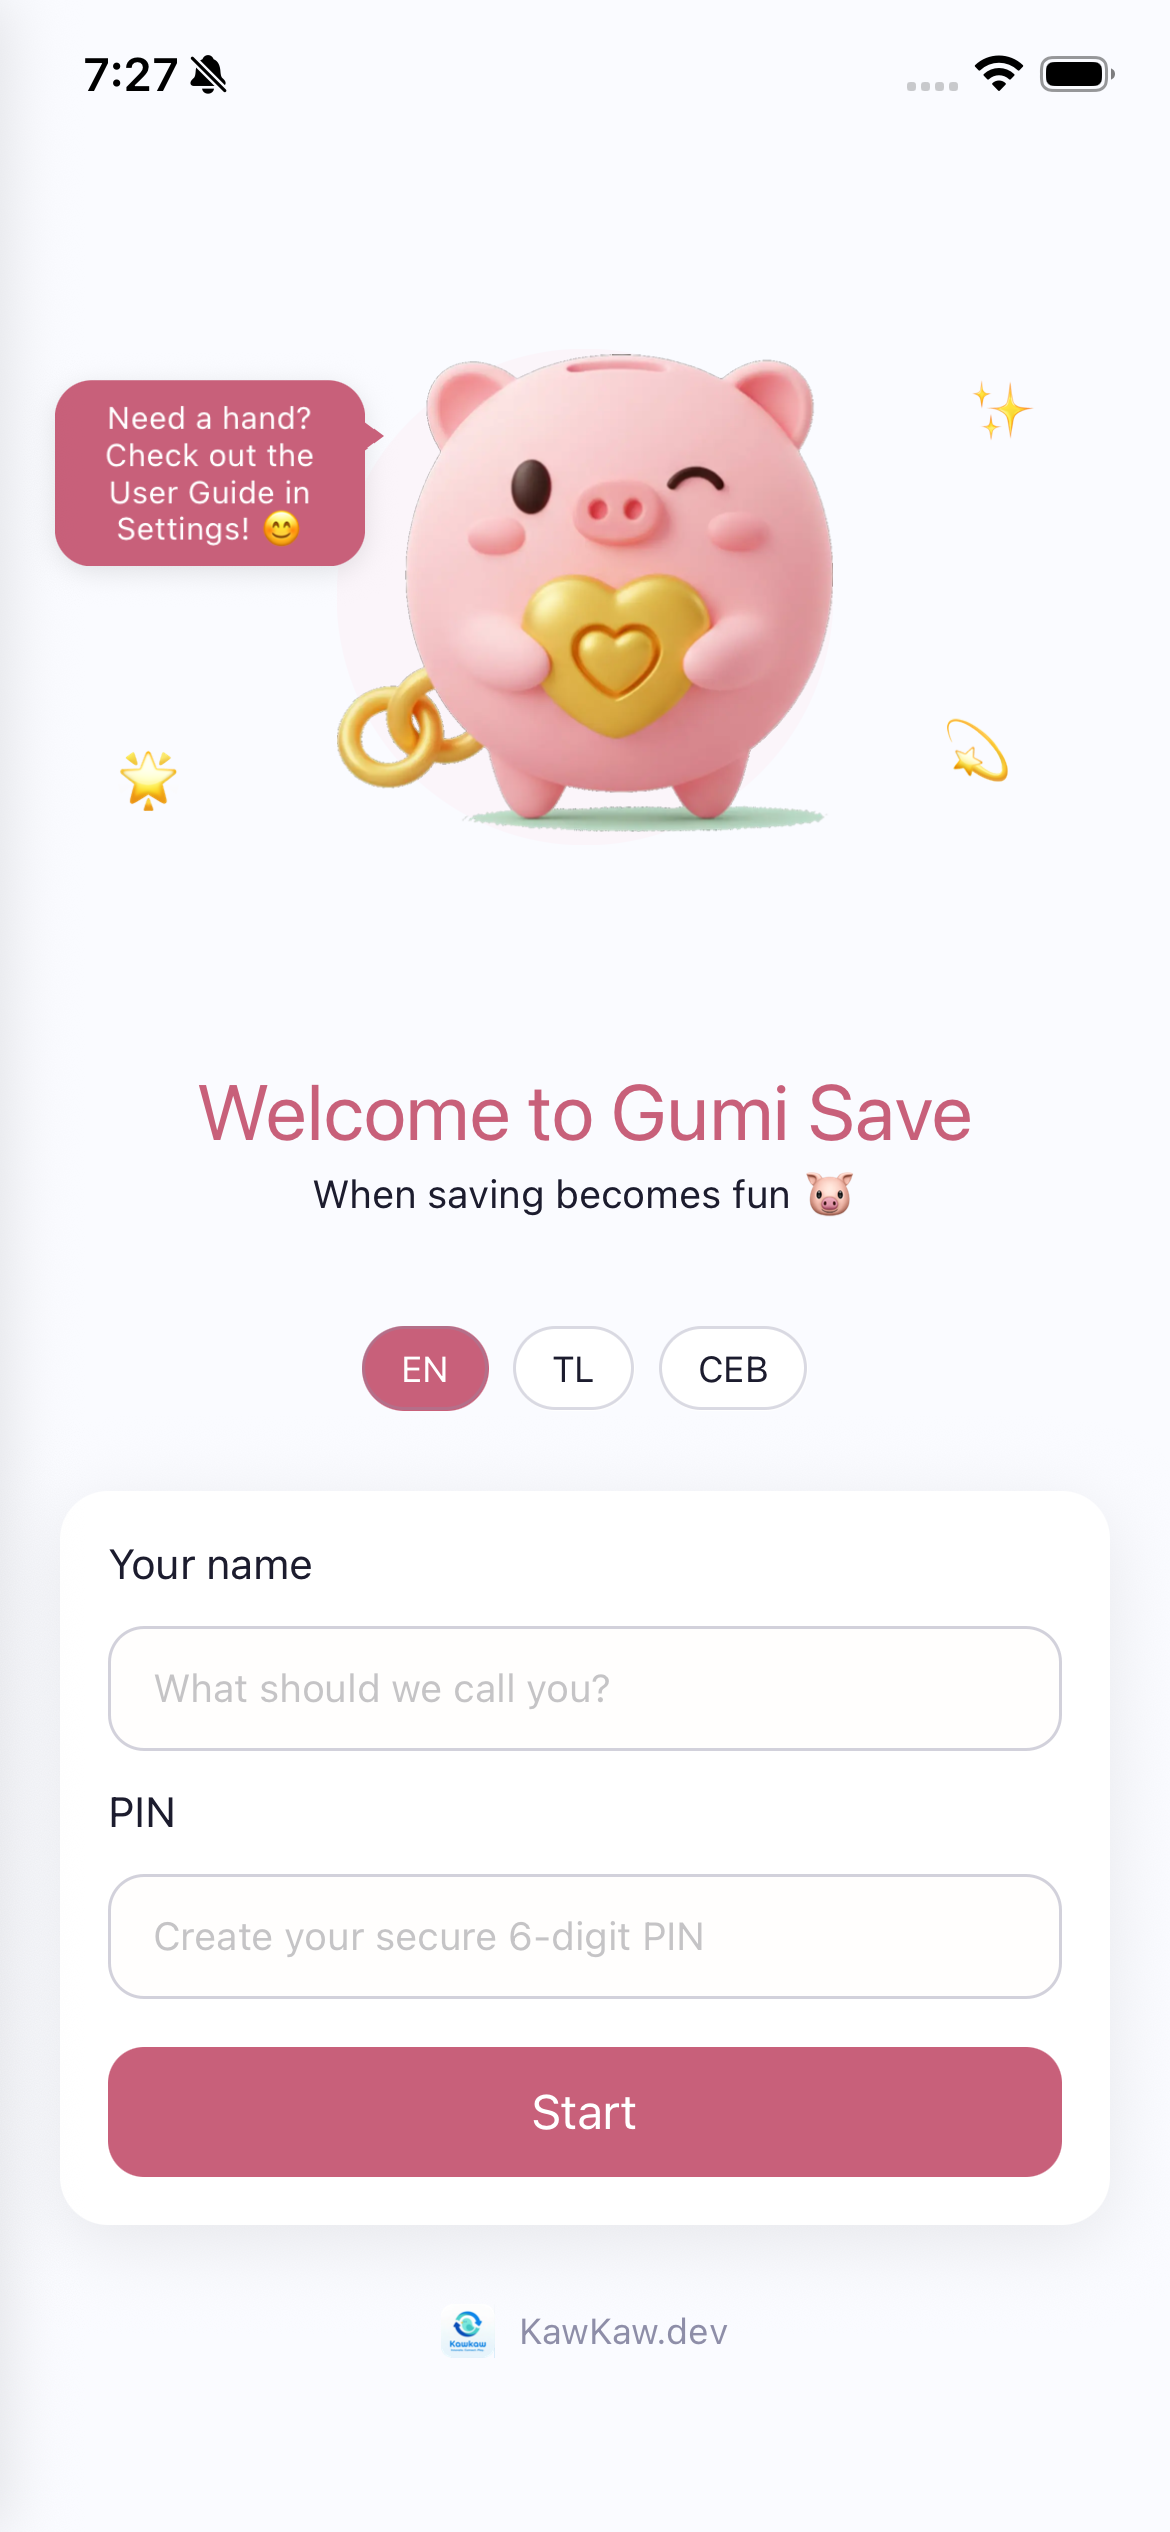
When you open the app for the first time, you'll see the onboarding screen with the adorable Gumi piggy bank mascot holding a golden heart.
The speech bubble says "Need a hand? Check out the User Guide in Settings!" - that's this guide!
Kapag unang binuksan mo ang app, makikita mo ang onboarding screen na may cute na Gumi piggy bank mascot na may hawak na gintong puso.
Kung una nimong ablihan ang app, makita nimo ang onboarding screen nga adunay cute nga Gumi piggy bank mascot.
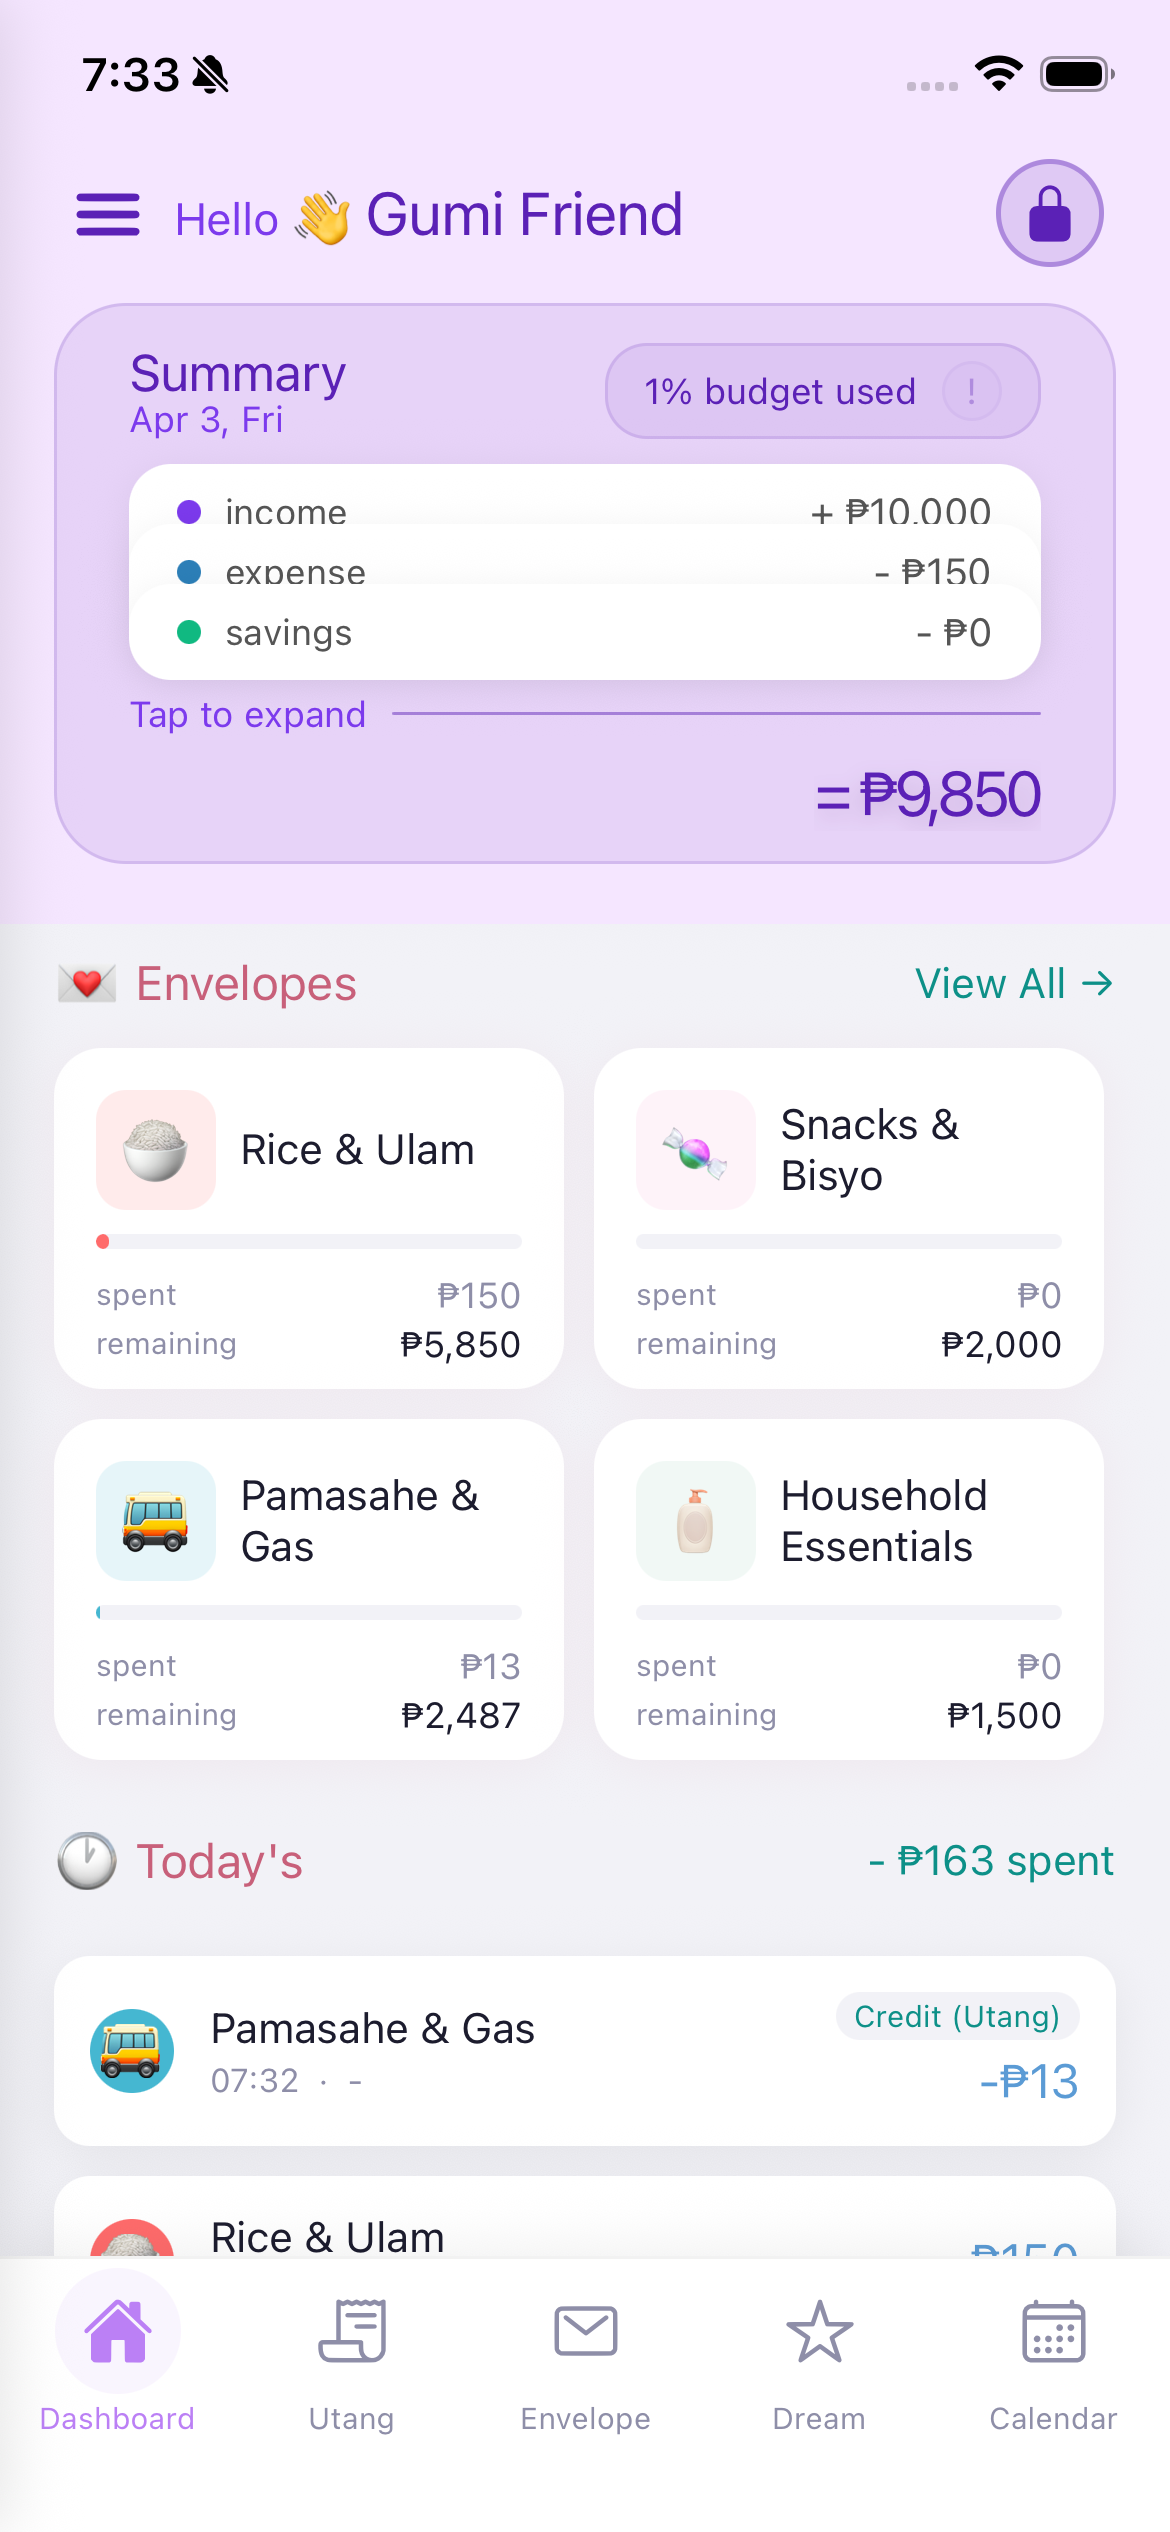
The Dashboard is your home screen. It gives you a complete overview of your finances at a glance. You can see your budget summary, quick expense shortcuts, action buttons, envelope status, and today's transactions all in one place.
Ang Dashboard ay ang iyong home screen. Nagbibigay ito ng buong overview ng iyong pananalapi sa isang tingin.
Ang Dashboard mao ang imong home screen. Naghatag kini og tibuok nga overview sa imong pinansyal sa usa ka tan-aw.
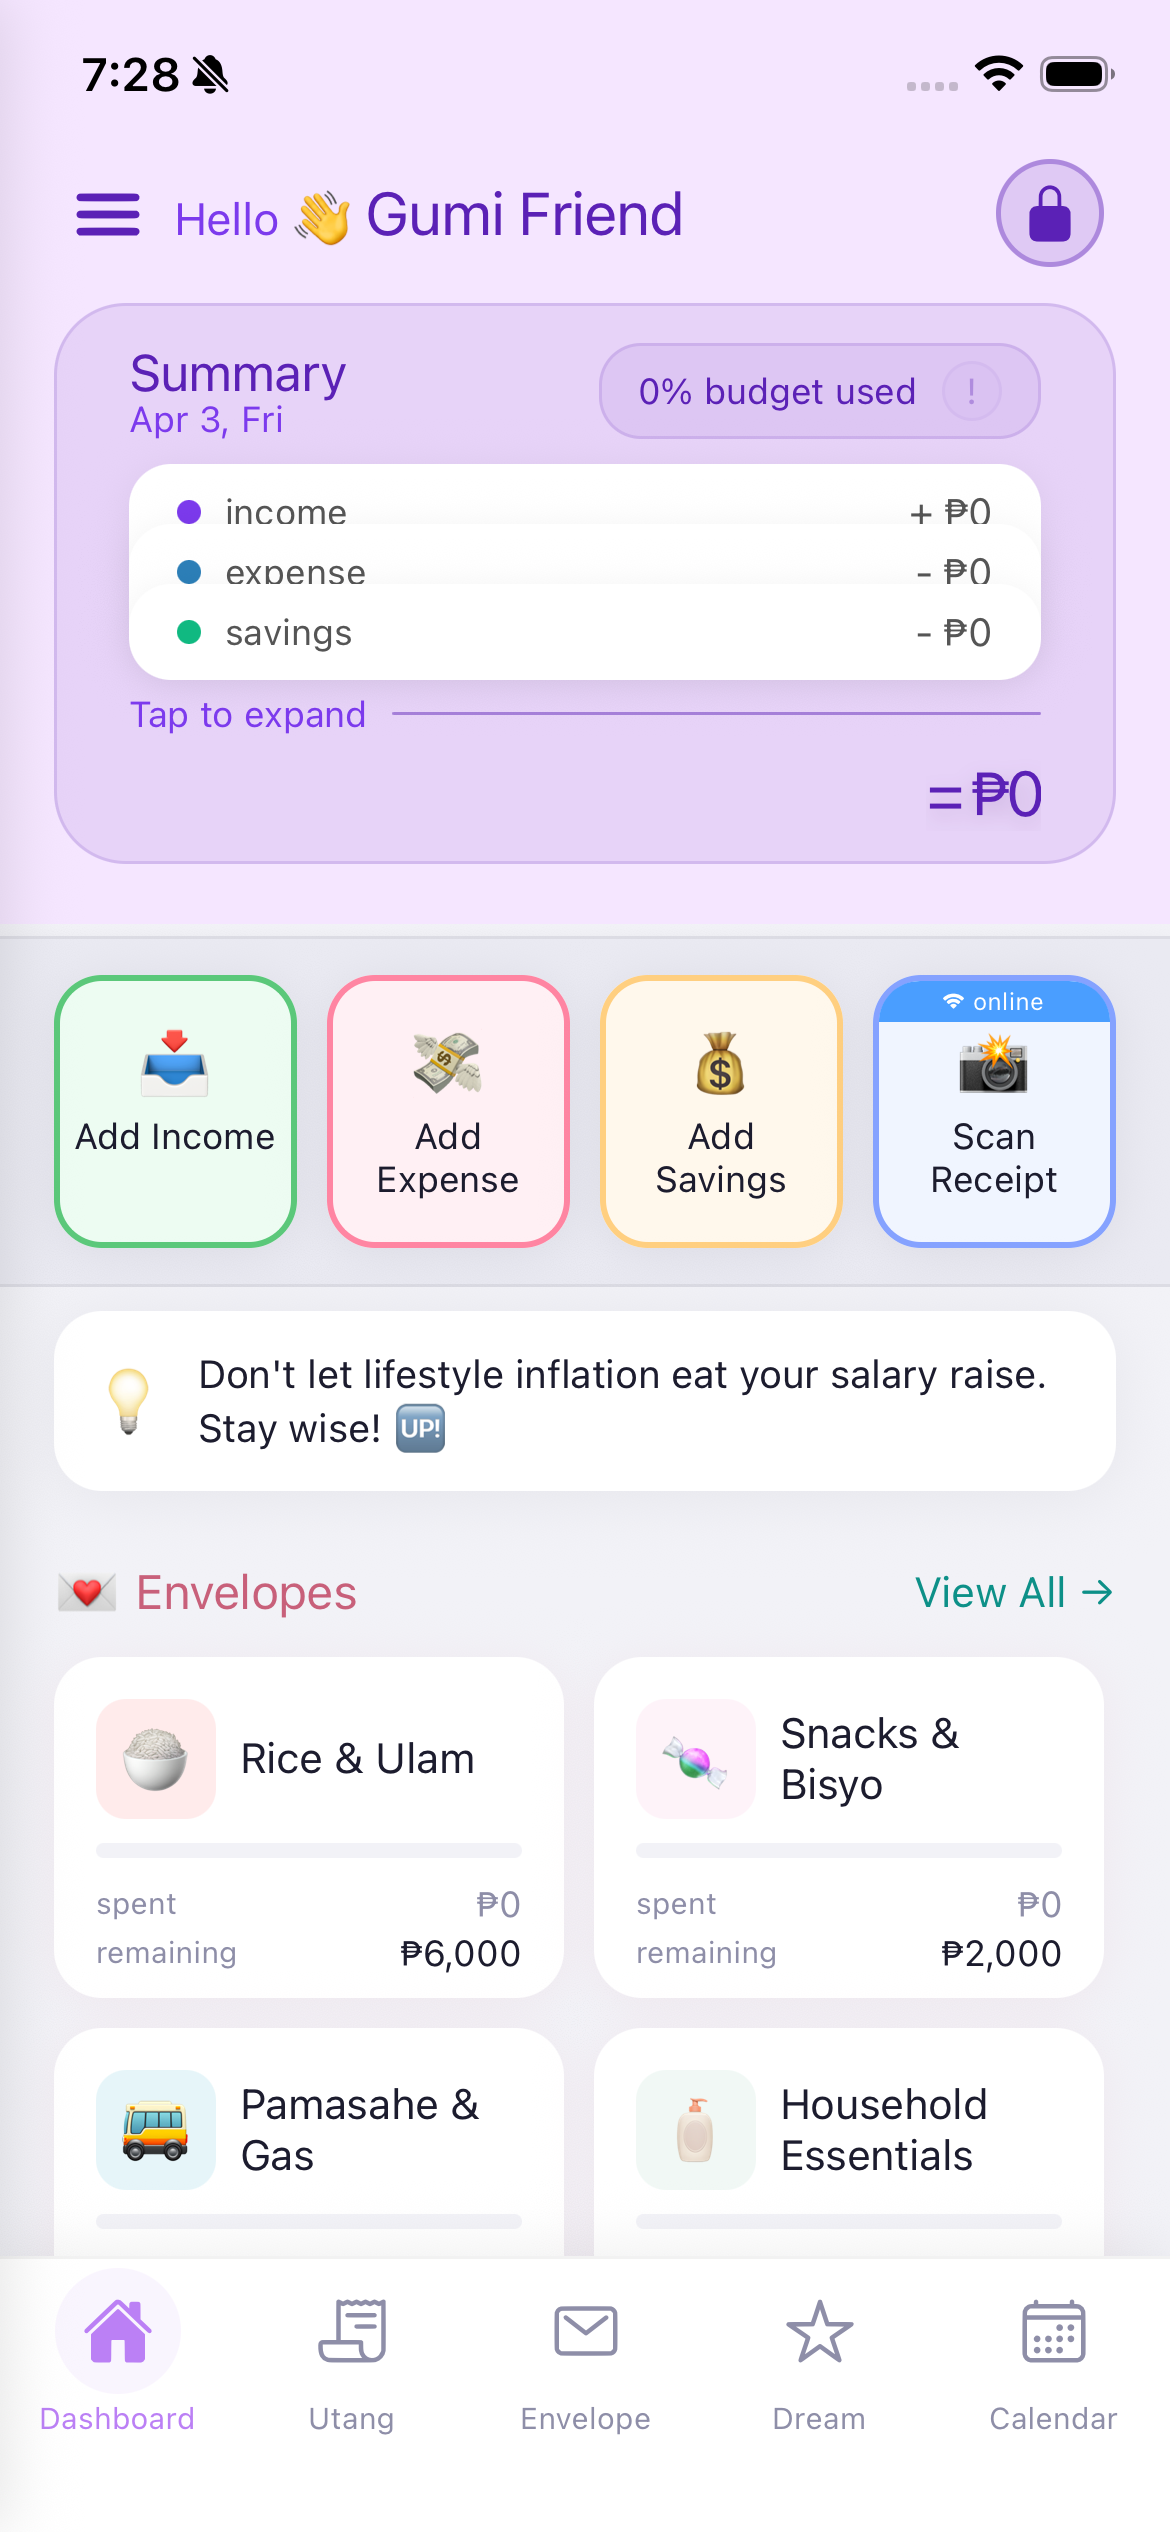

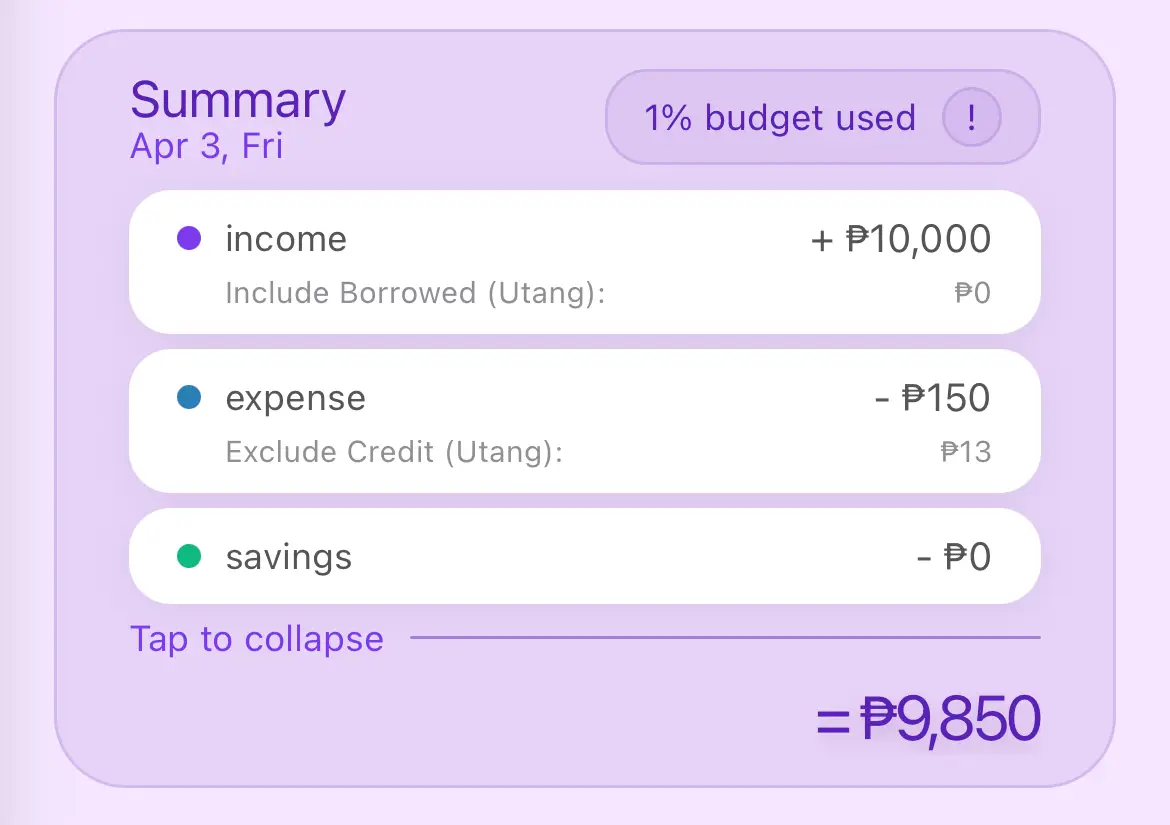
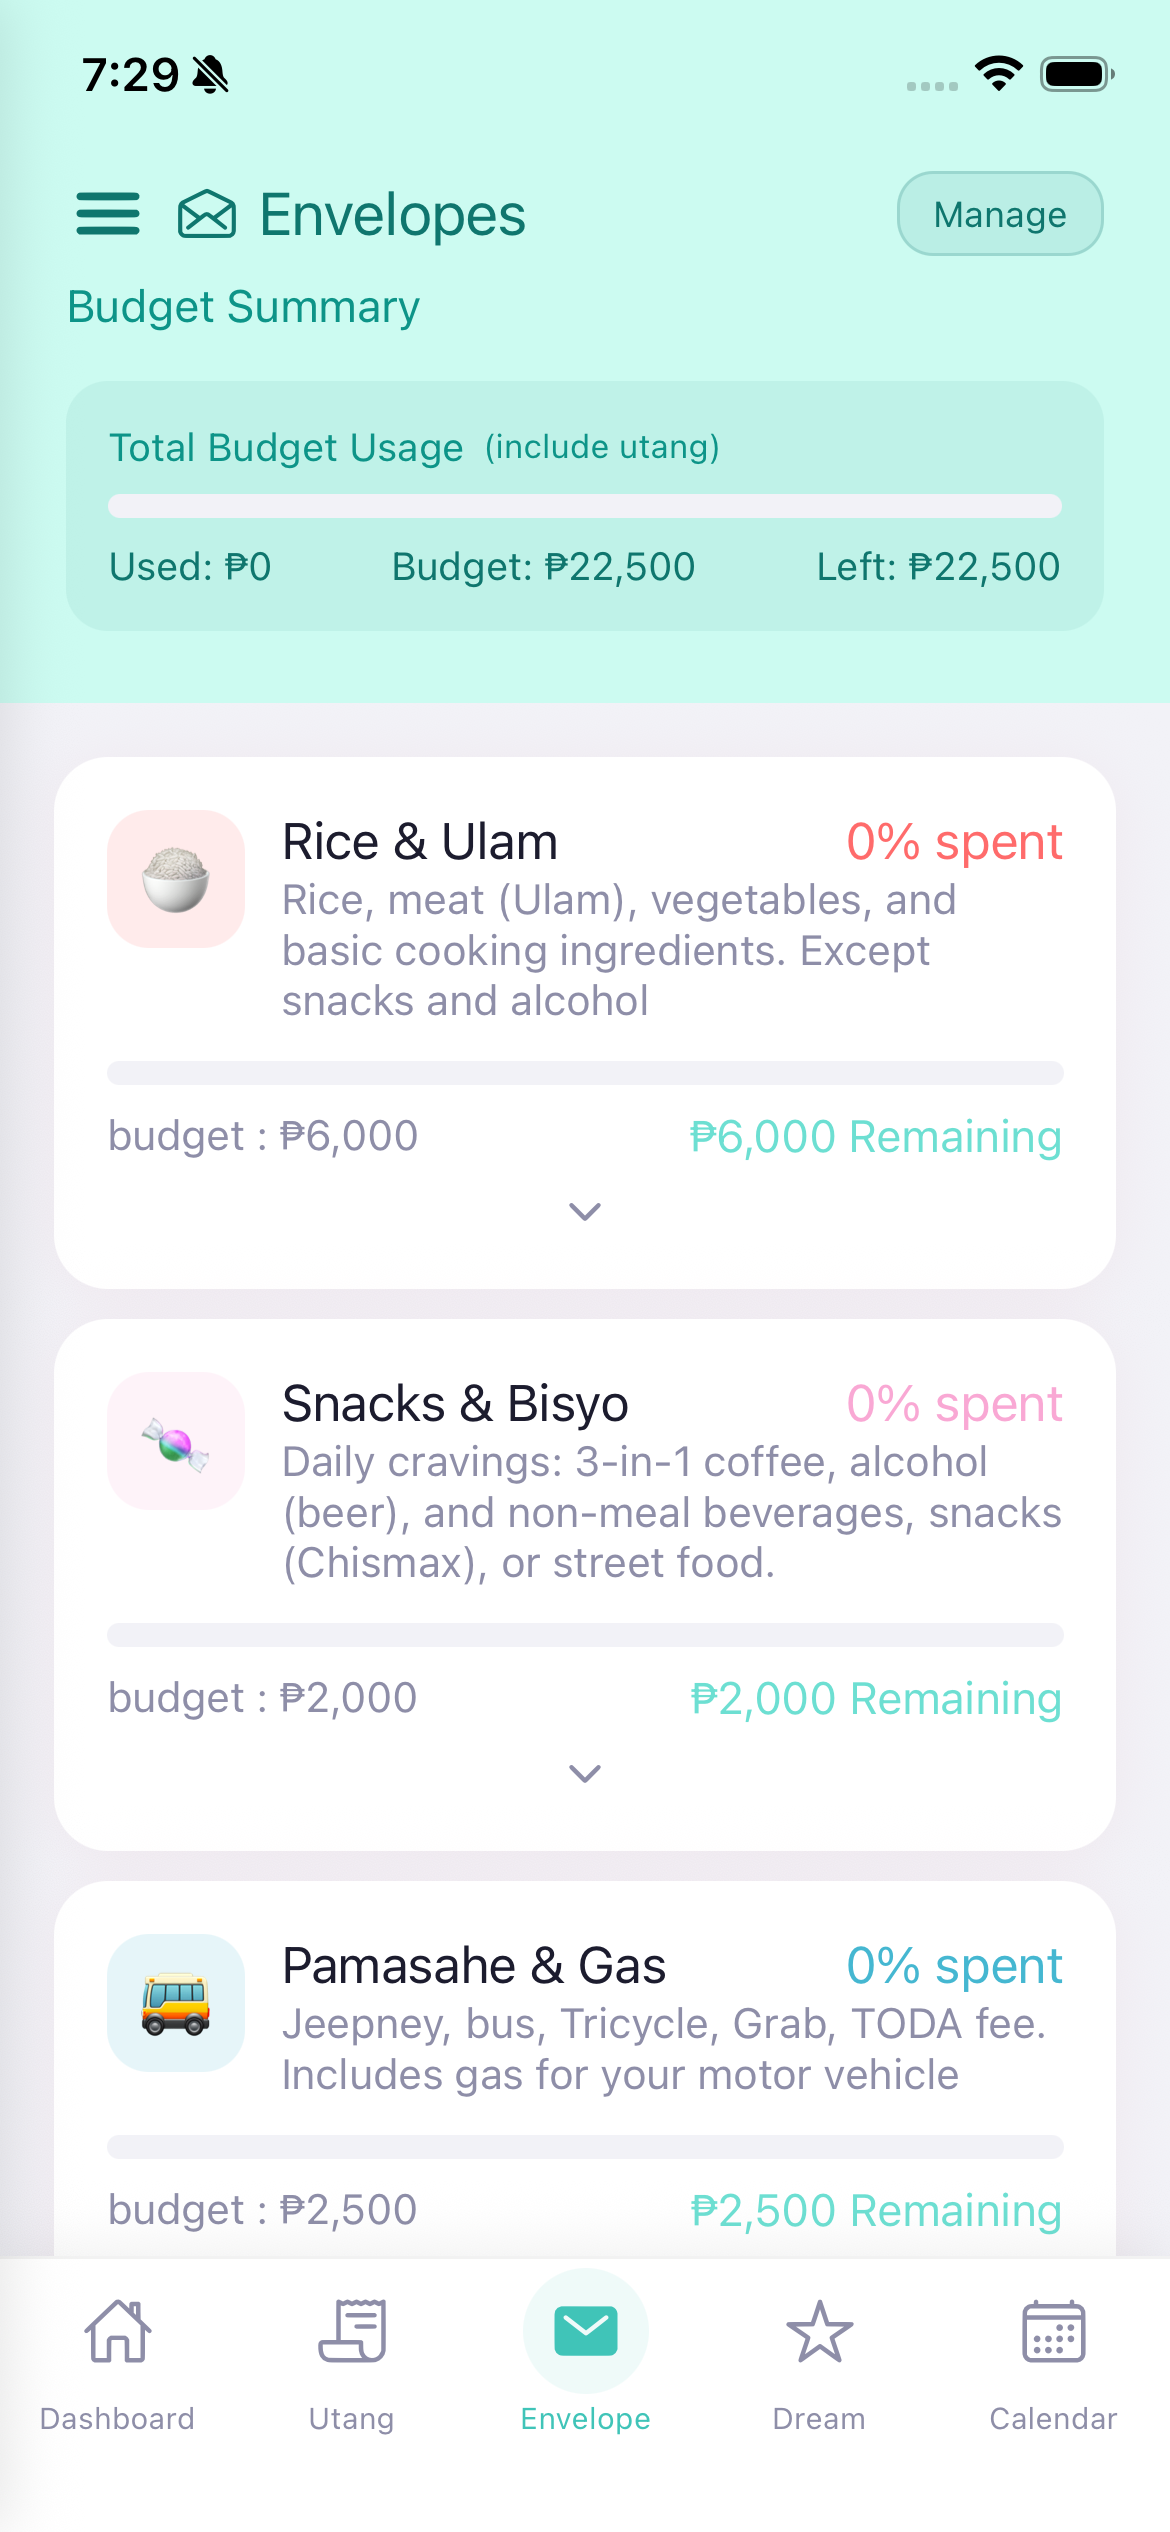
This is the main financial overview card at the top of the dashboard.
Ito ang pangunahing financial overview card sa itaas ng dashboard.
Mao ni ang nag-una nga financial overview card sa ibabaw sa dashboard.
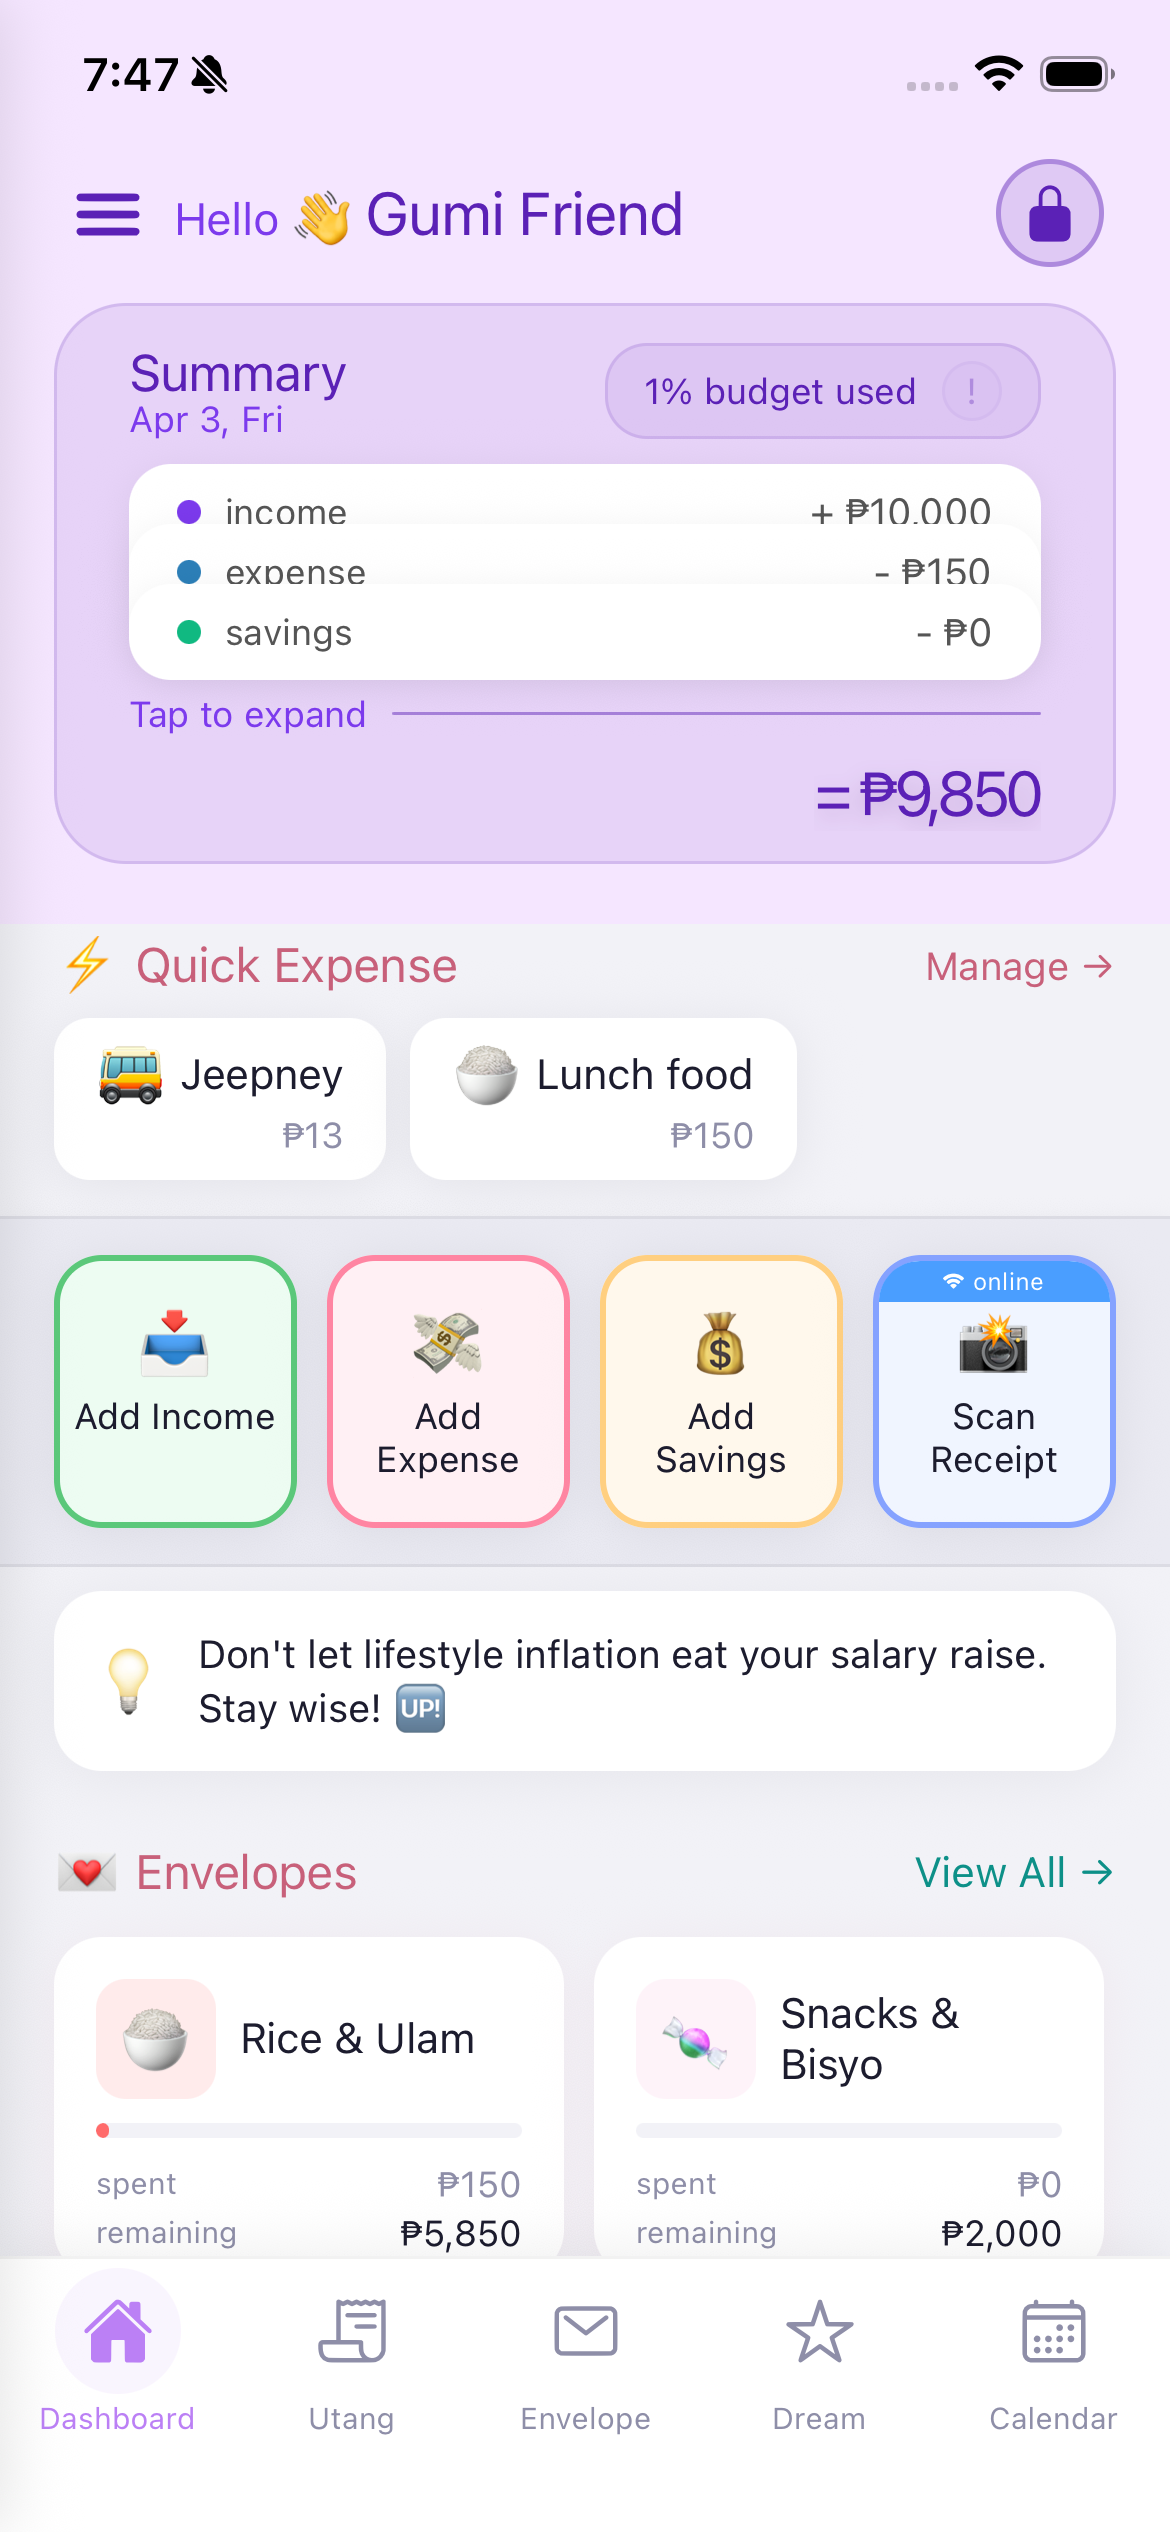
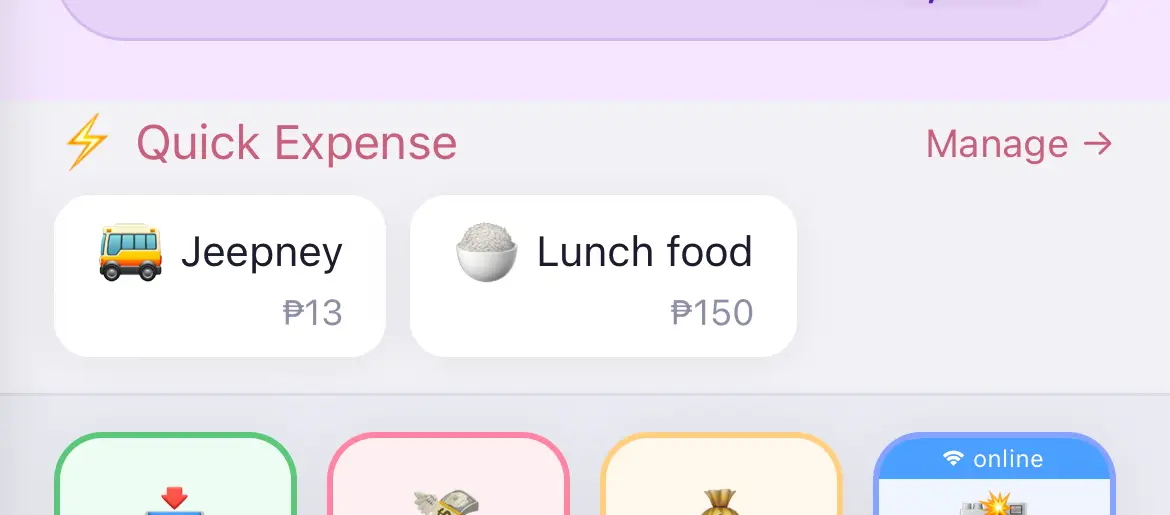
Quick Expense is a shortcut feature that lets you record frequently used expenses with a single tap from the dashboard. For example, if you ride a jeepney every day for P13, you can set it up once and then just tap it each time.
How to set it up:
How to use it: Simply tap the Quick Expense button (e.g., "Jeepney P13") on the dashboard, and the expense is instantly recorded. You also see a "Manage" link to edit your Quick Expense items.
Note: If you haven't added any Quick Expense items, this section will not appear on the dashboard.
Ang Quick Expense ay isang shortcut feature na nagbibigay-daan sa iyo na mag-record ng madalas gamitin na gastos sa isang tap lang mula sa dashboard.
Paano i-set up:
Paano gamitin: I-tap lang ang Quick Expense button sa dashboard, at matatala agad ang gastos.
Ang Quick Expense usa ka shortcut feature nga nagtugot nimo sa pag-record sa kanunay gamiton nga gastos sa usa ka tap lang gikan sa dashboard.
Giunsa pag-set up:
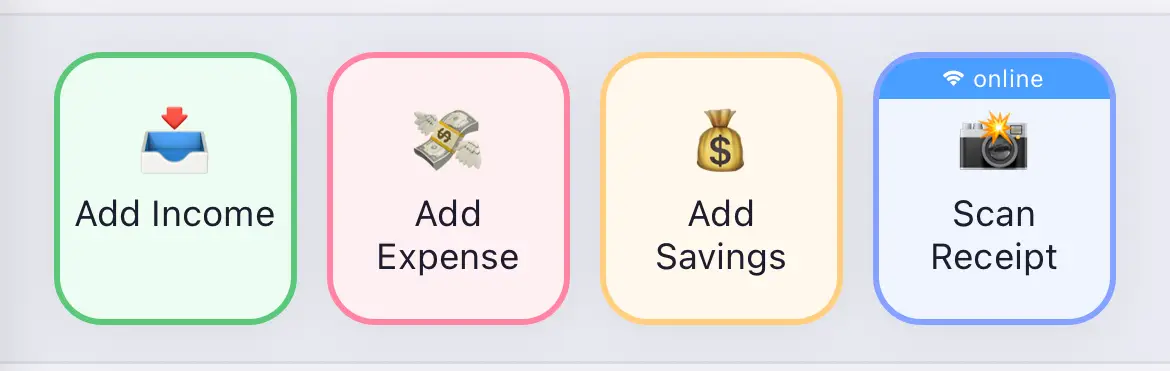
These colorful buttons are your primary way to record transactions:
Below the action buttons, you'll see a rotating motivational tip about saving money. For example: "Don't let lifestyle inflation eat your salary raise. Stay wise!"
Sa ibaba ng mga action button, may makikitang motivational tip tungkol sa pagtitipid.
Sa ubos sa mga action button, makita ang motivational tip bahin sa pag-save.
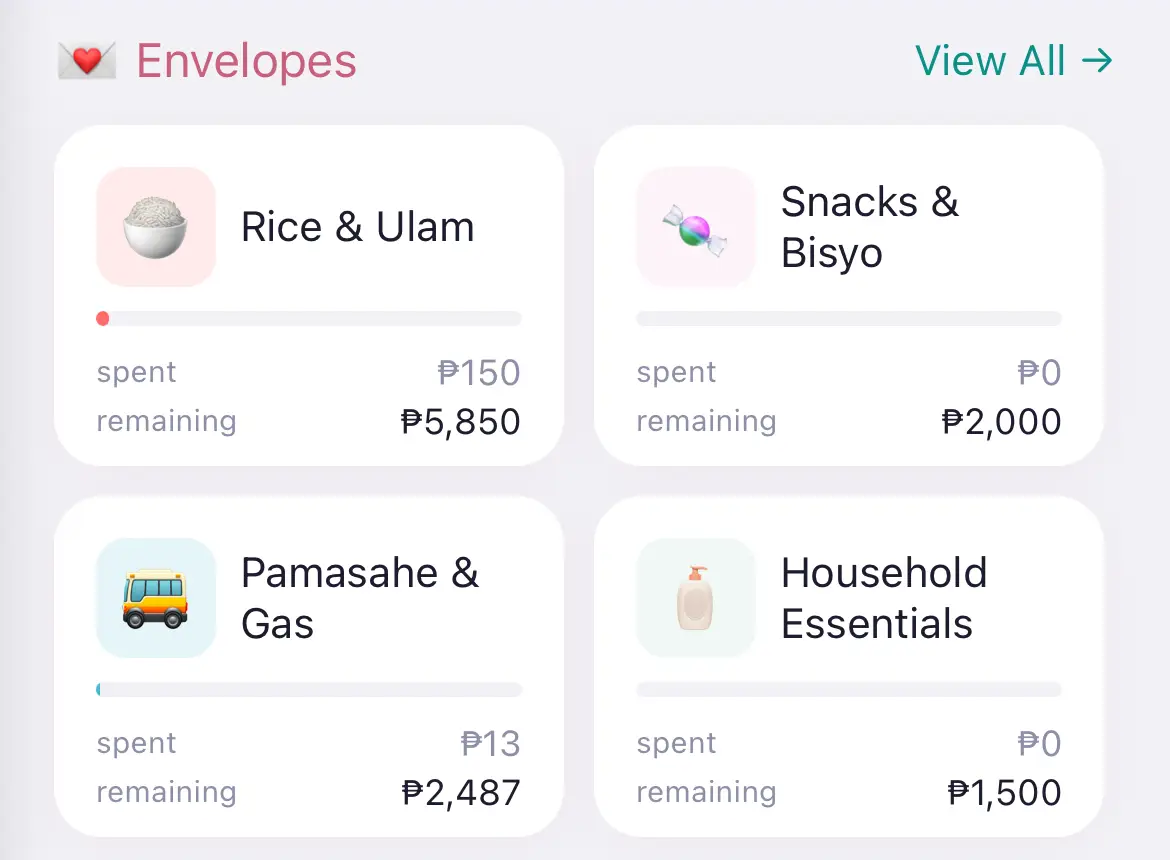
Shows up to 4 pinned envelopes from your budget categories. Each envelope card displays:
Tap "View All" to go to the full Envelope tab for detailed budget information.
Nagpapakita ng hanggang 4 na pinned envelope. Bawat envelope card ay nagpapakita ng pangalan, progress bar, nagastos, at natitirang halaga.
I-tap ang "View All" para pumunta sa buong Envelope tab.
Nagpakita og hangtud 4 ka pinned envelope. Matag envelope card nagpakita sa ngalan, progress bar, nagasto, ug nahibilin nga kantidad.
I-tap ang "View All" para moadto sa tibuok Envelope tab.
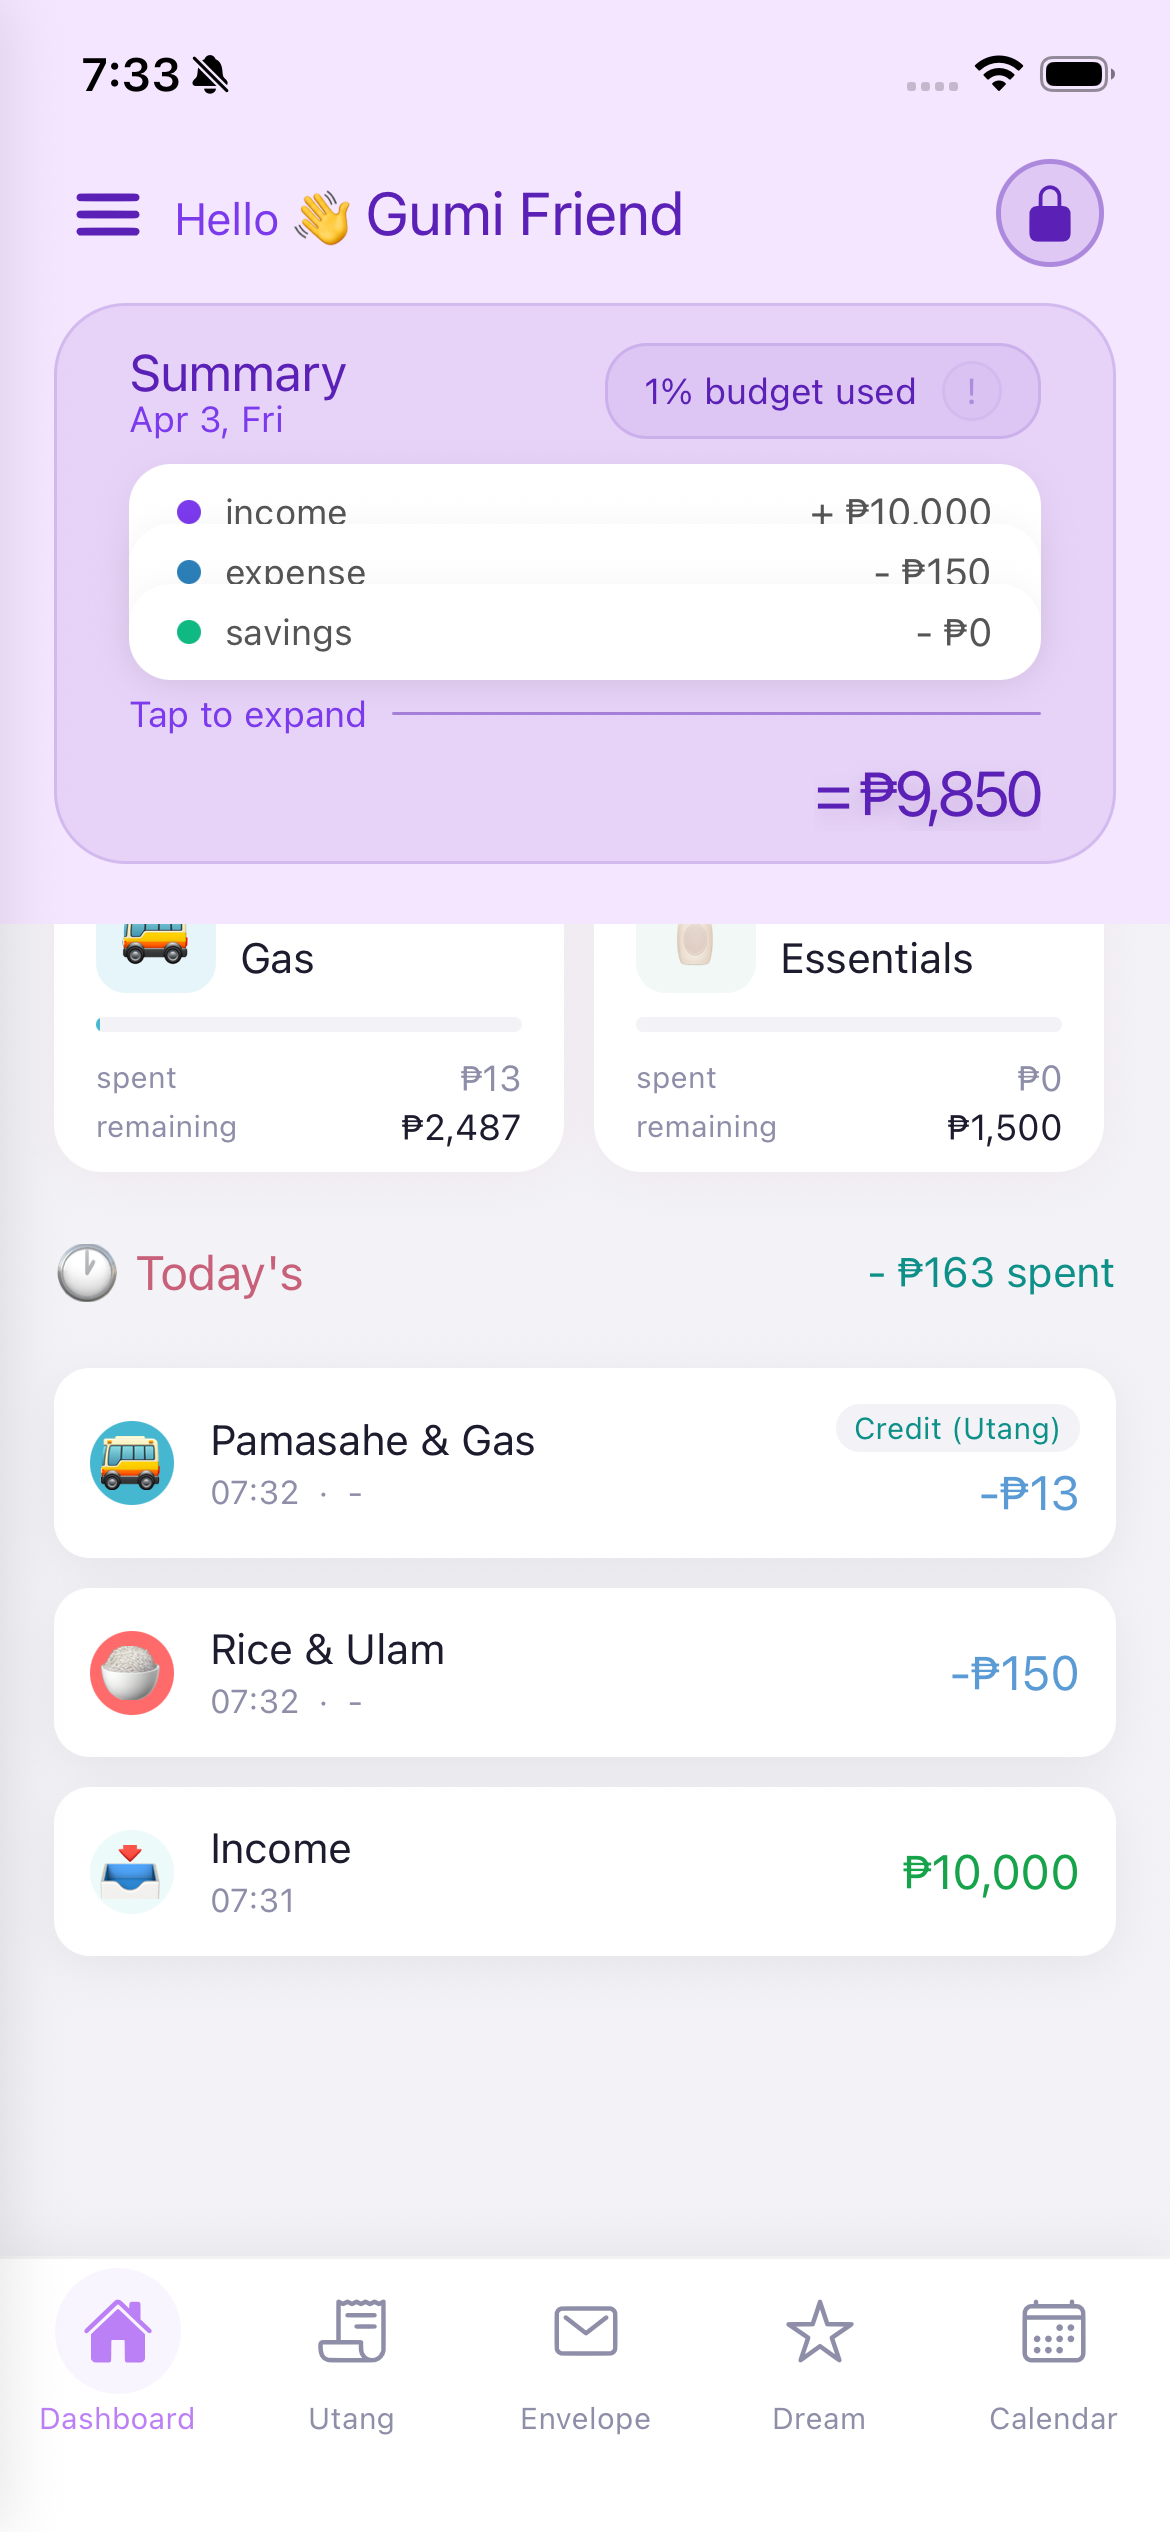
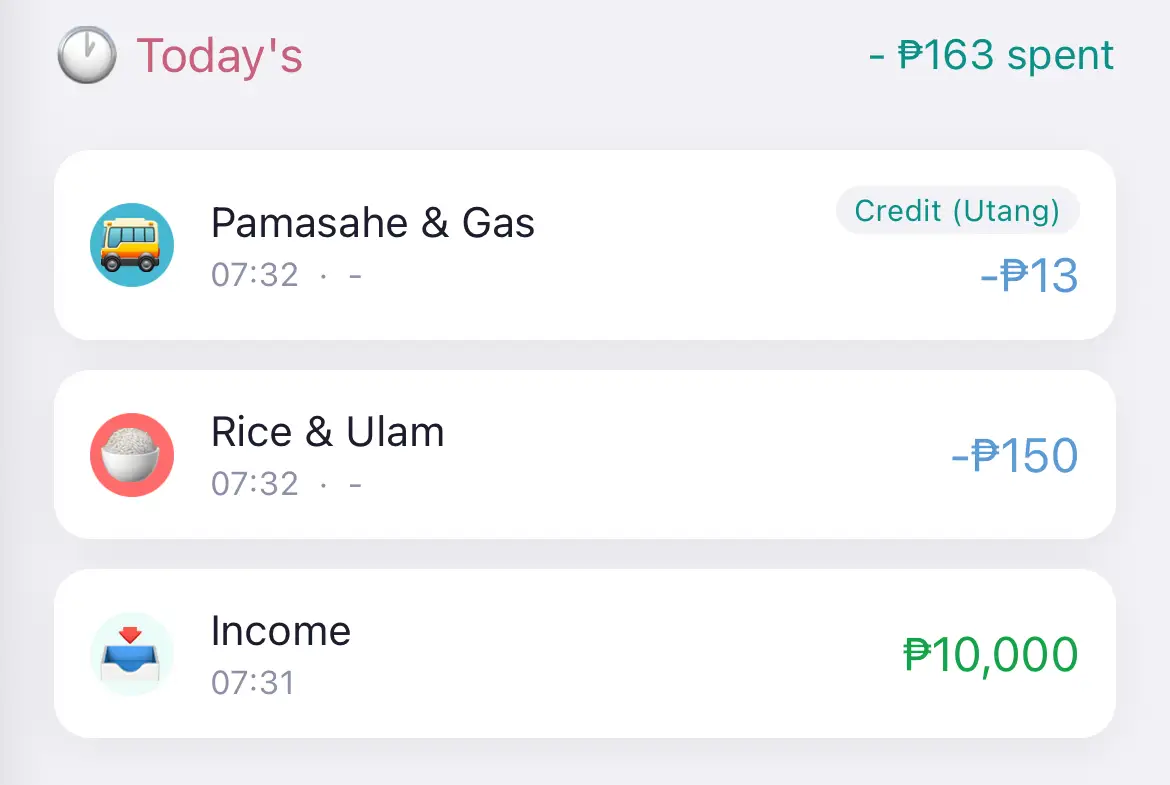
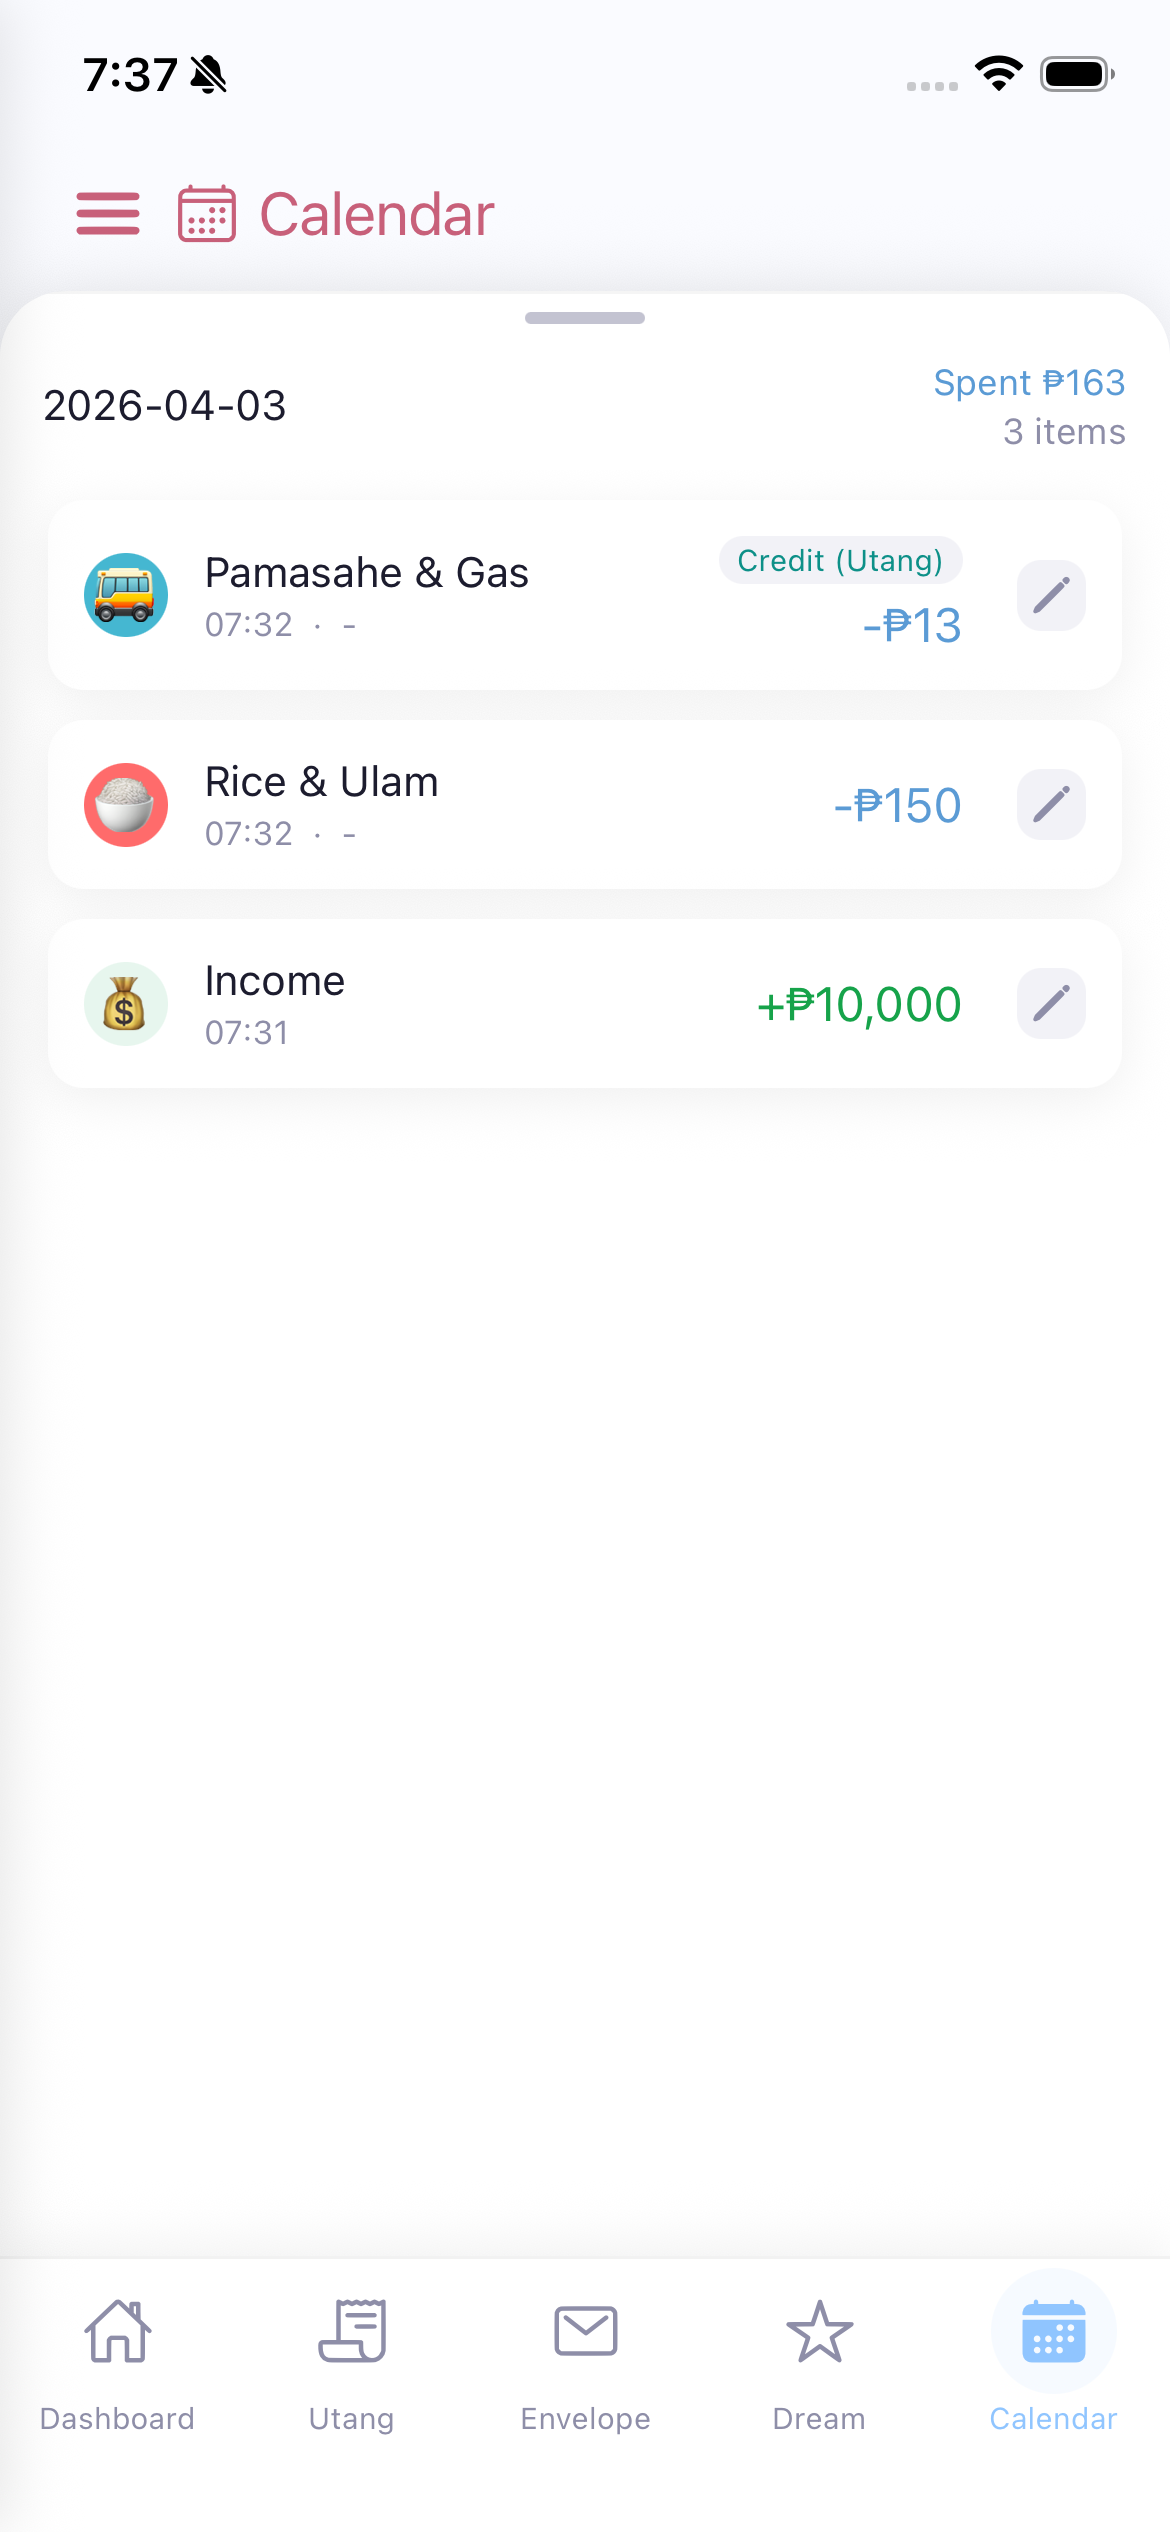
At the bottom of the dashboard, you'll see all transactions recorded today.
Sa ibaba ng dashboard, makikita mo ang lahat ng transaksyon na naitala ngayon.
Sa ubos sa dashboard, makita nimo ang tanan nga transaksyon nga na-record karon.
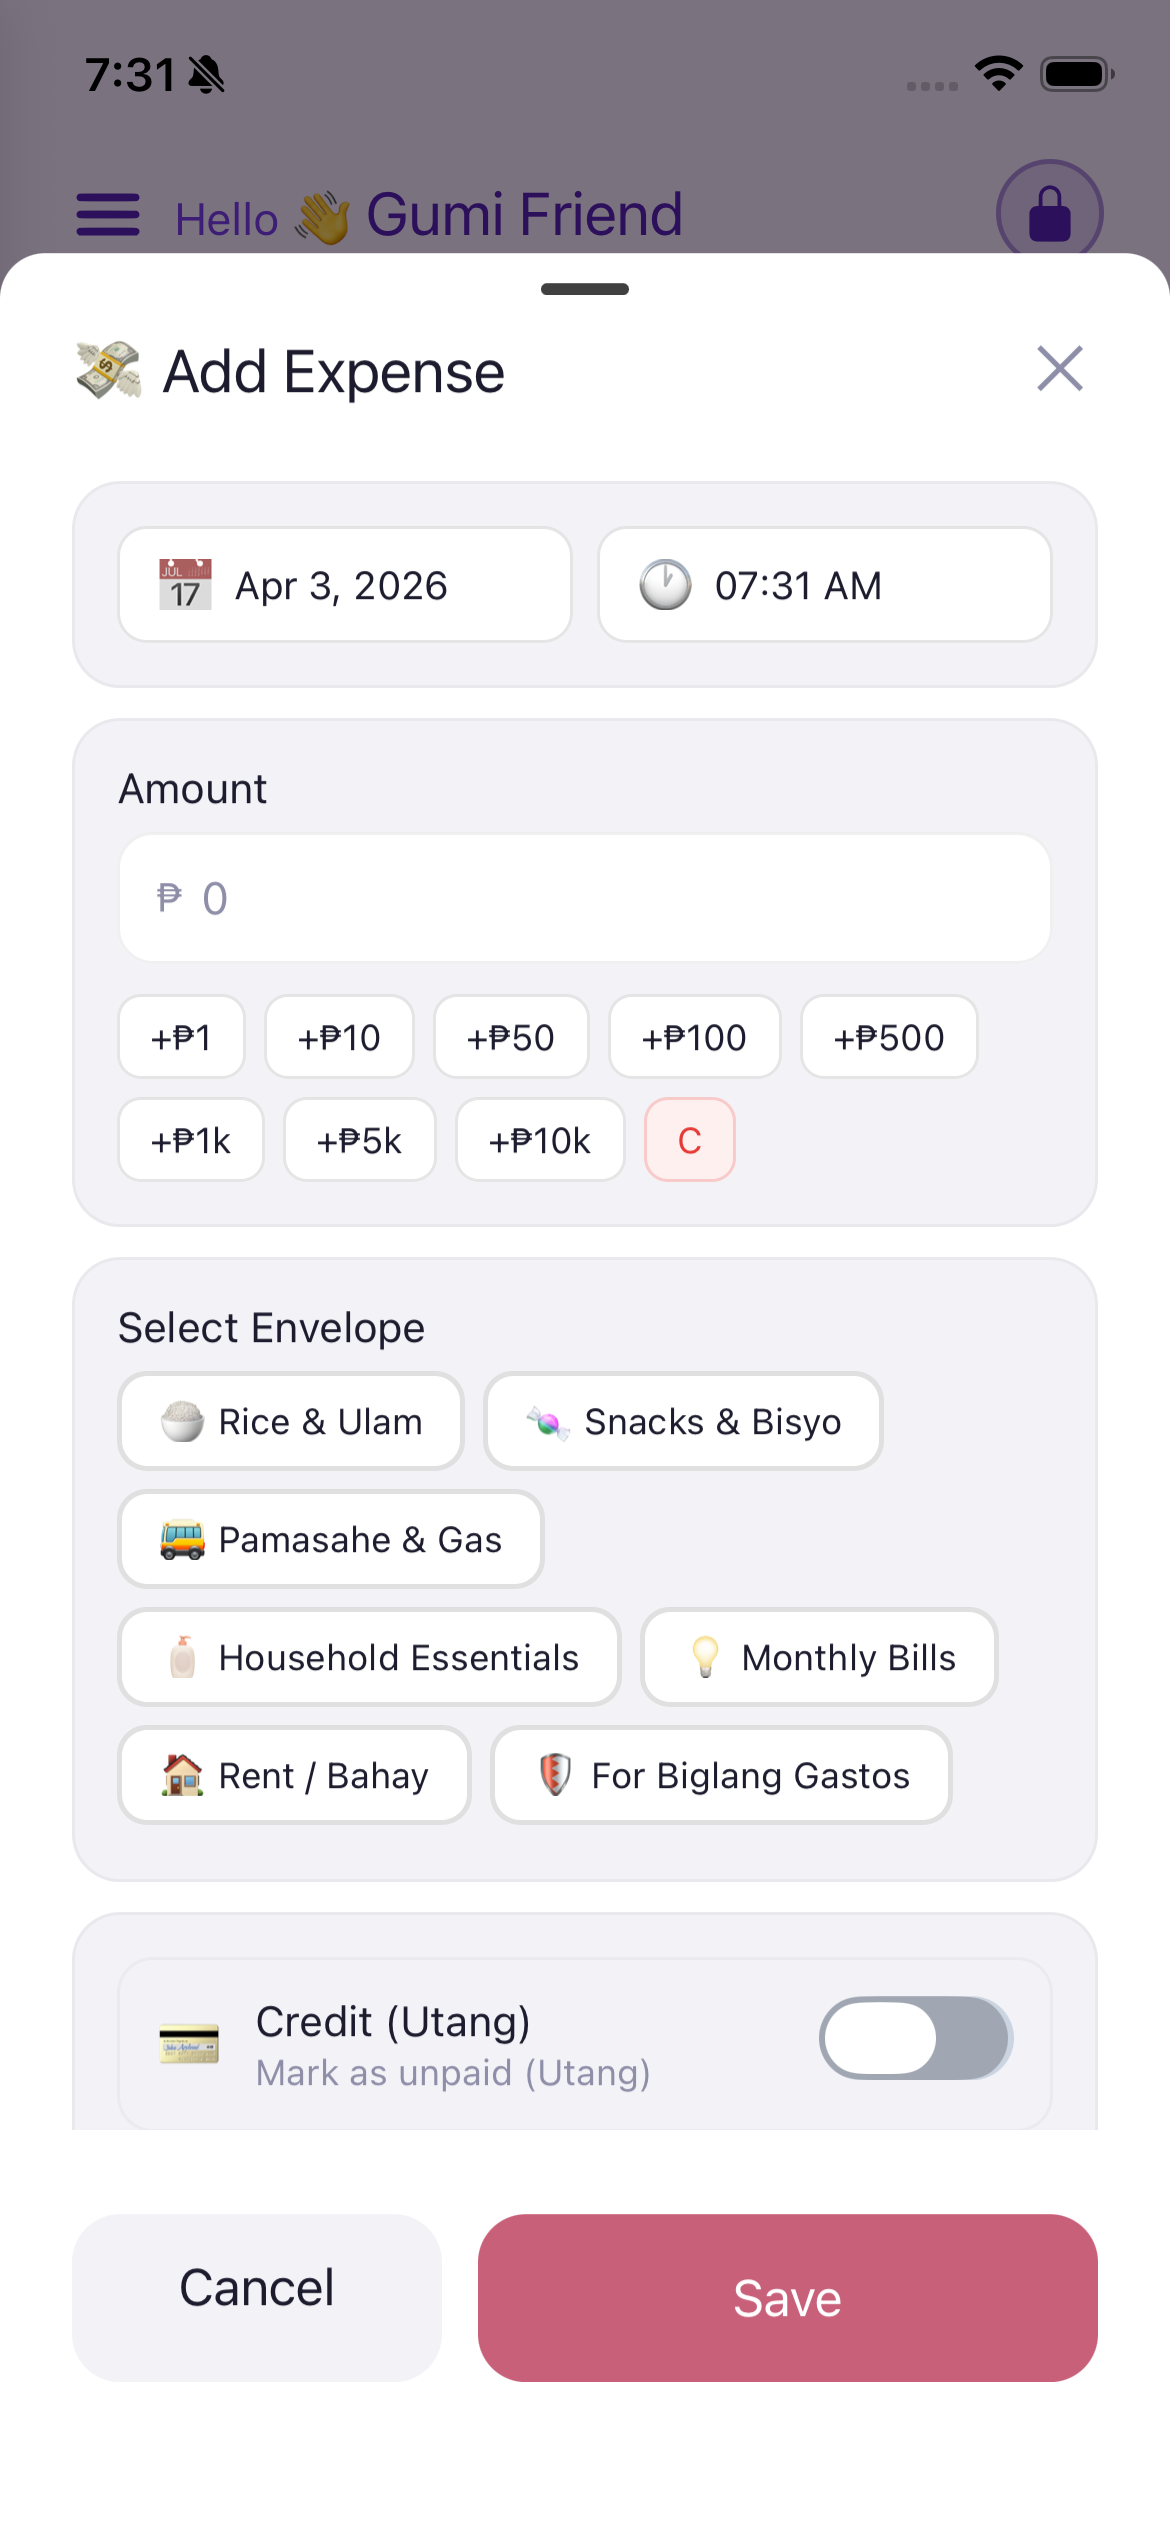
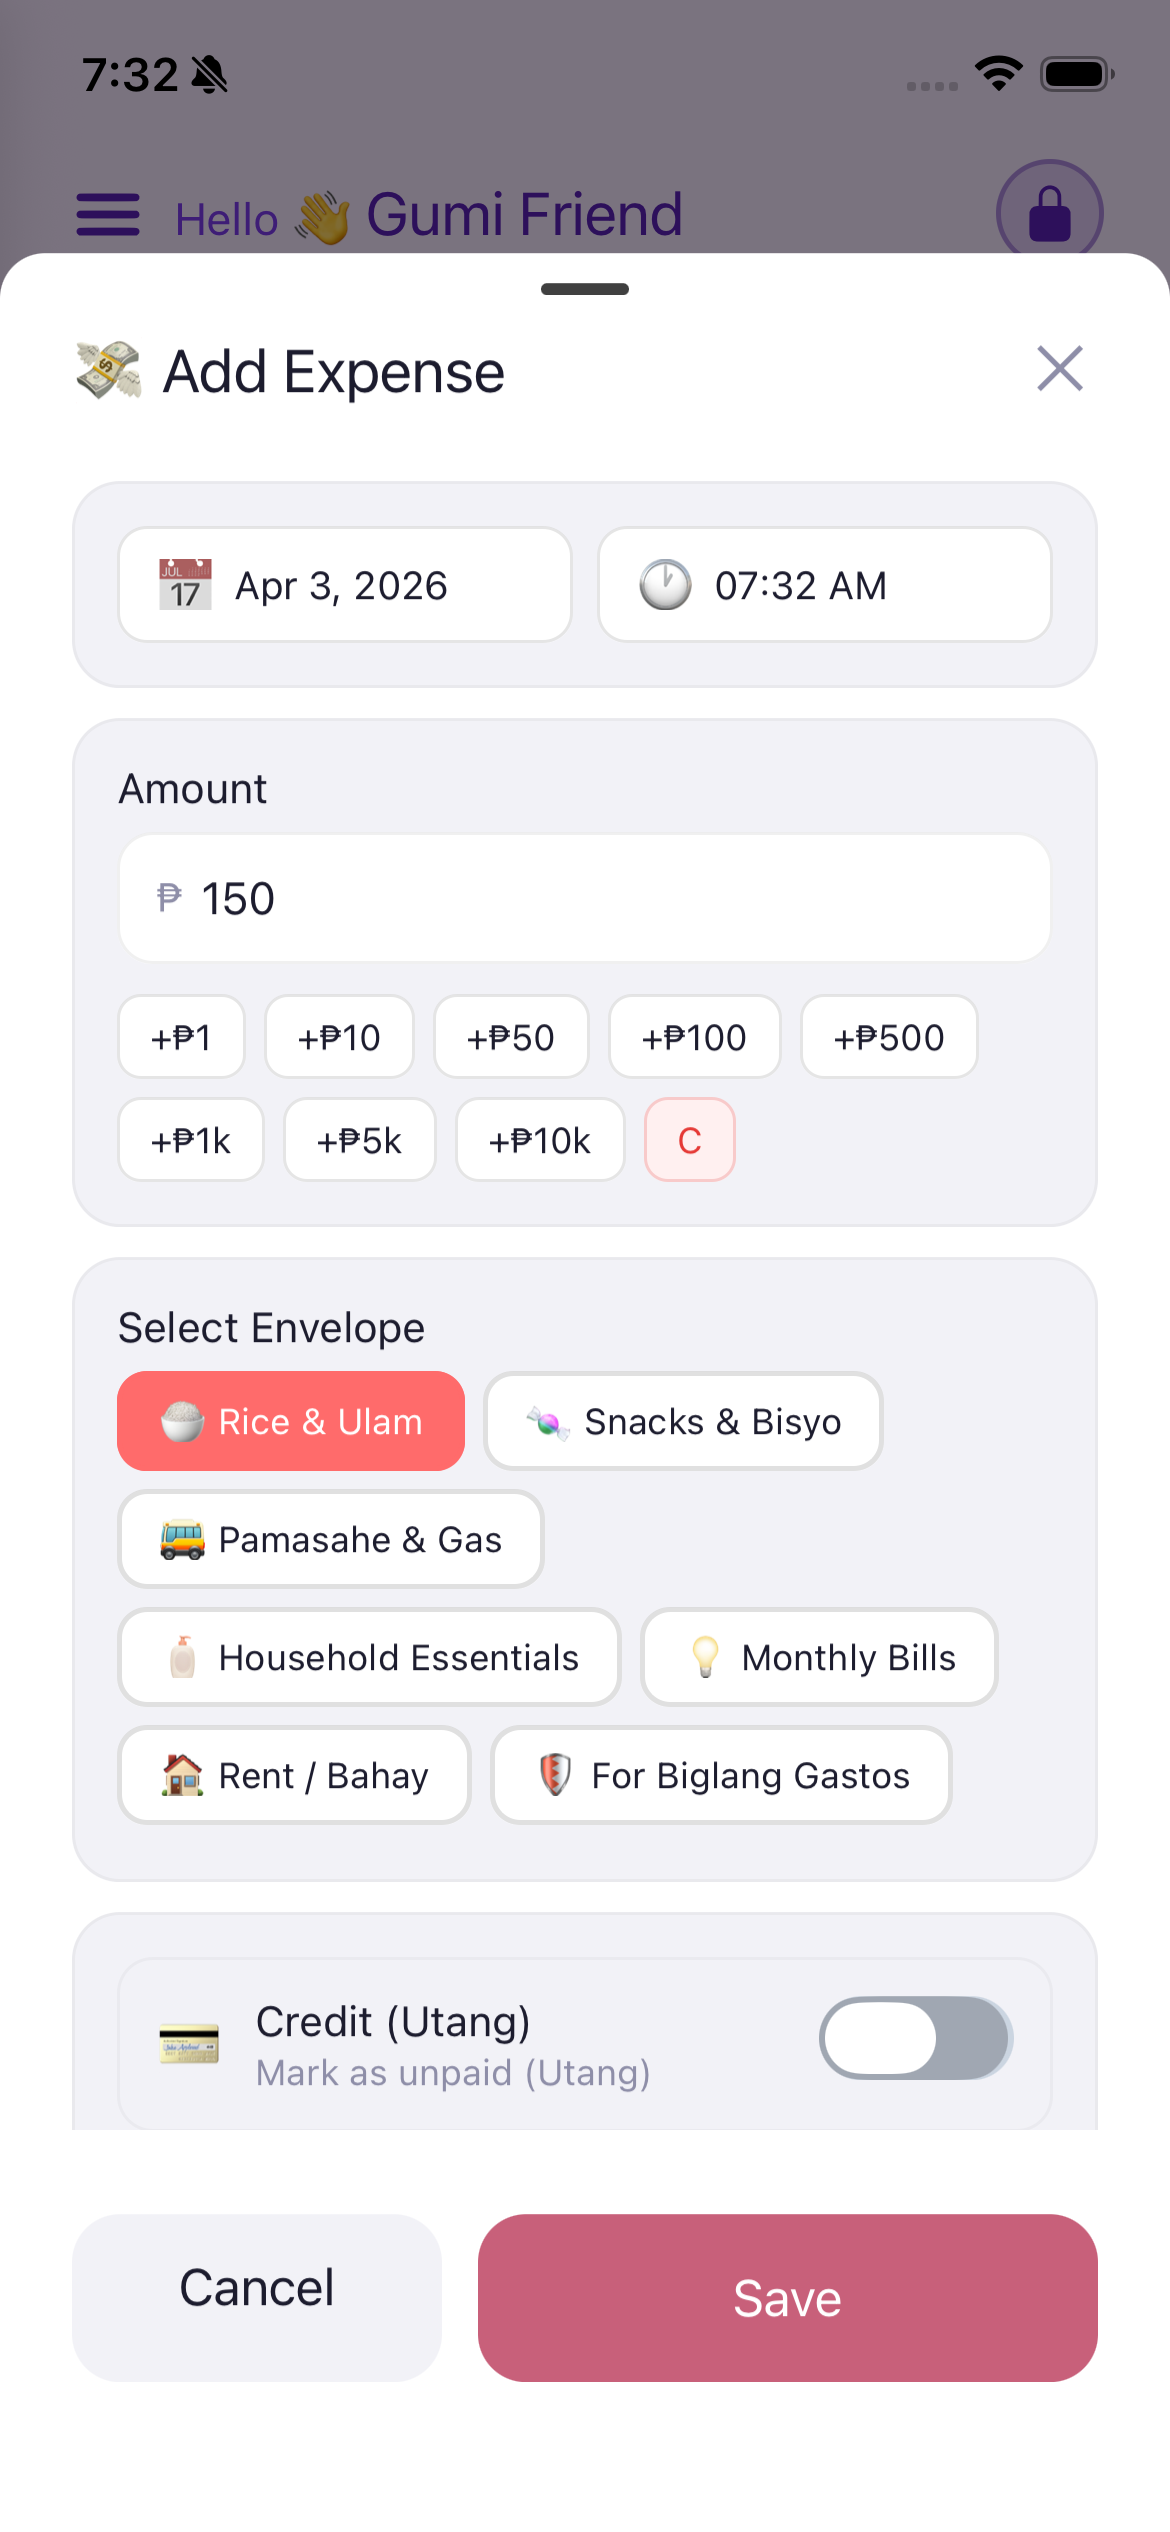
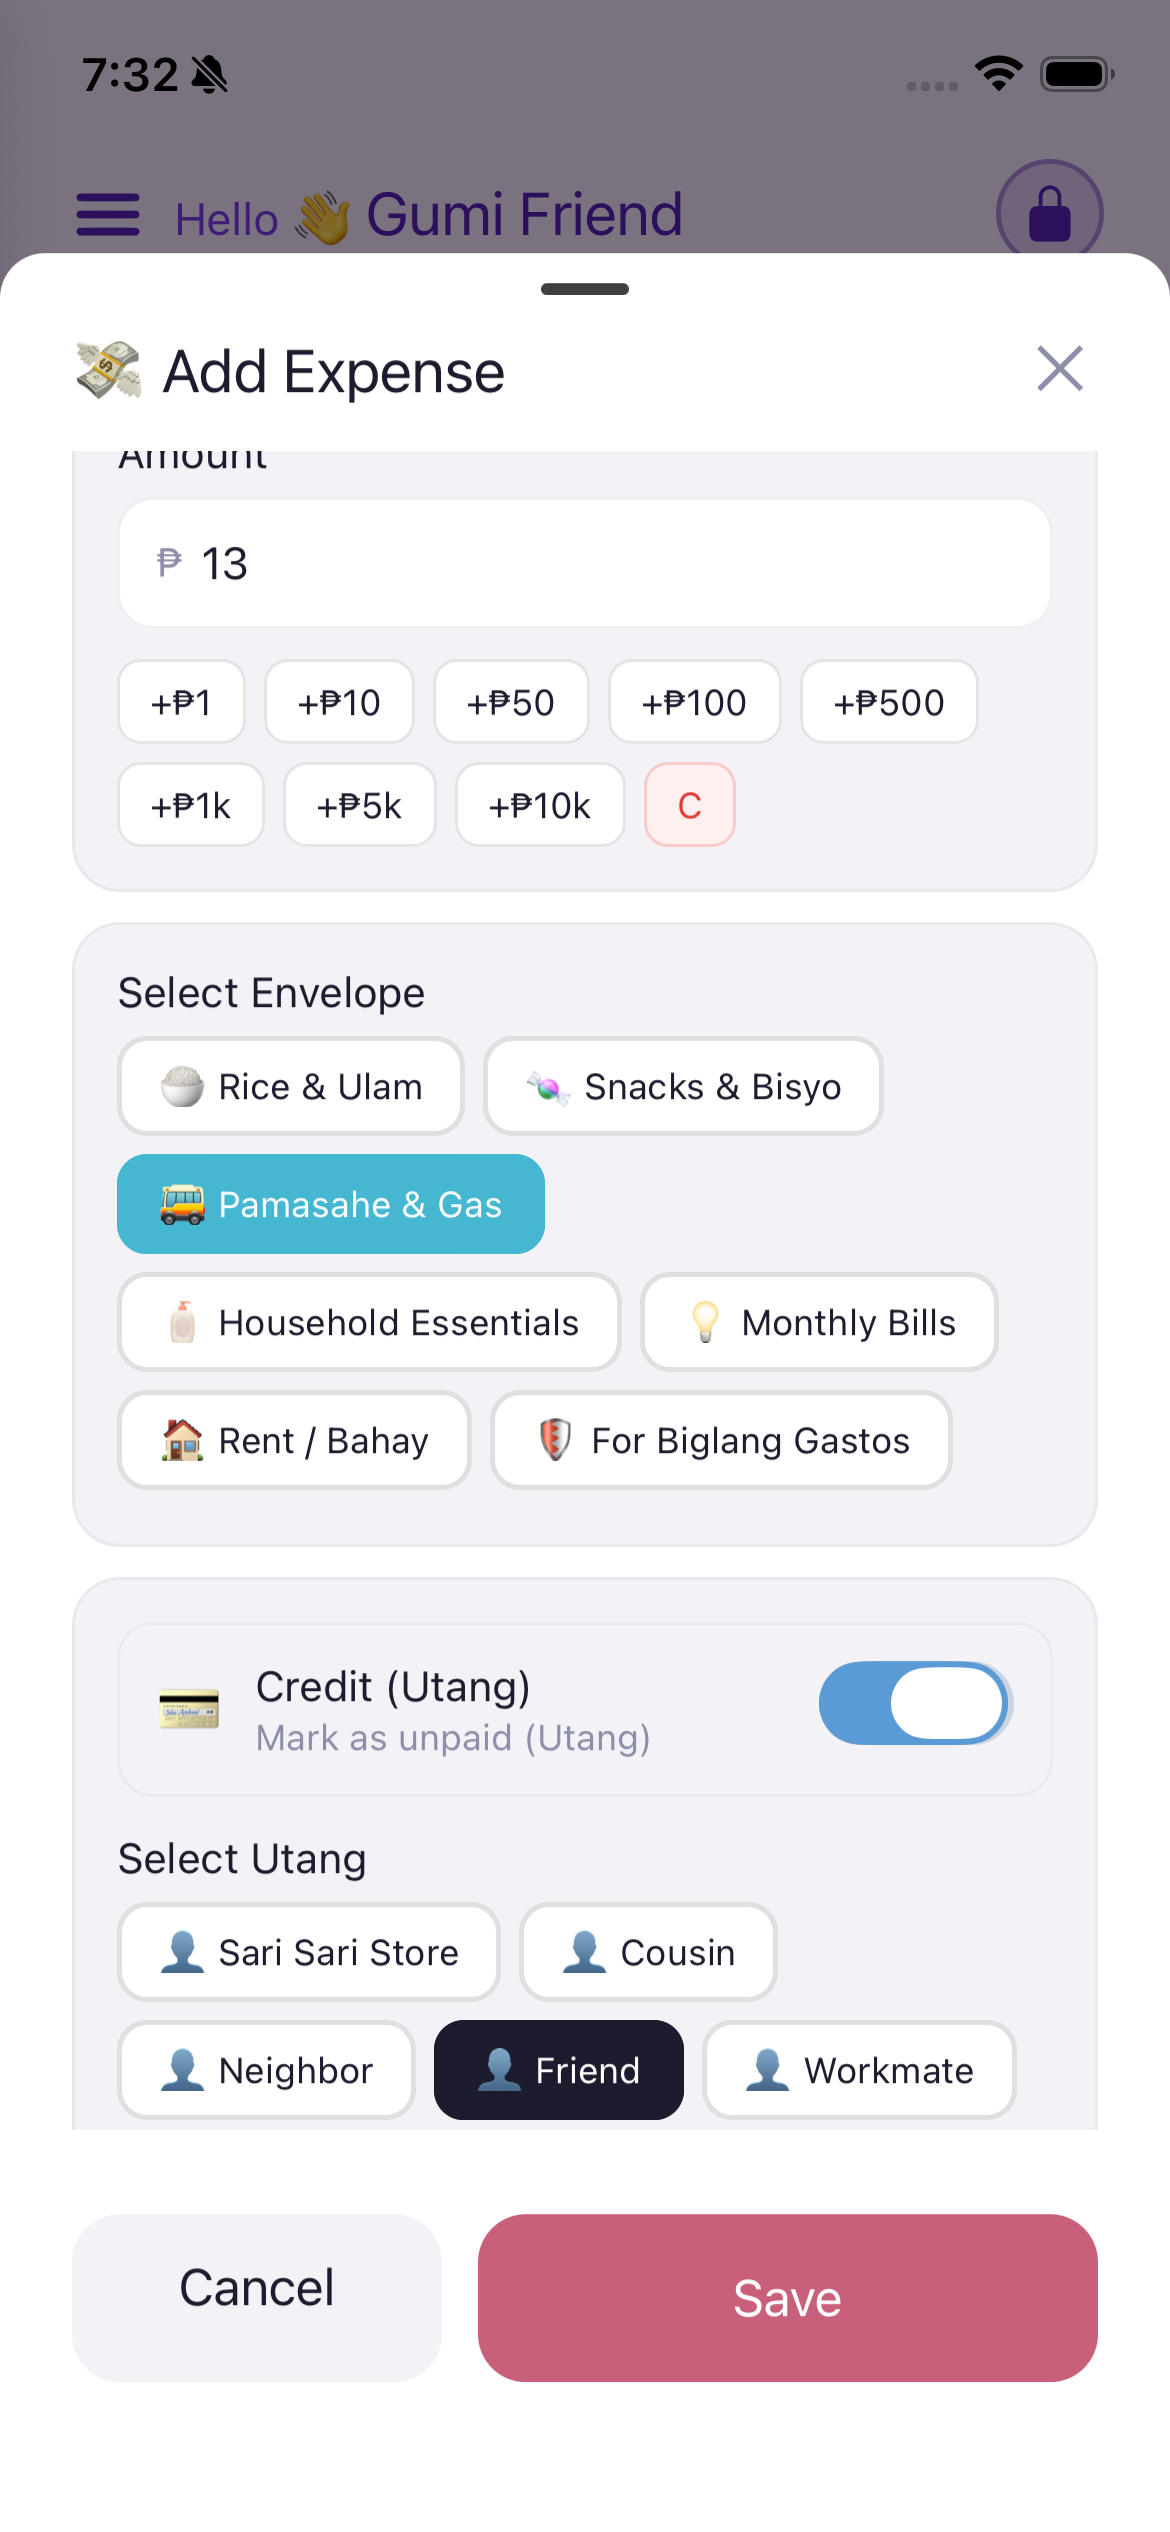
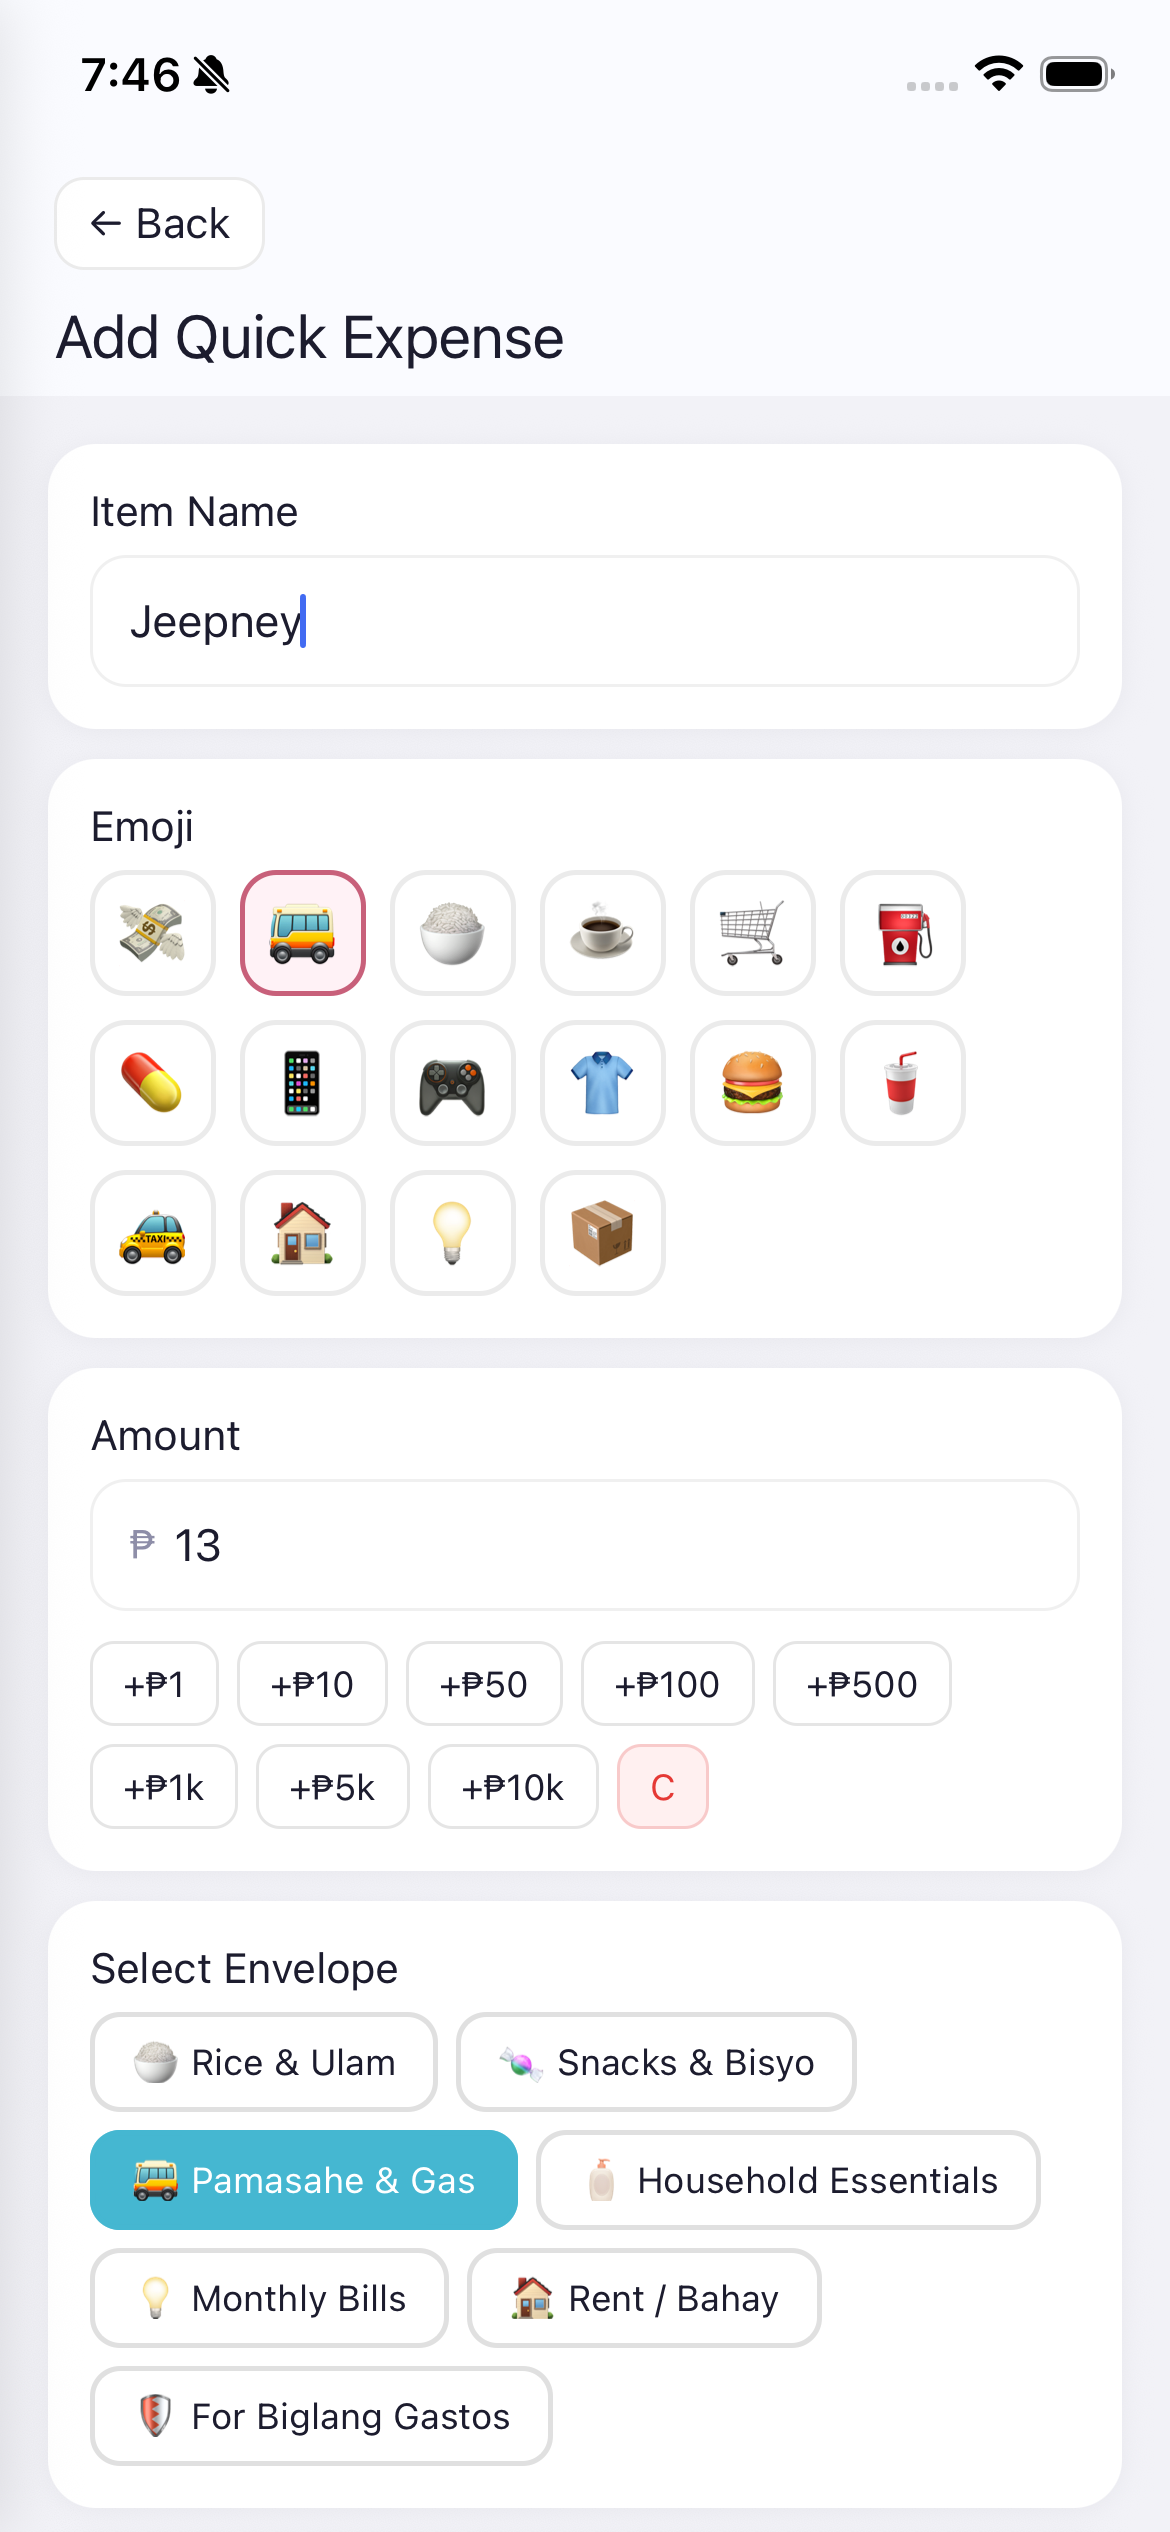
Instead of typing the full amount, you tap the quick-add buttons to accumulate the amount. This is especially useful for small daily expenses.
Available buttons: +P1, +P10, +P50, +P100, +P500, +P1k, +P5k, +P10k
Example: To enter P13 for a jeepney fare:
The C button (clear) resets the amount to 0.
Sa halip na i-type ang buong halaga, i-tap mo ang quick-add buttons para dagdagan ang halaga.
Mga button: +P1, +P10, +P50, +P100, +P500, +P1k, +P5k, +P10k
Halimbawa: Para mag-enter ng P13:
Ang C button ay nagre-reset ng halaga sa 0.
Imbis nga i-type ang tibuok kantidad, i-tap ang quick-add buttons para idugang ang kantidad.
Mga button: +P1, +P10, +P50, +P100, +P500, +P1k, +P5k, +P10k
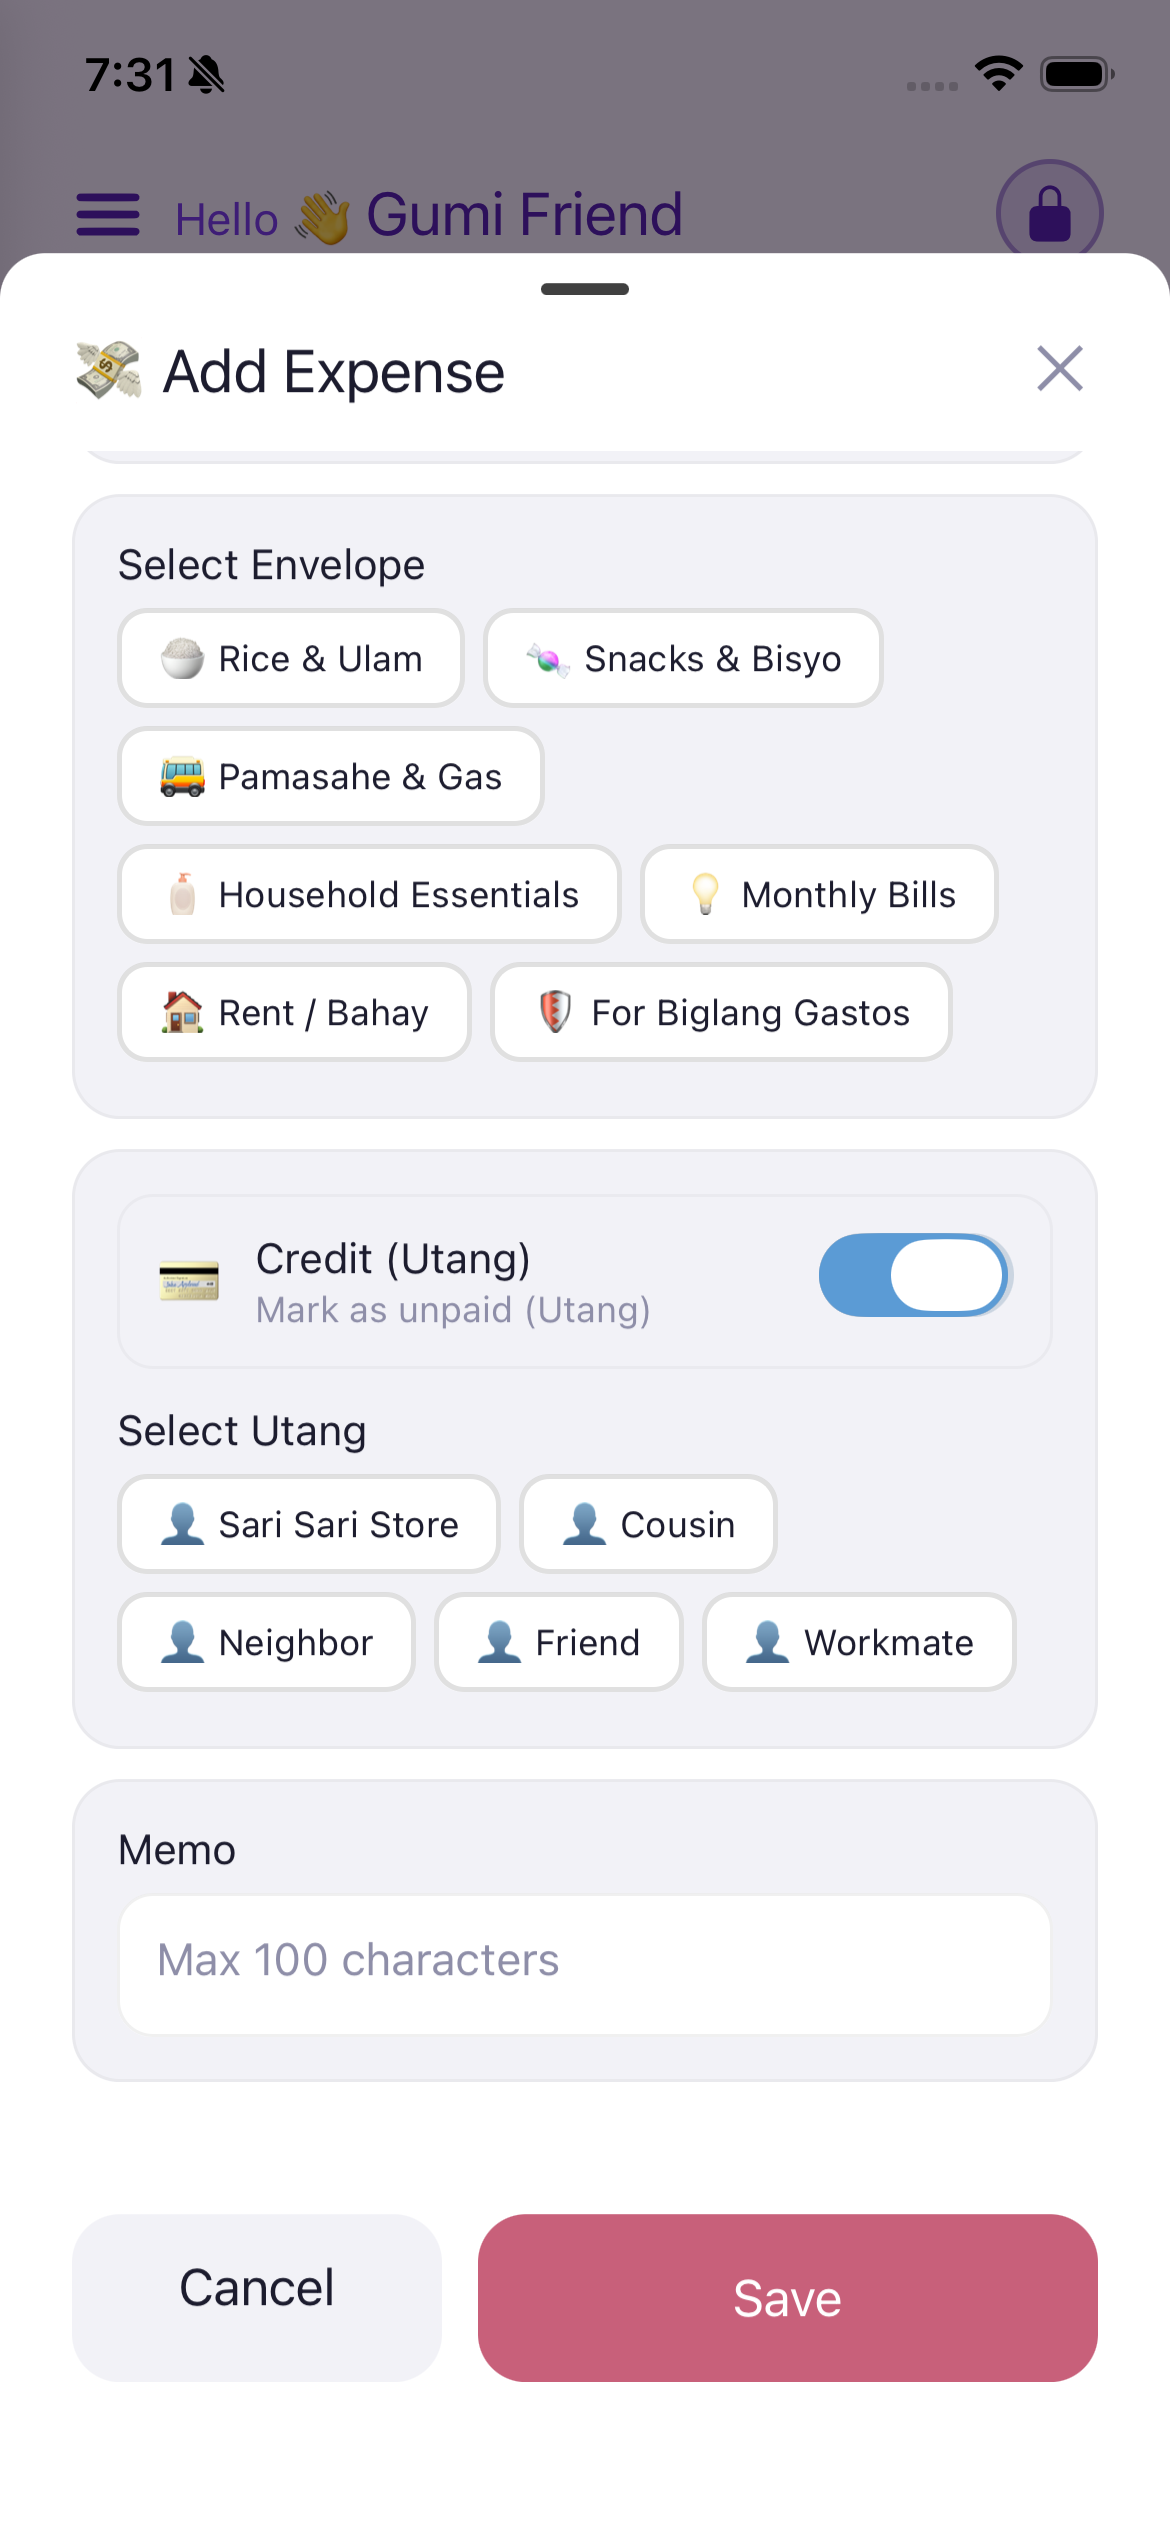
The Envelope system is based on the "envelope budgeting method" - you divide your income into different envelopes (categories) and only spend what's in each envelope.
Default Envelopes: Rice & Ulam, Snacks & Bisyo, Pamasahe & Gas, Household Essentials, Monthly Bills, Rent / Bahay, For Biglang Gastos.
Ang Envelope system ay batay sa "envelope budgeting method" - hinahati mo ang iyong kita sa iba't ibang envelope (kategorya).
Ang Envelope system gibase sa "envelope budgeting method" - gibahin nimo ang imong kita sa lain-lain nga envelope (kategorya).
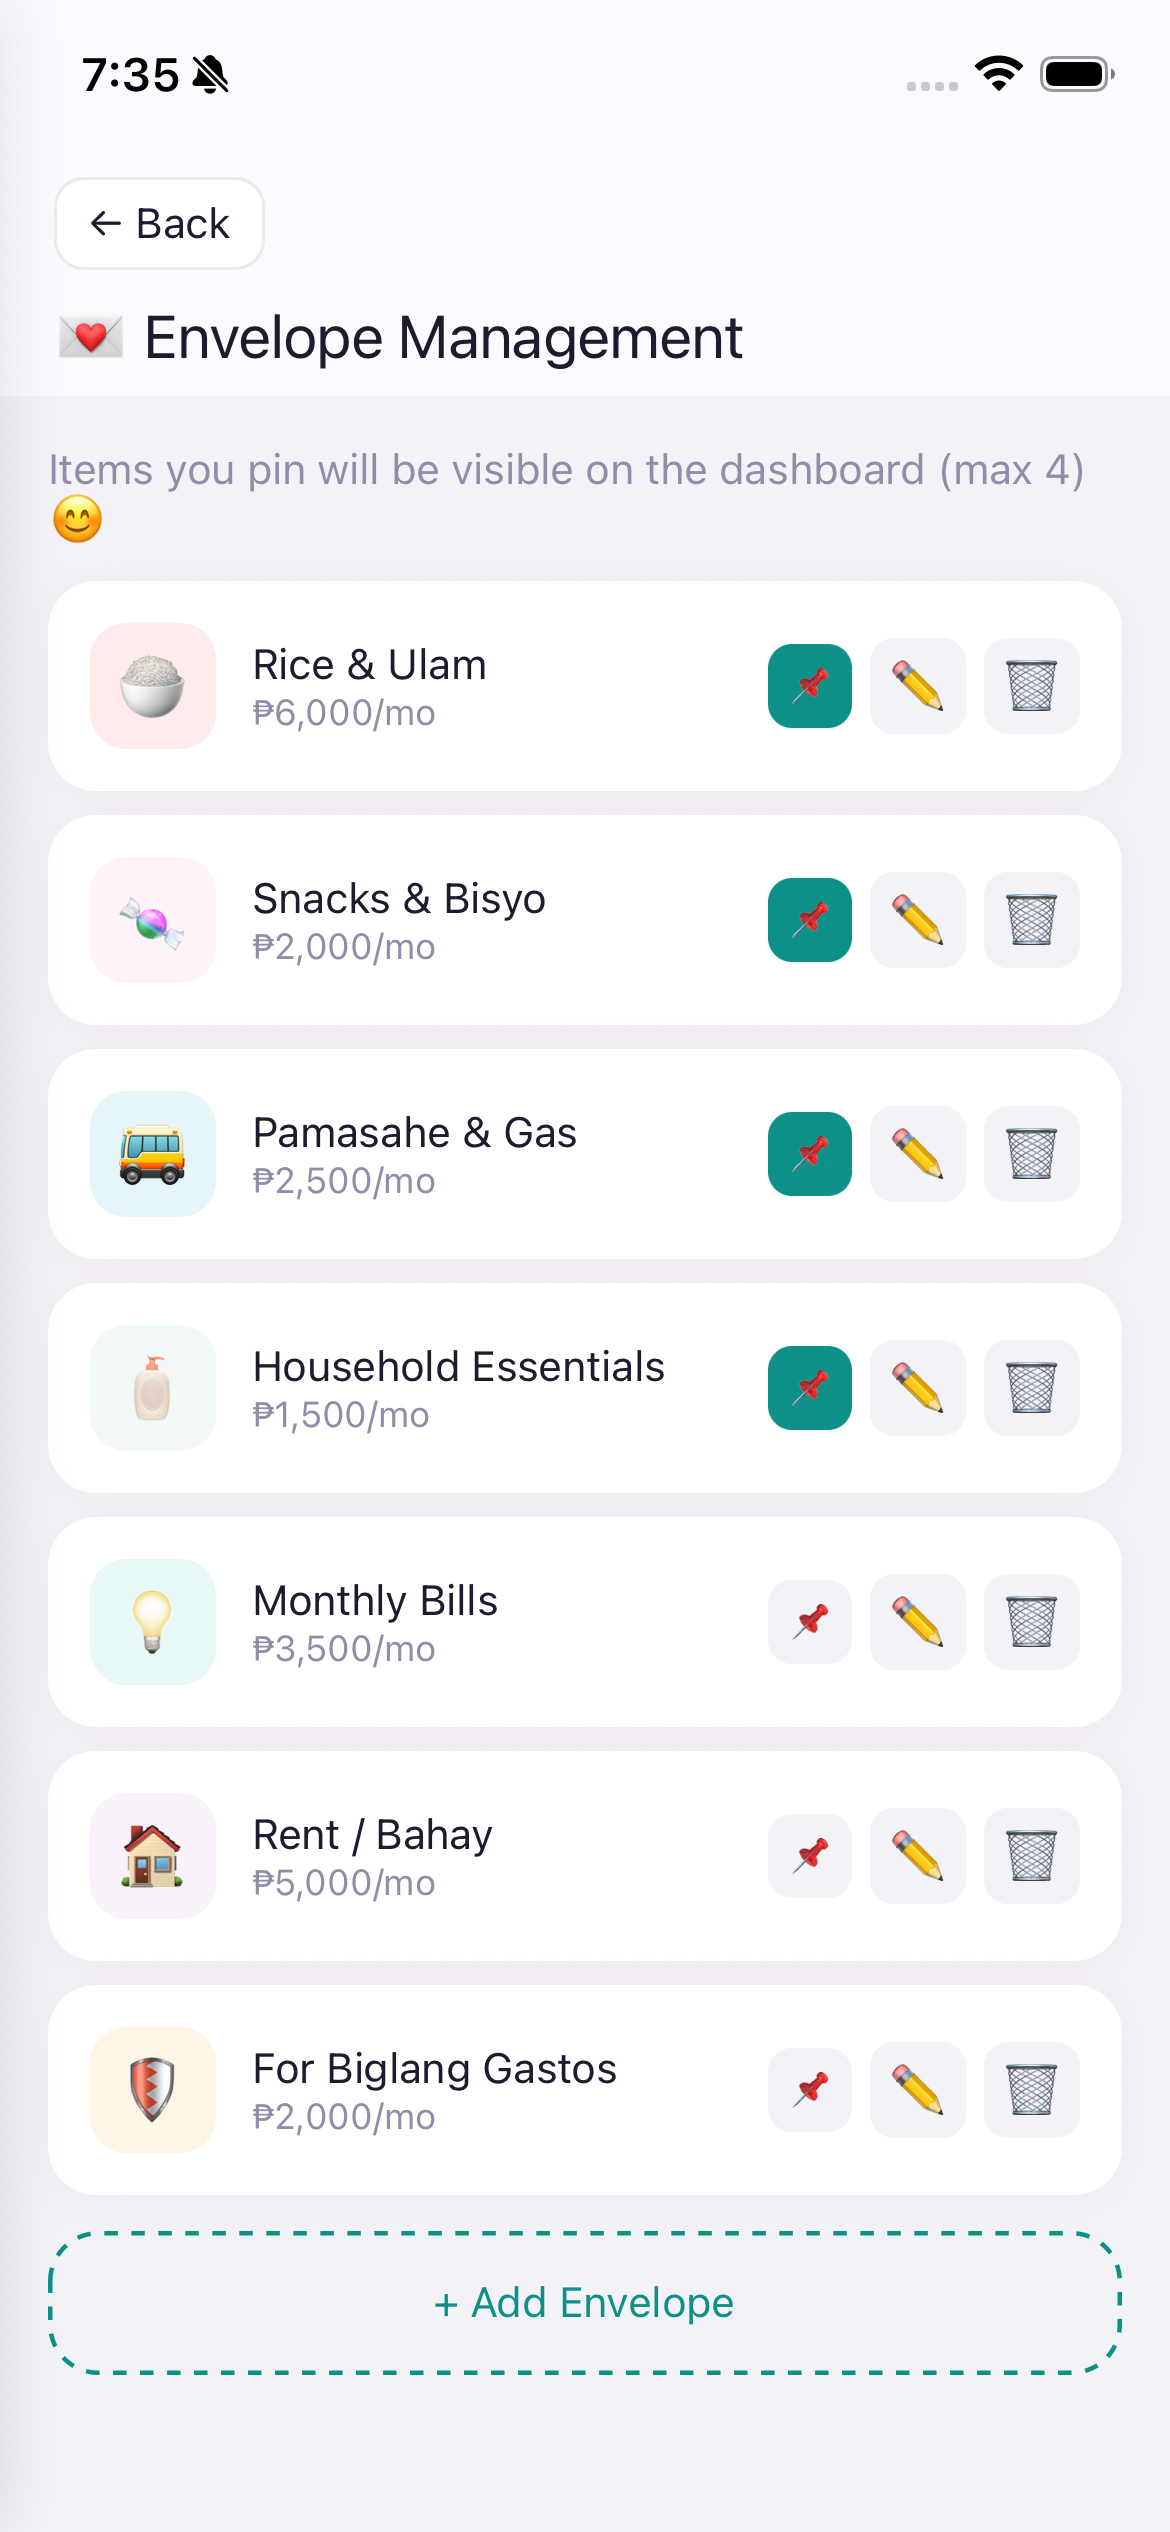
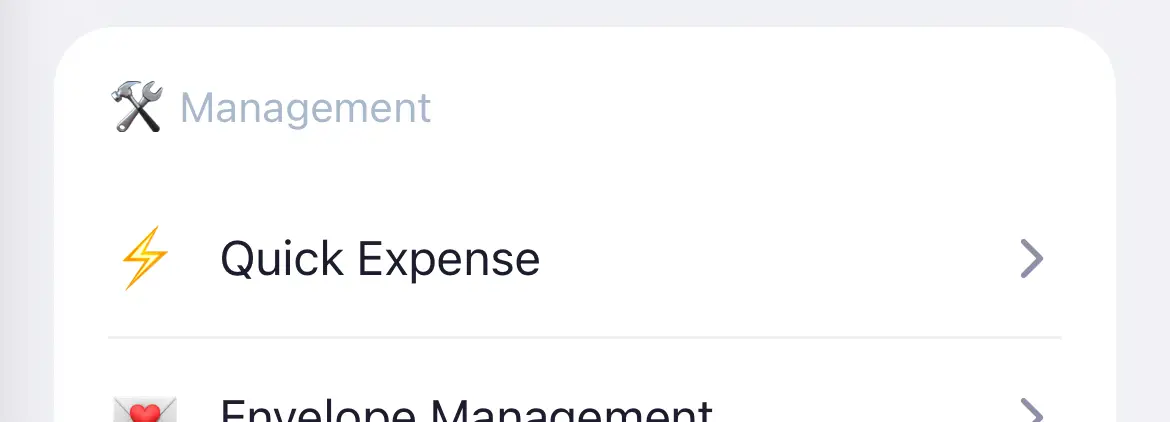
Access via the "Manage" button on the Envelope tab, or from Settings > Management > Envelope Management.
Each envelope shows its monthly budget amount (e.g., "P6,000/mo").
I-access sa pamamagitan ng "Manage" button o Settings > Management > Envelope Management.
I-access pinaagi sa "Manage" button o Settings > Management > Envelope Management.
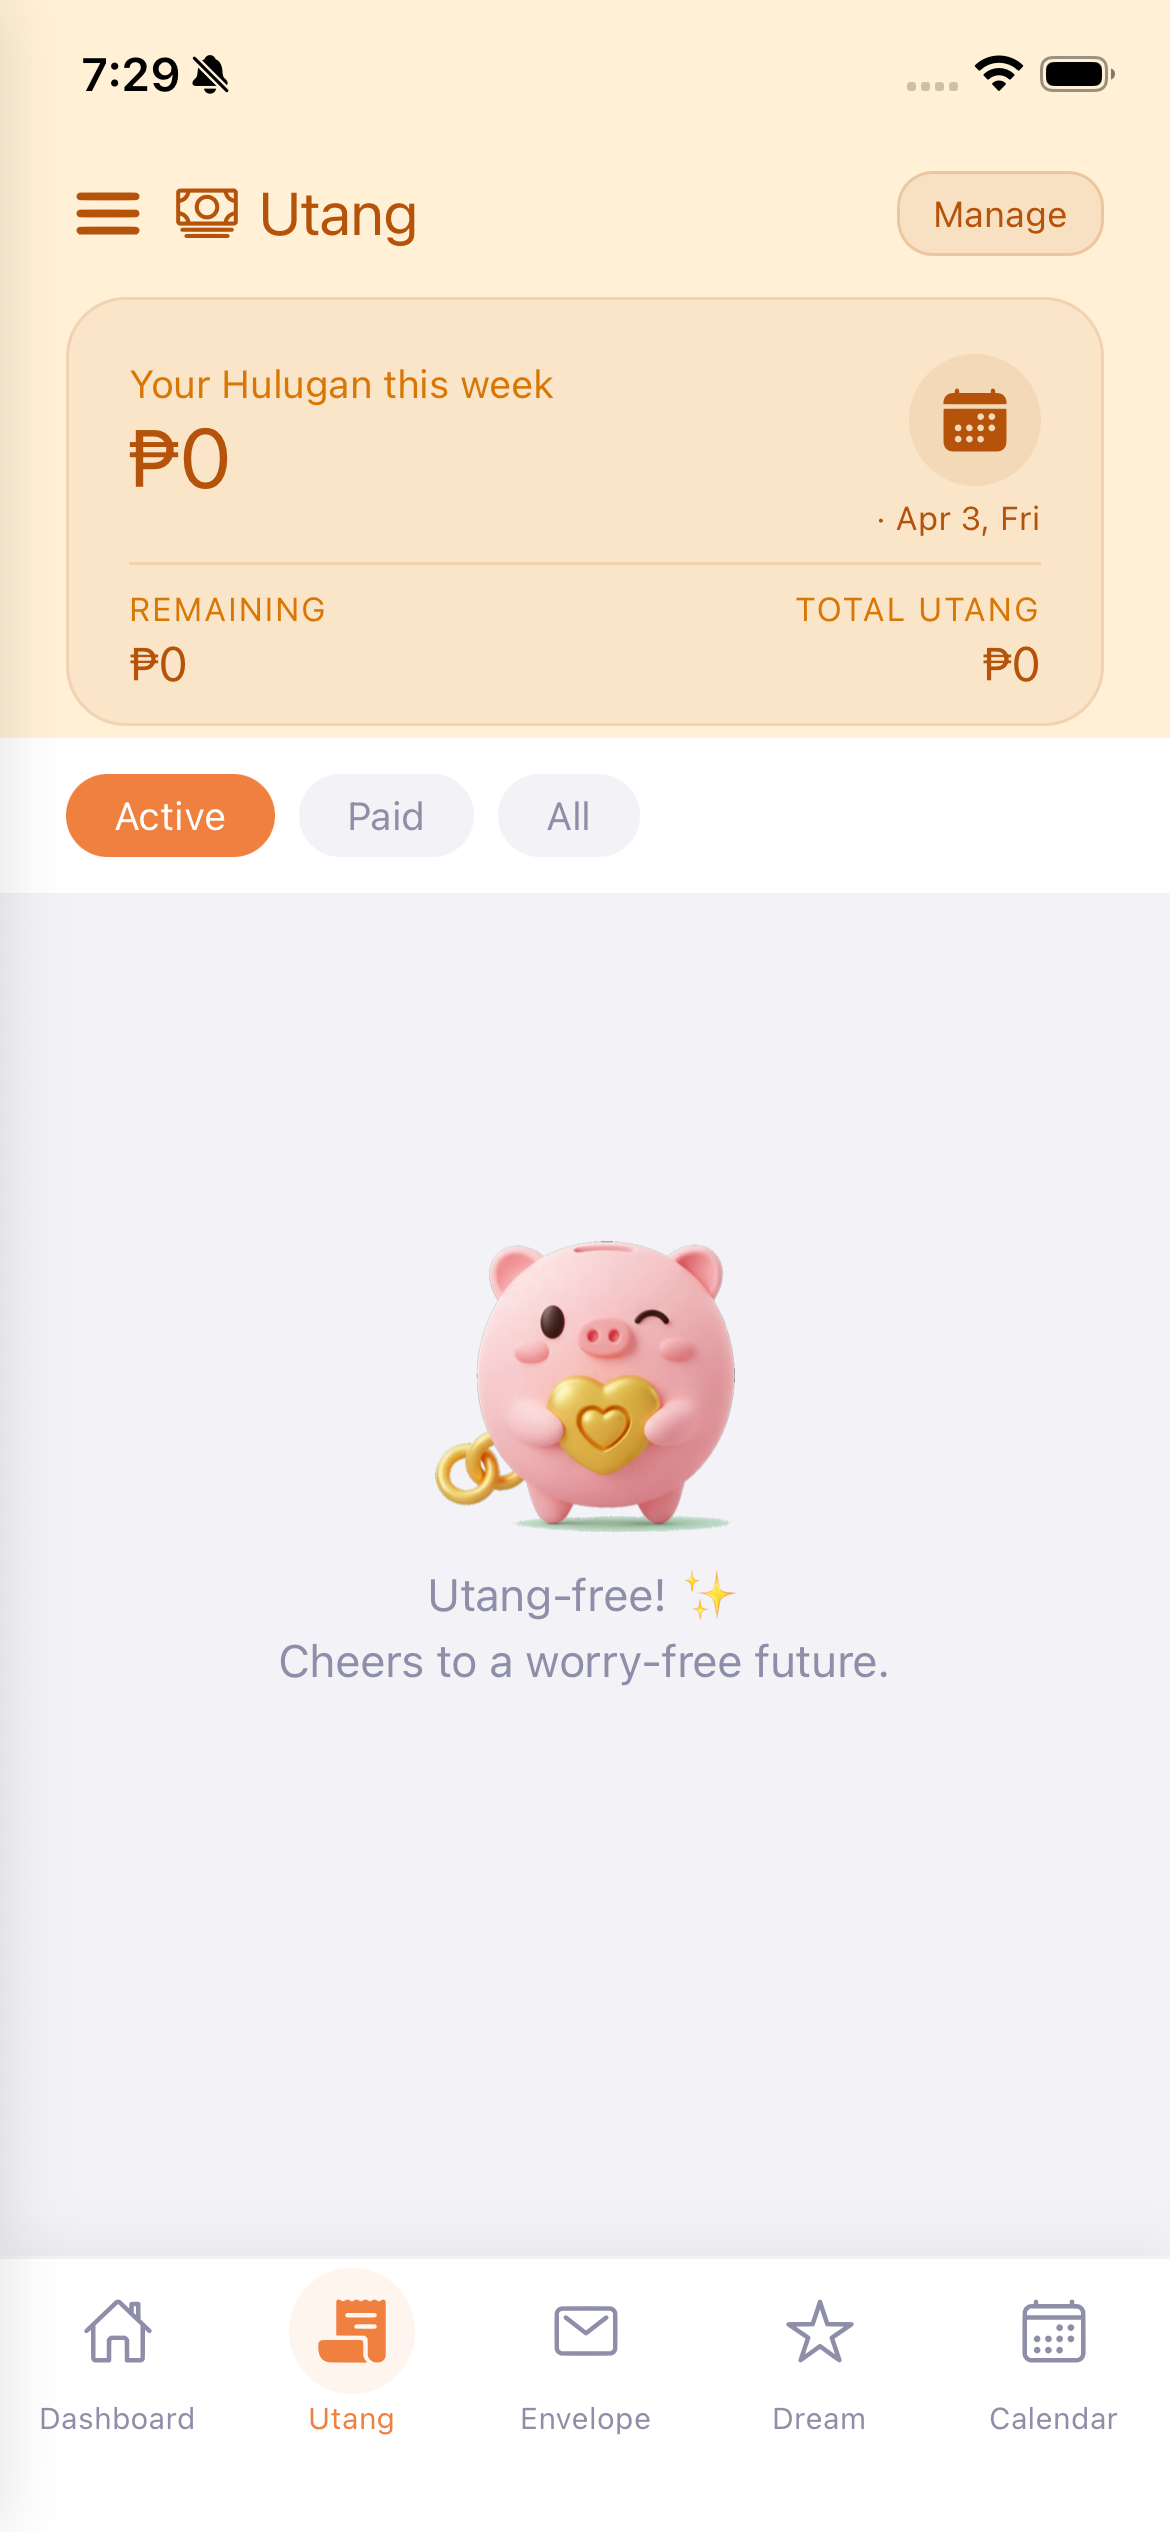
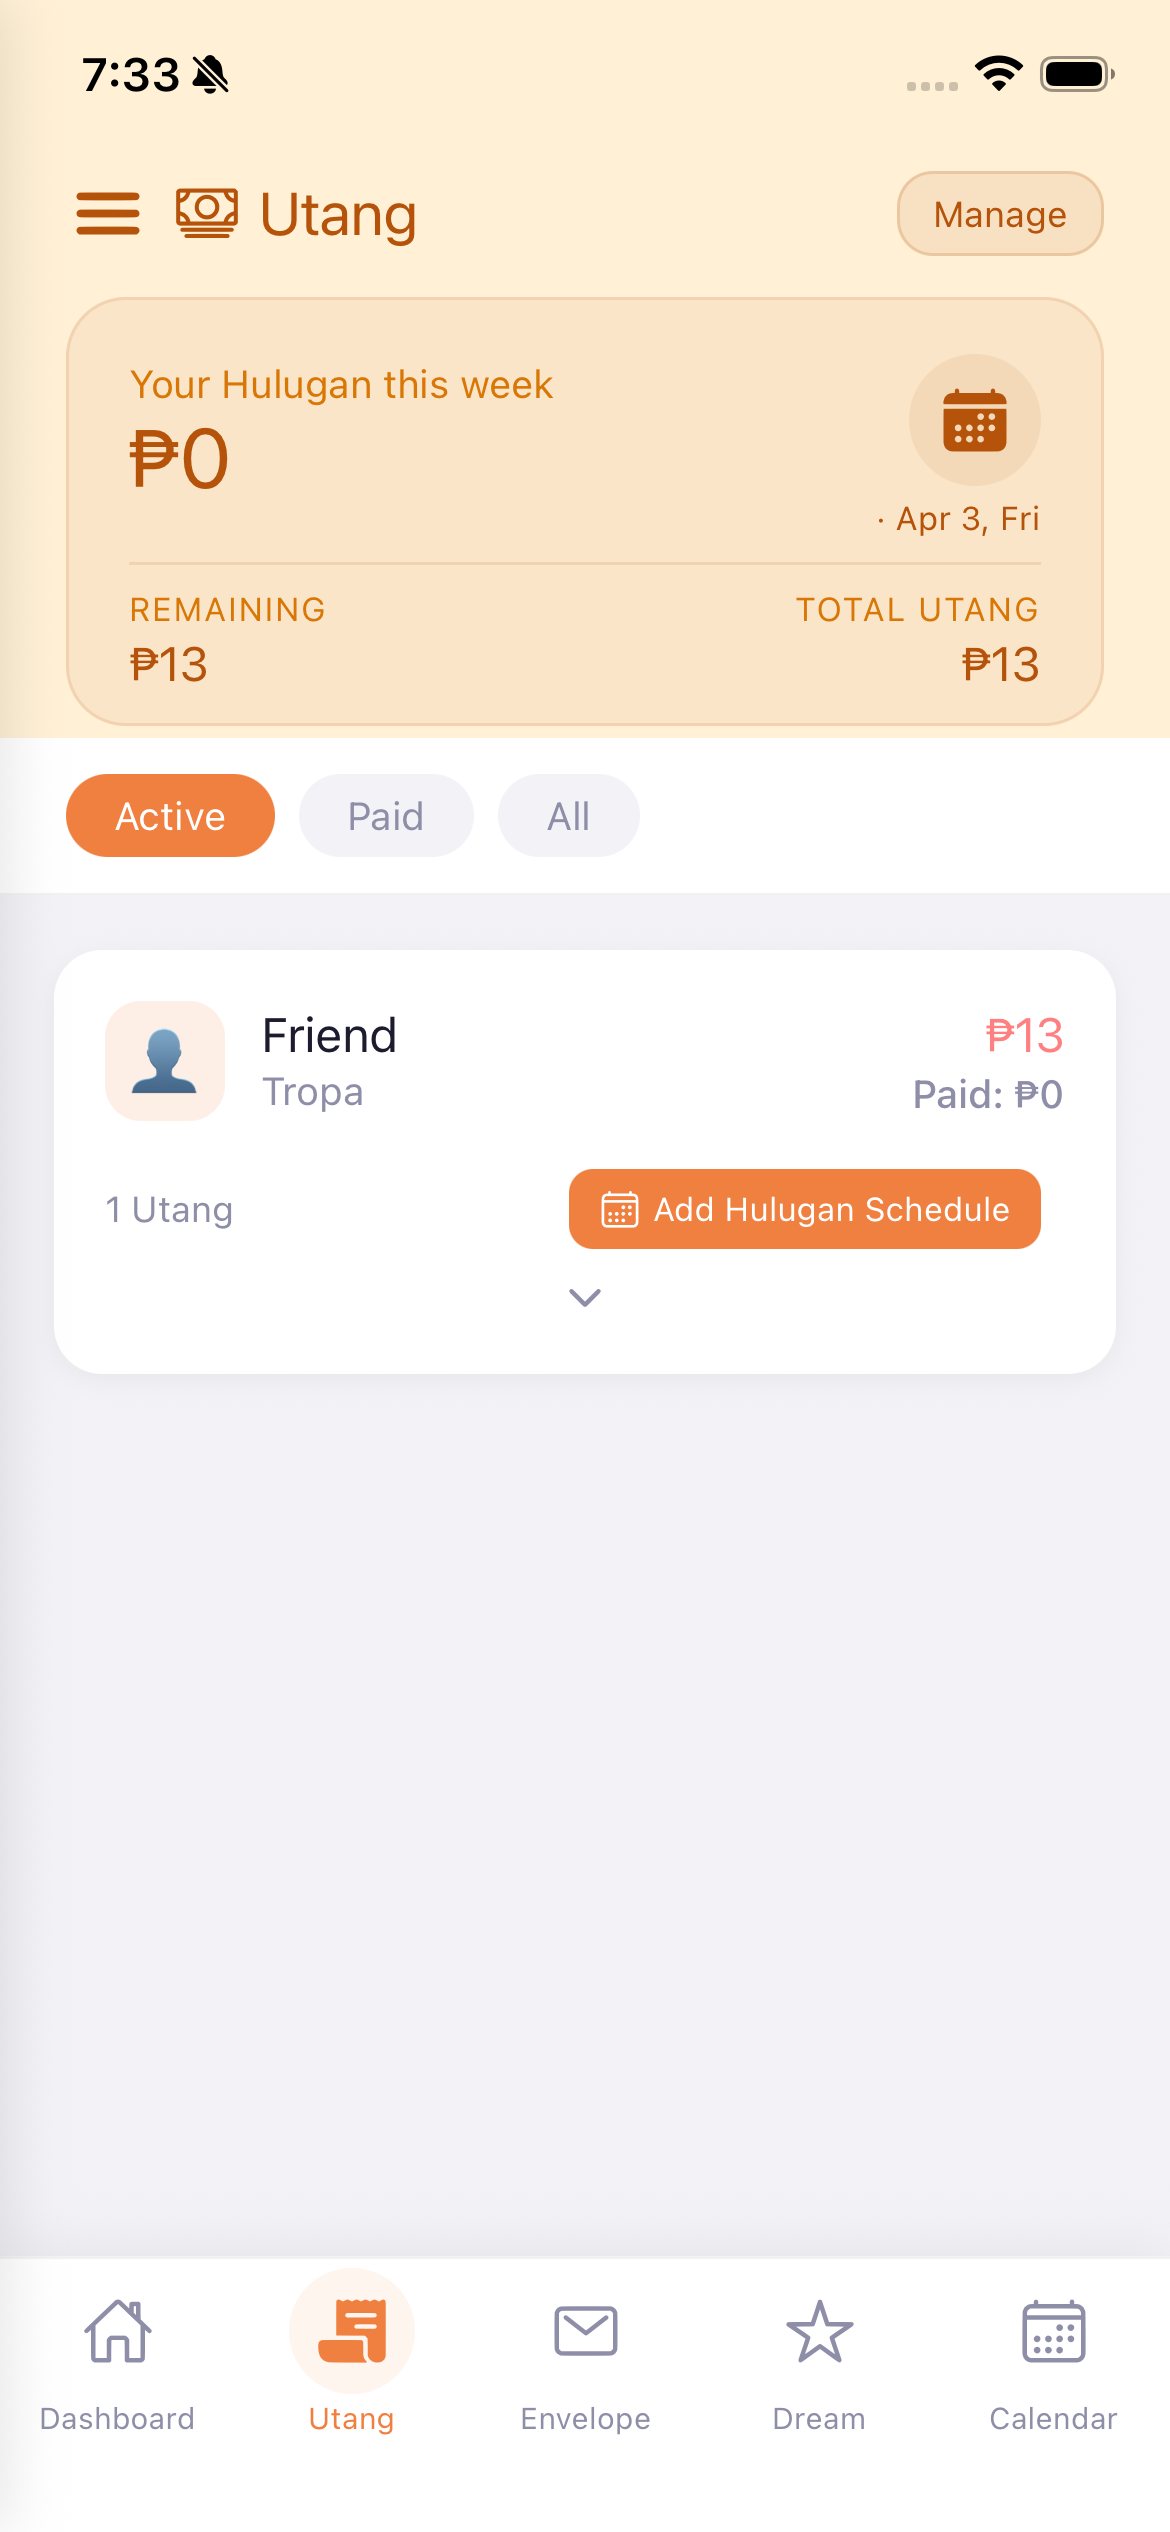
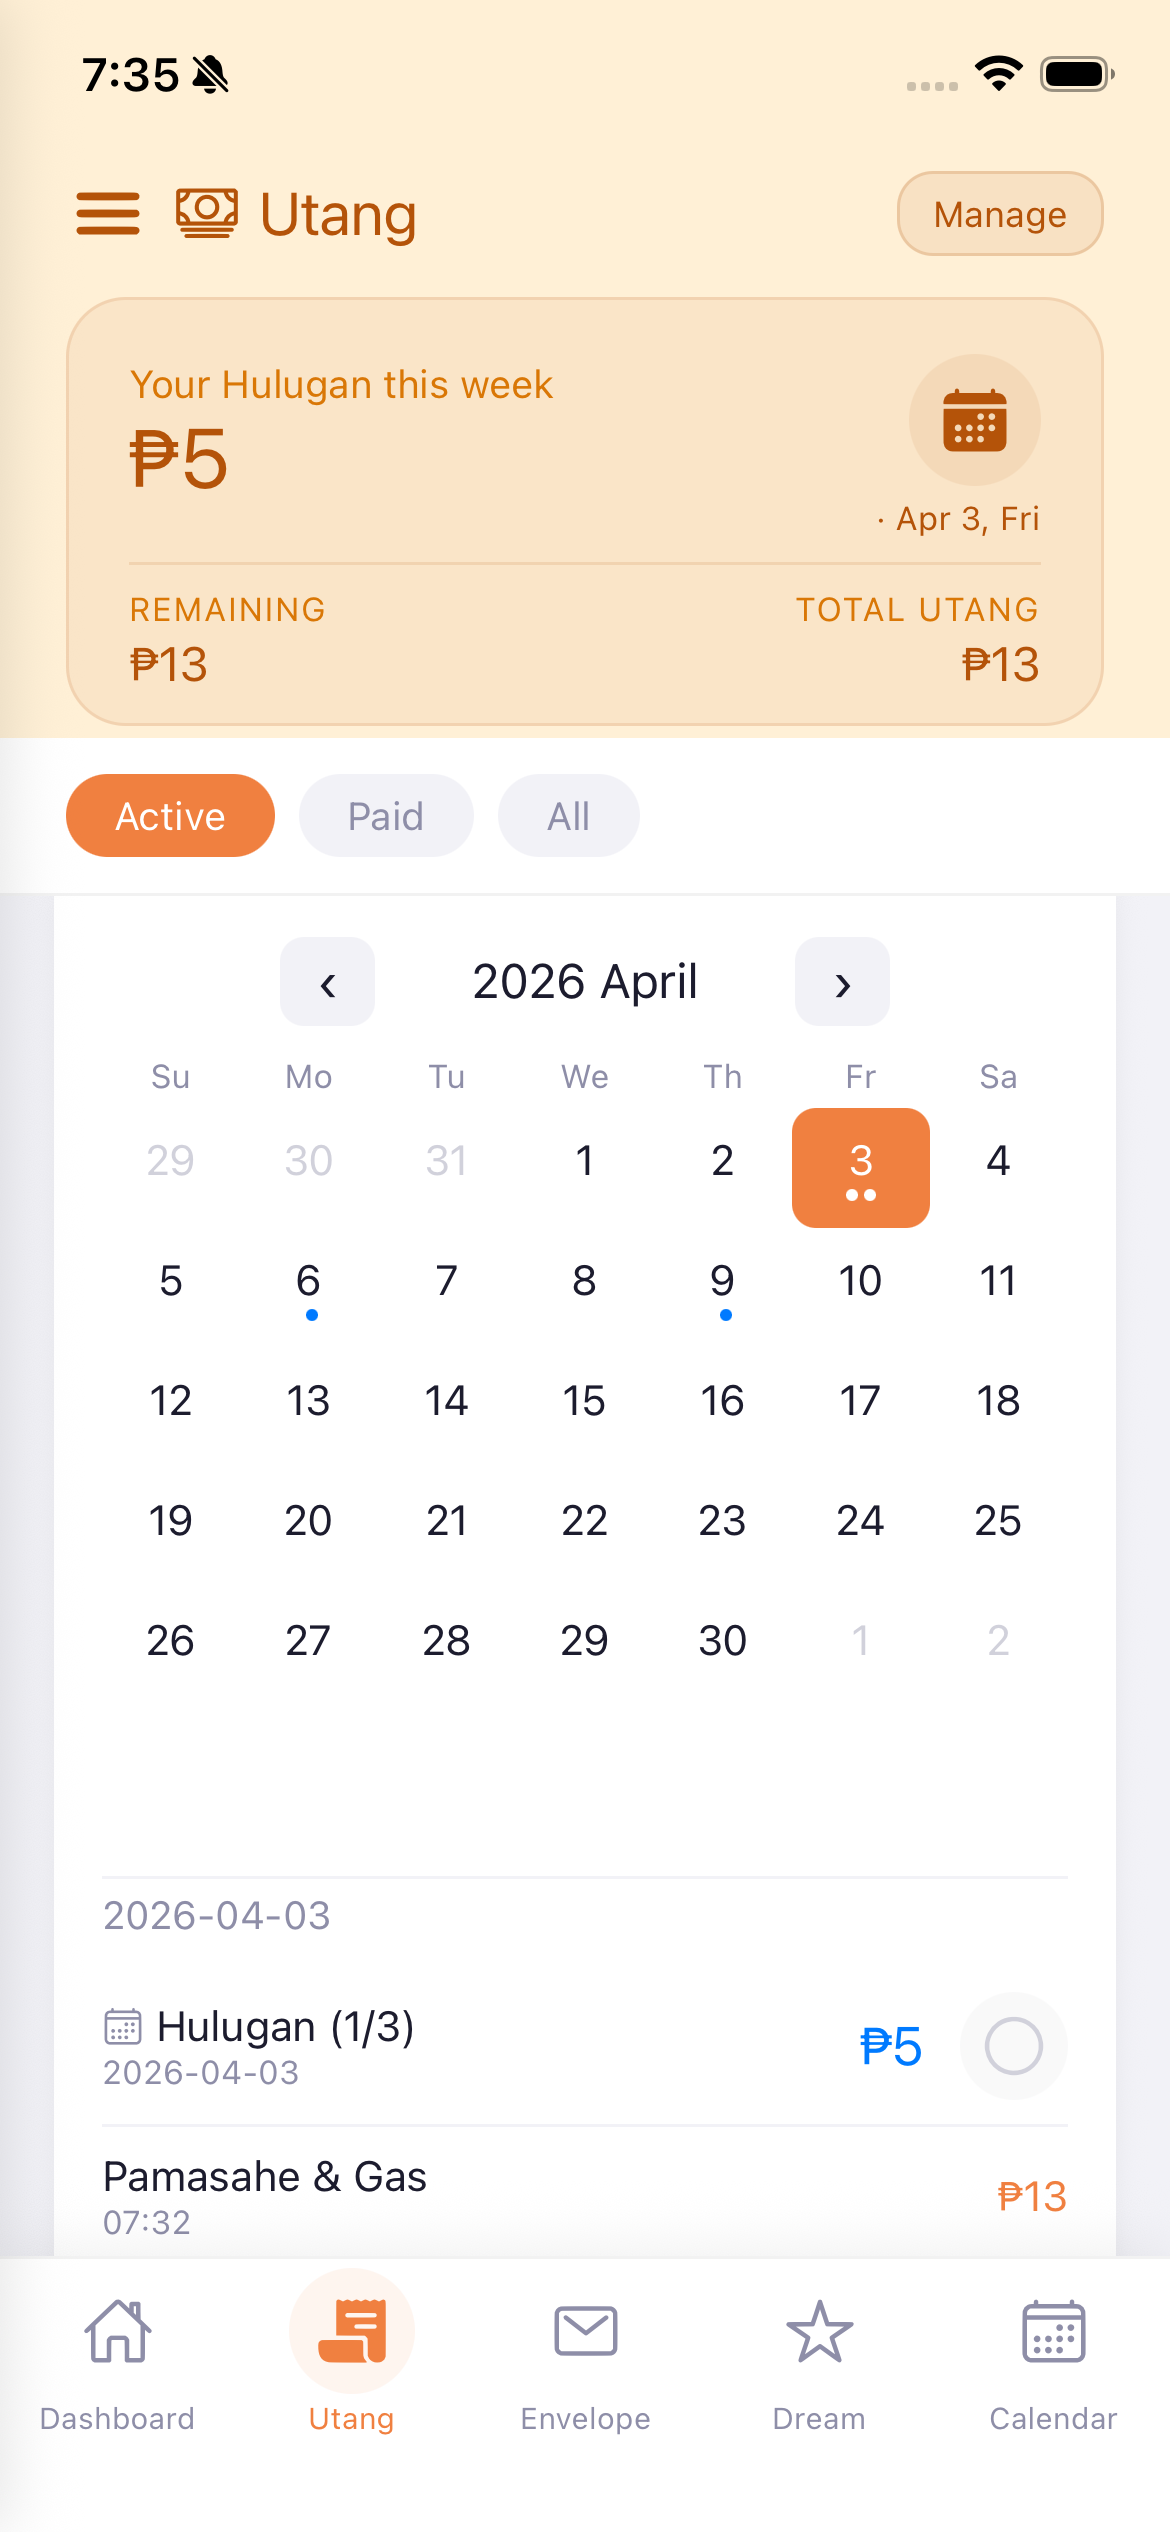
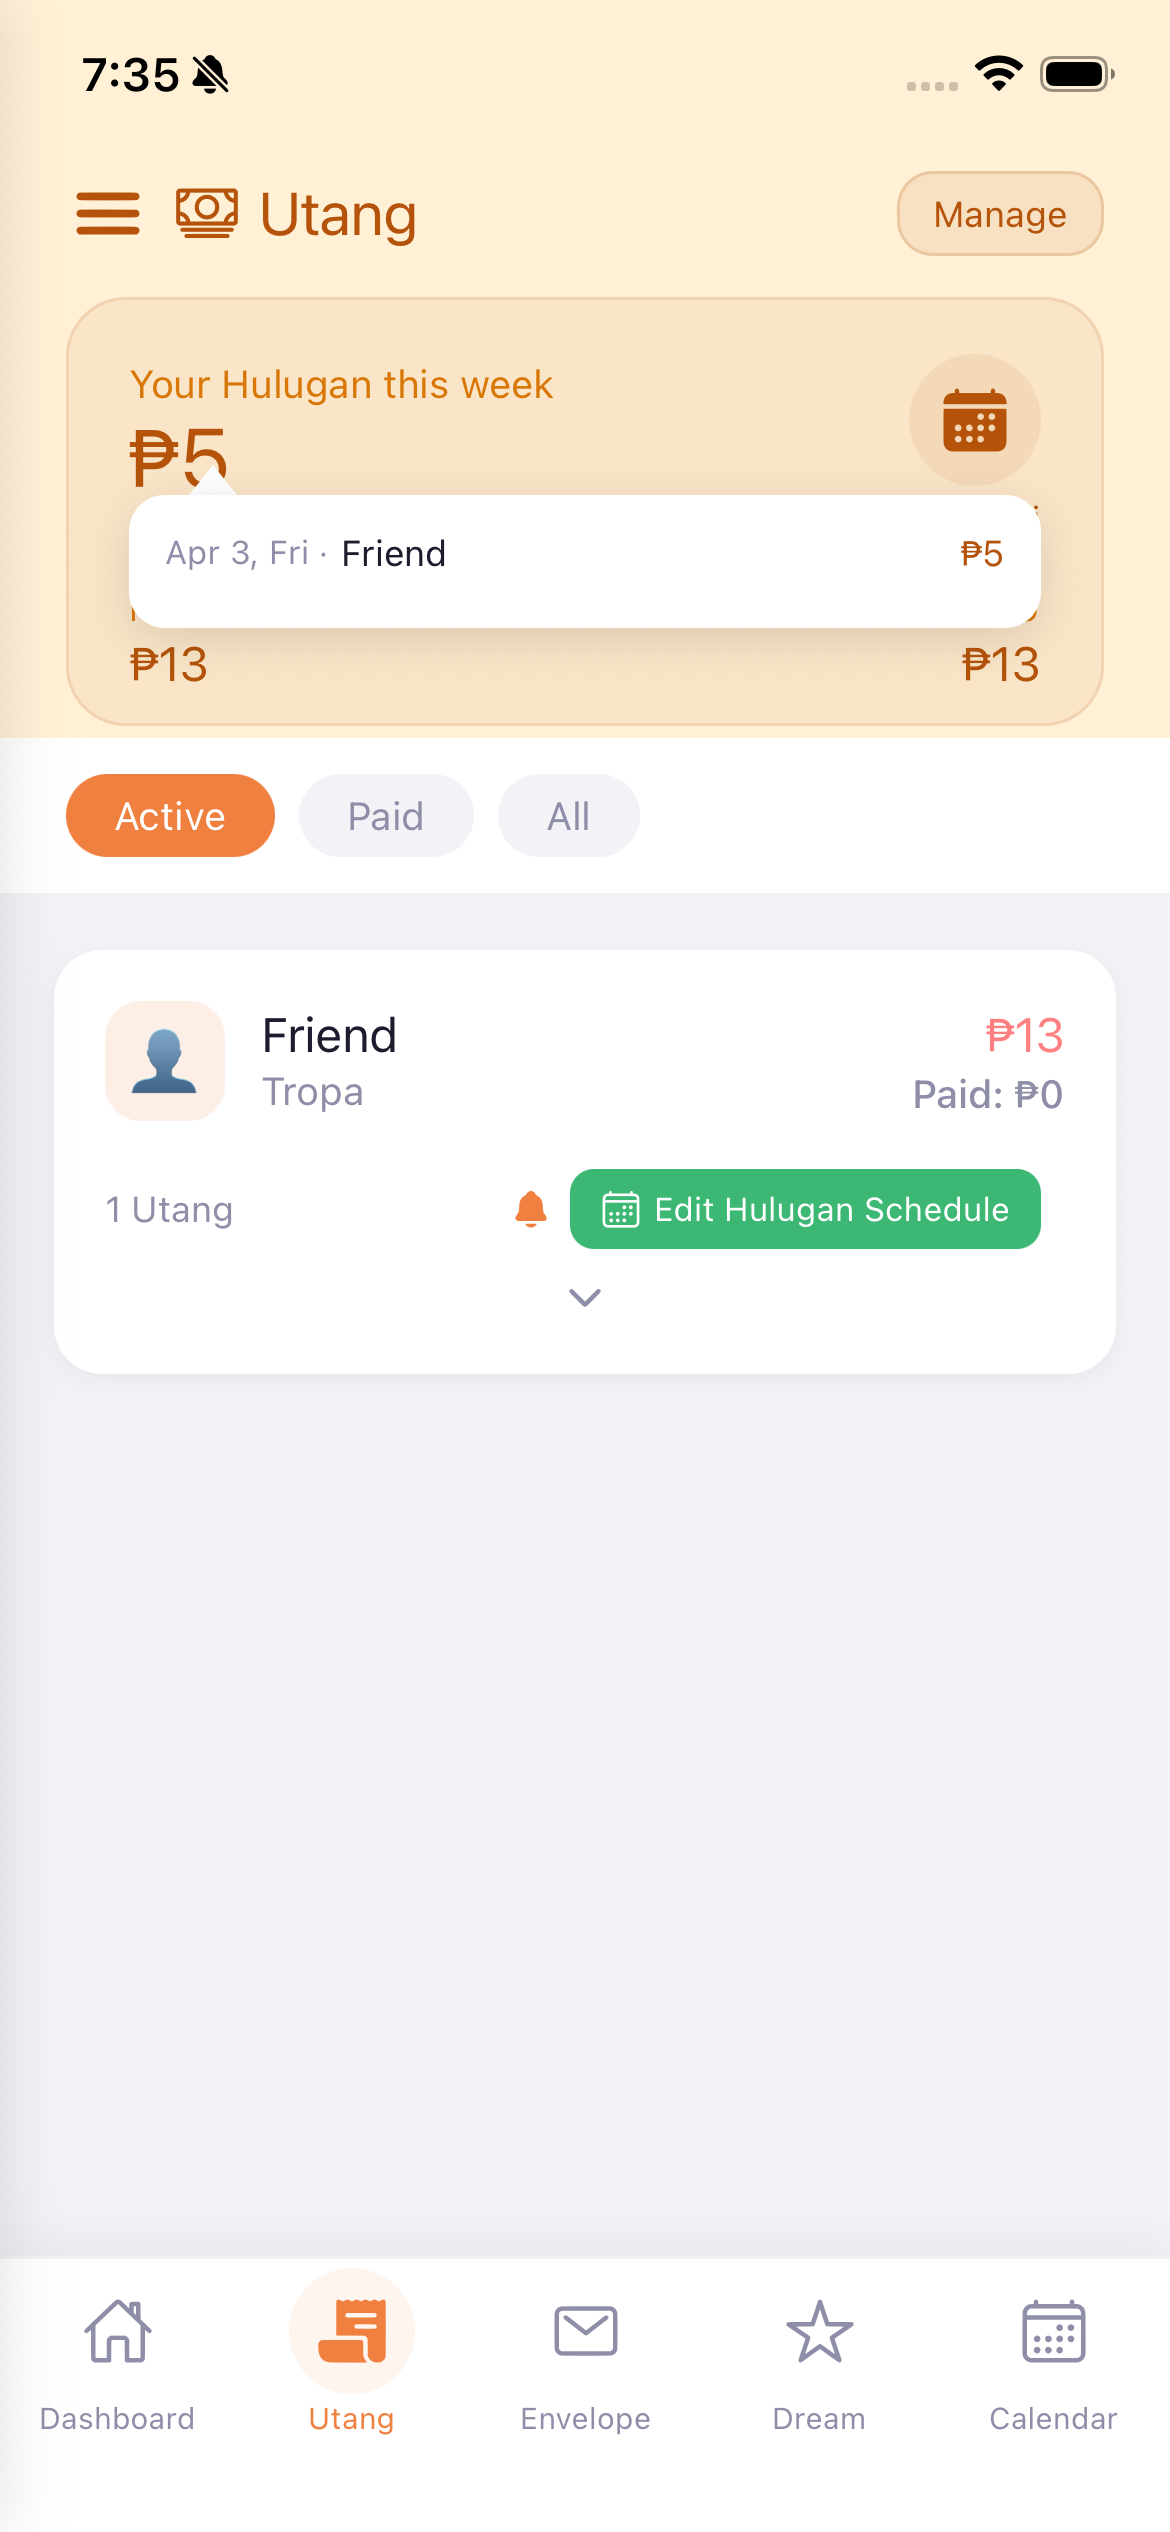
The Utang tab helps you track all your debts (money you owe to people or stores).
When you have no debts, Gumi celebrates with "Utang-free! Cheers to a worry-free future."
Ang Utang tab ay tumutulong sa iyo na ma-track ang lahat ng iyong utang.
Ang Utang tab nagtabang nimo sa pag-track sa tanan nimong utang.
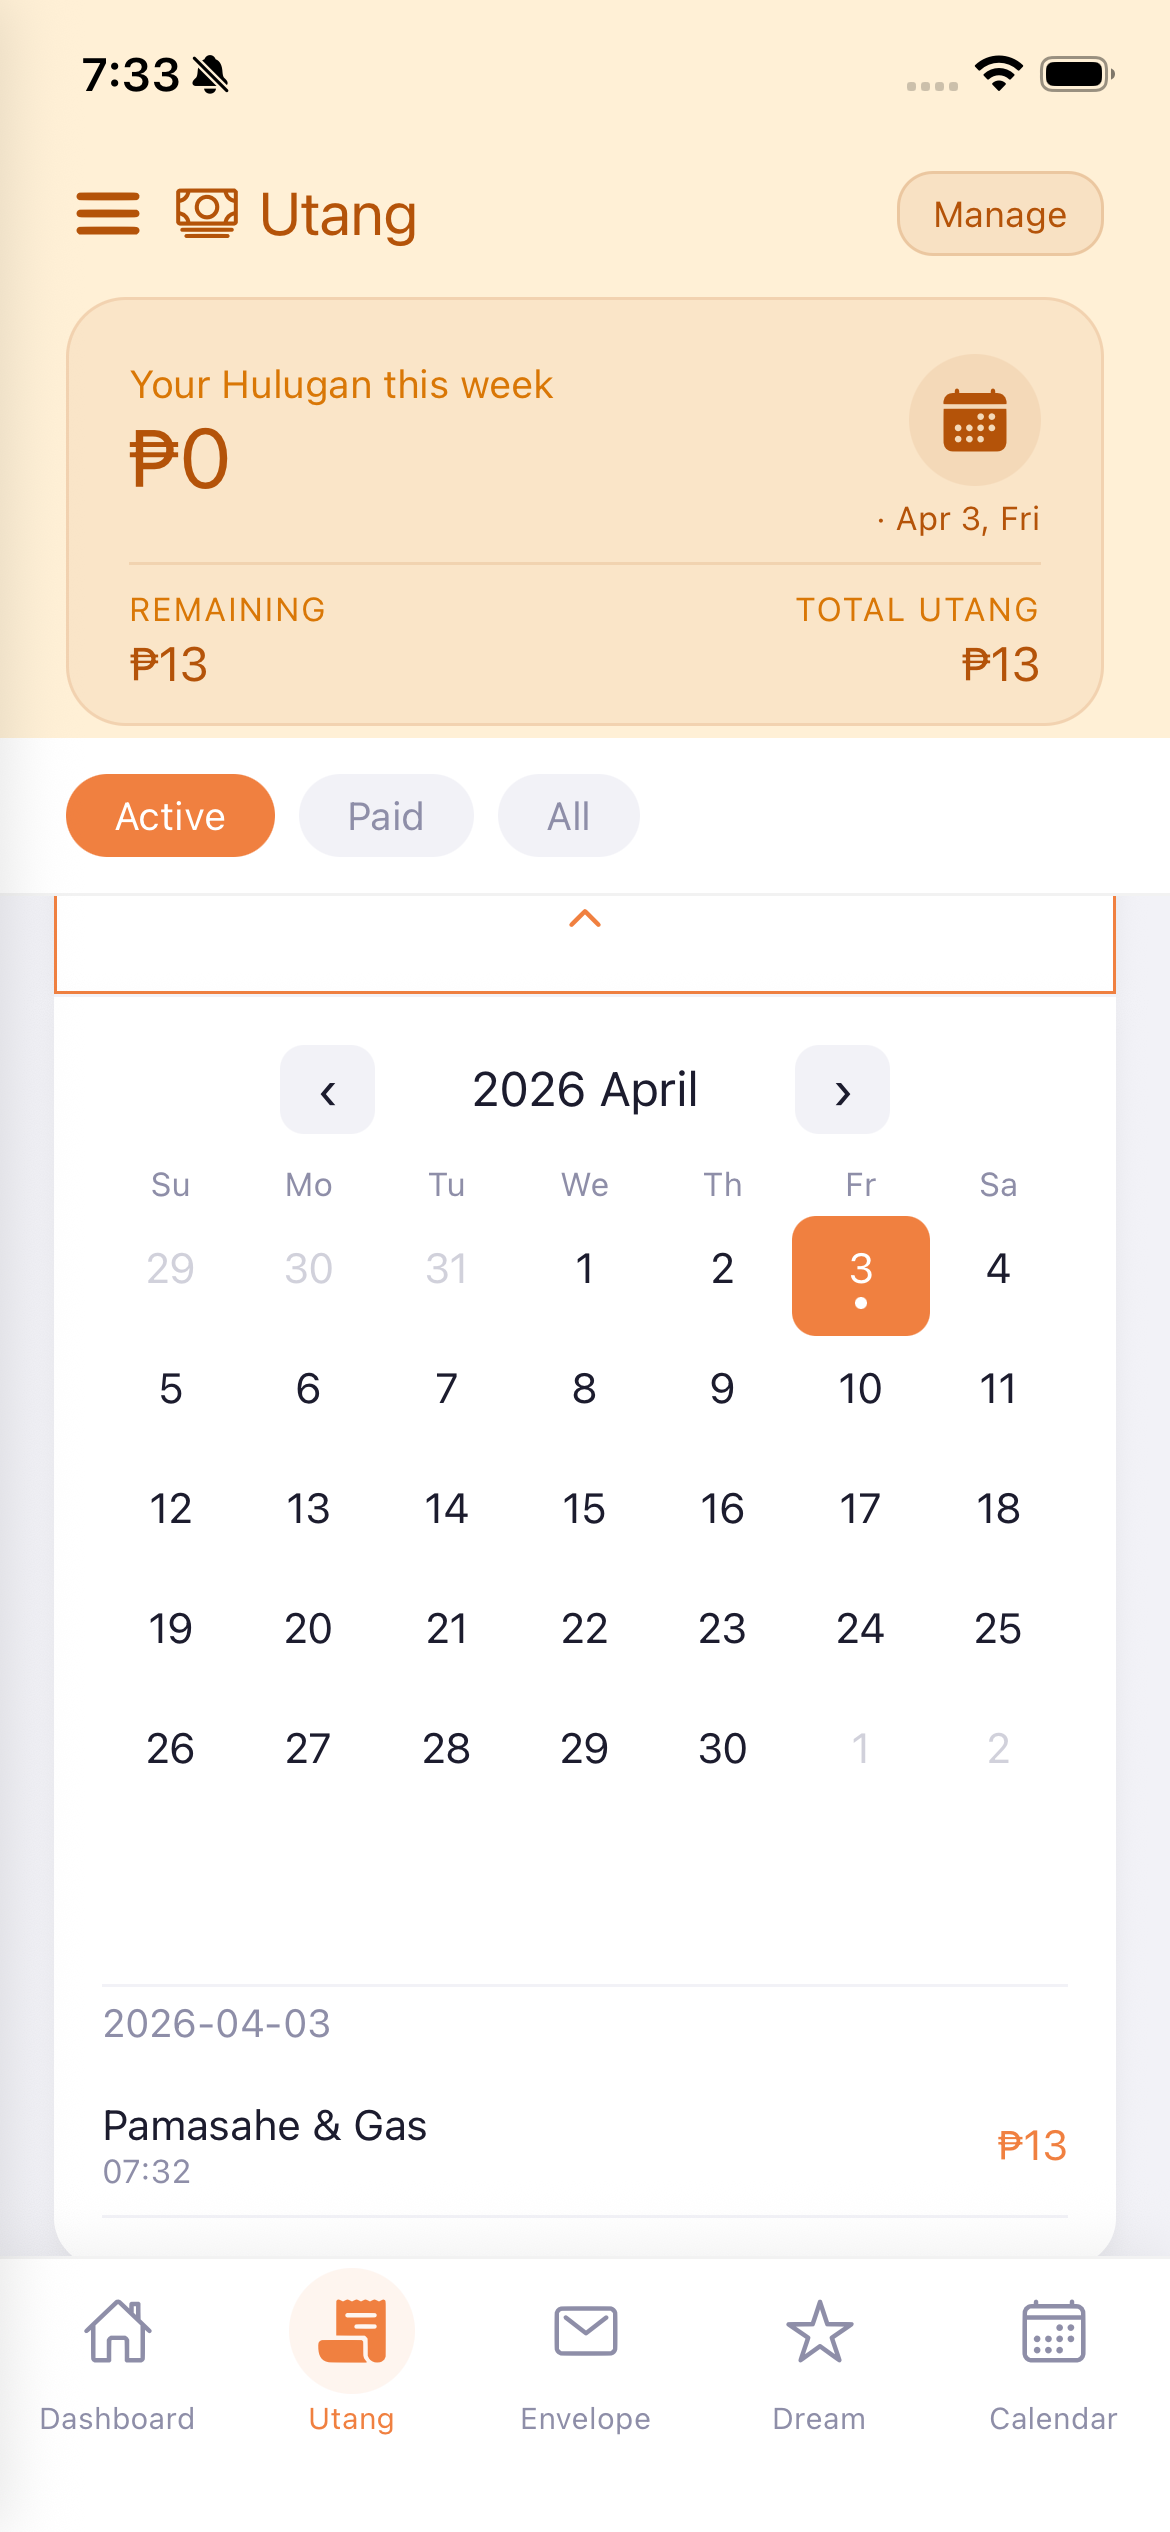
Tap on a debt card to expand a calendar view. Dates with scheduled payments are marked with dots. Tap on a date to see what's due that day.
I-tap ang debt card para i-expand ang calendar view. Ang mga petsa na may nakatakdang bayarin ay may mga tuldok.
I-tap ang debt card para i-expand ang calendar view.
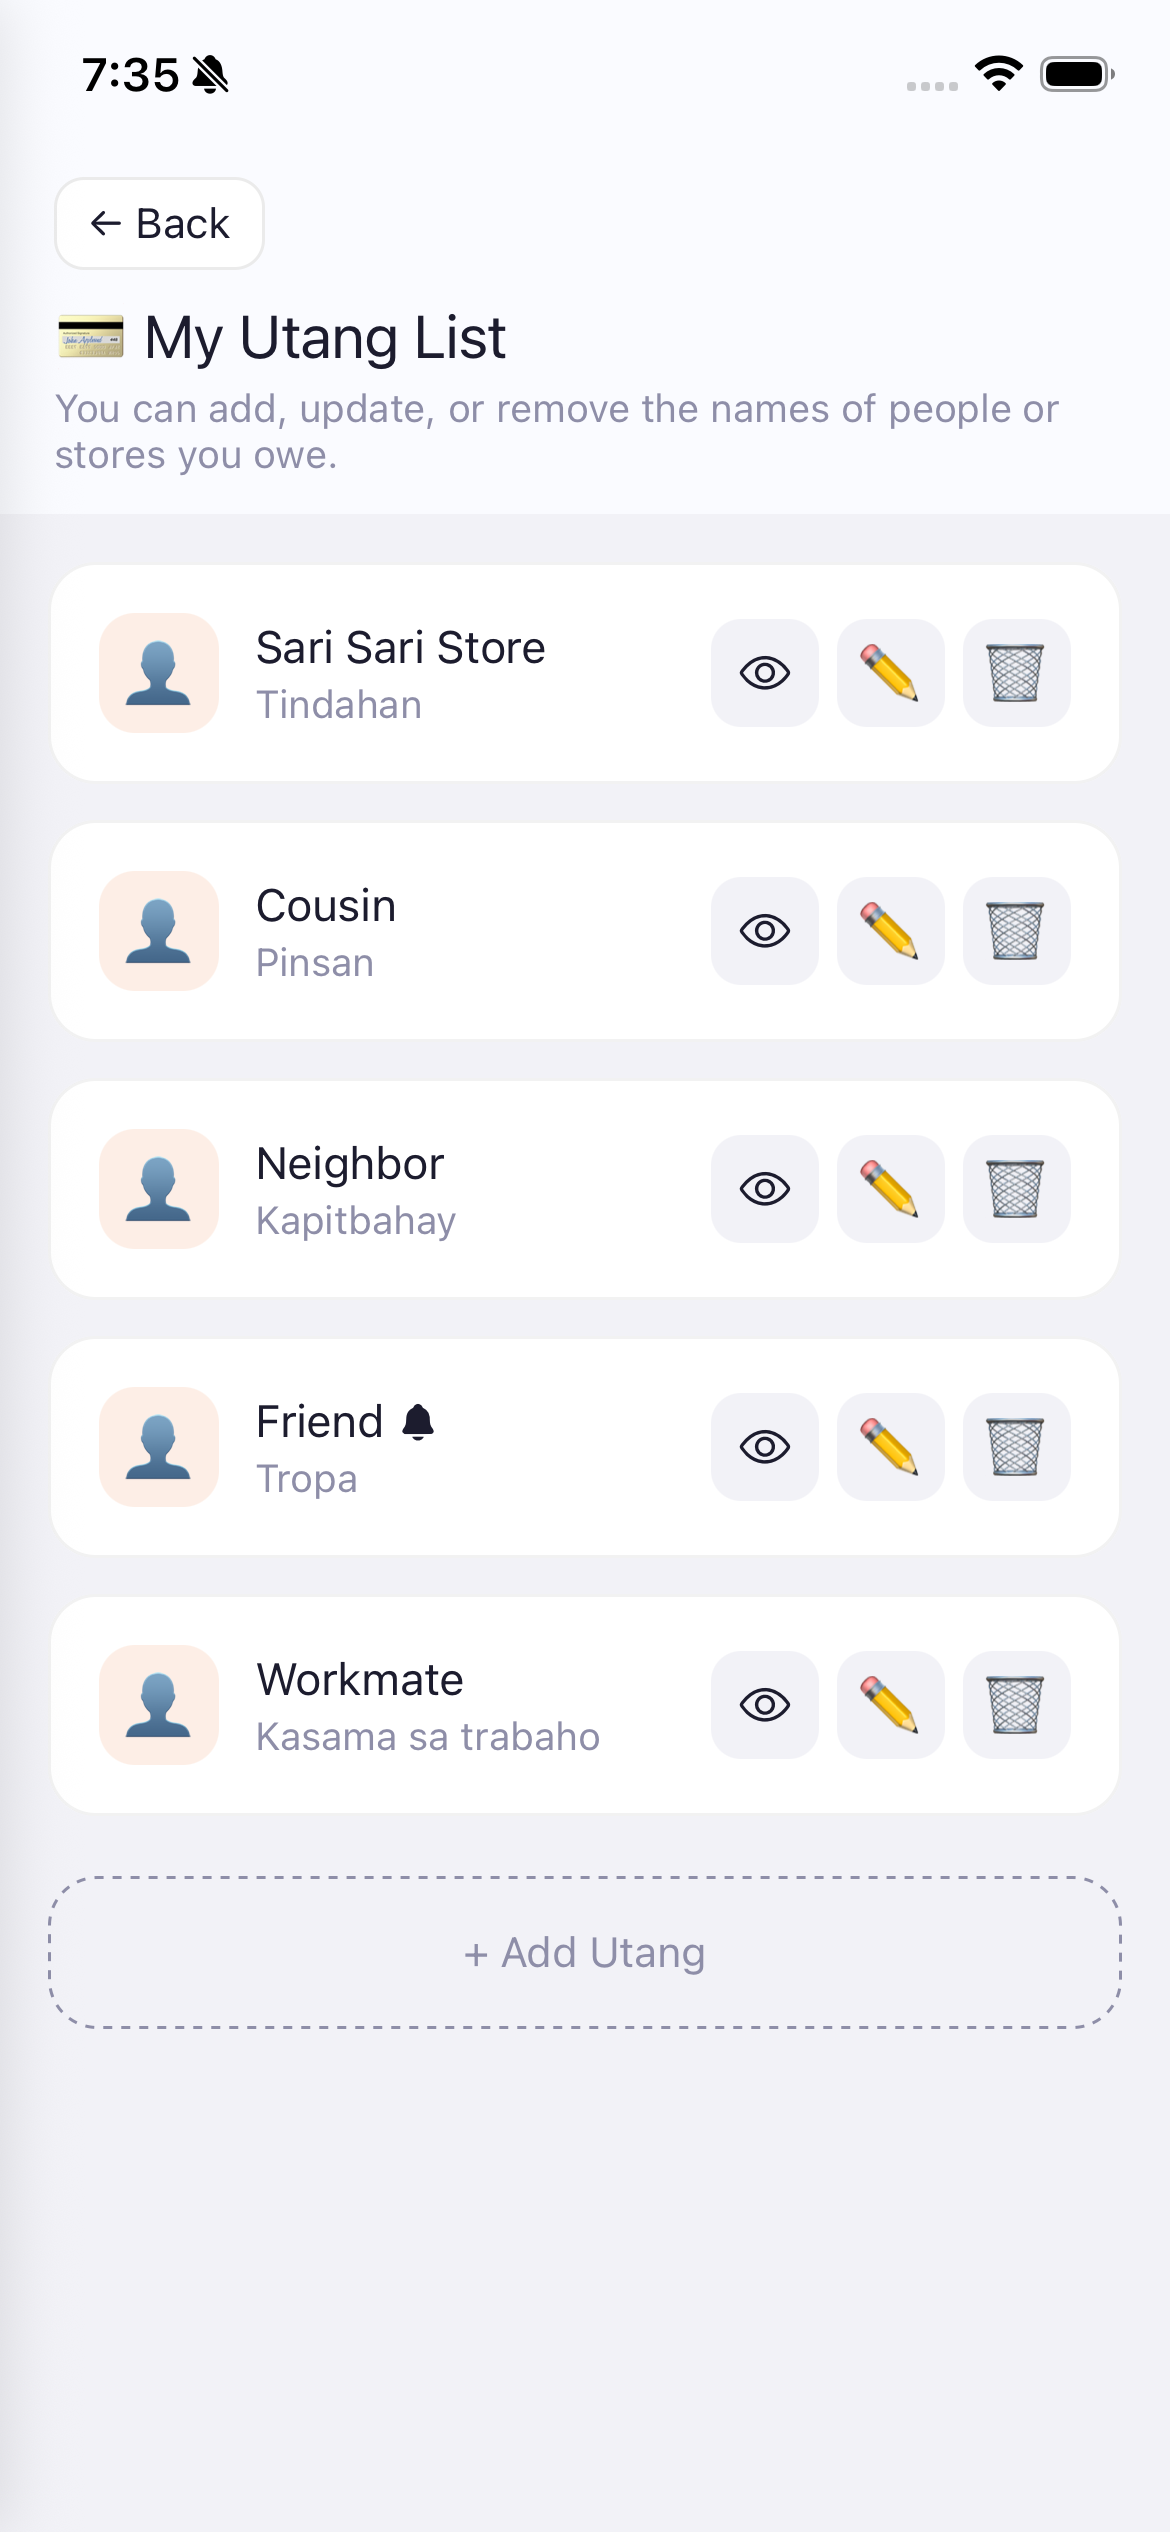
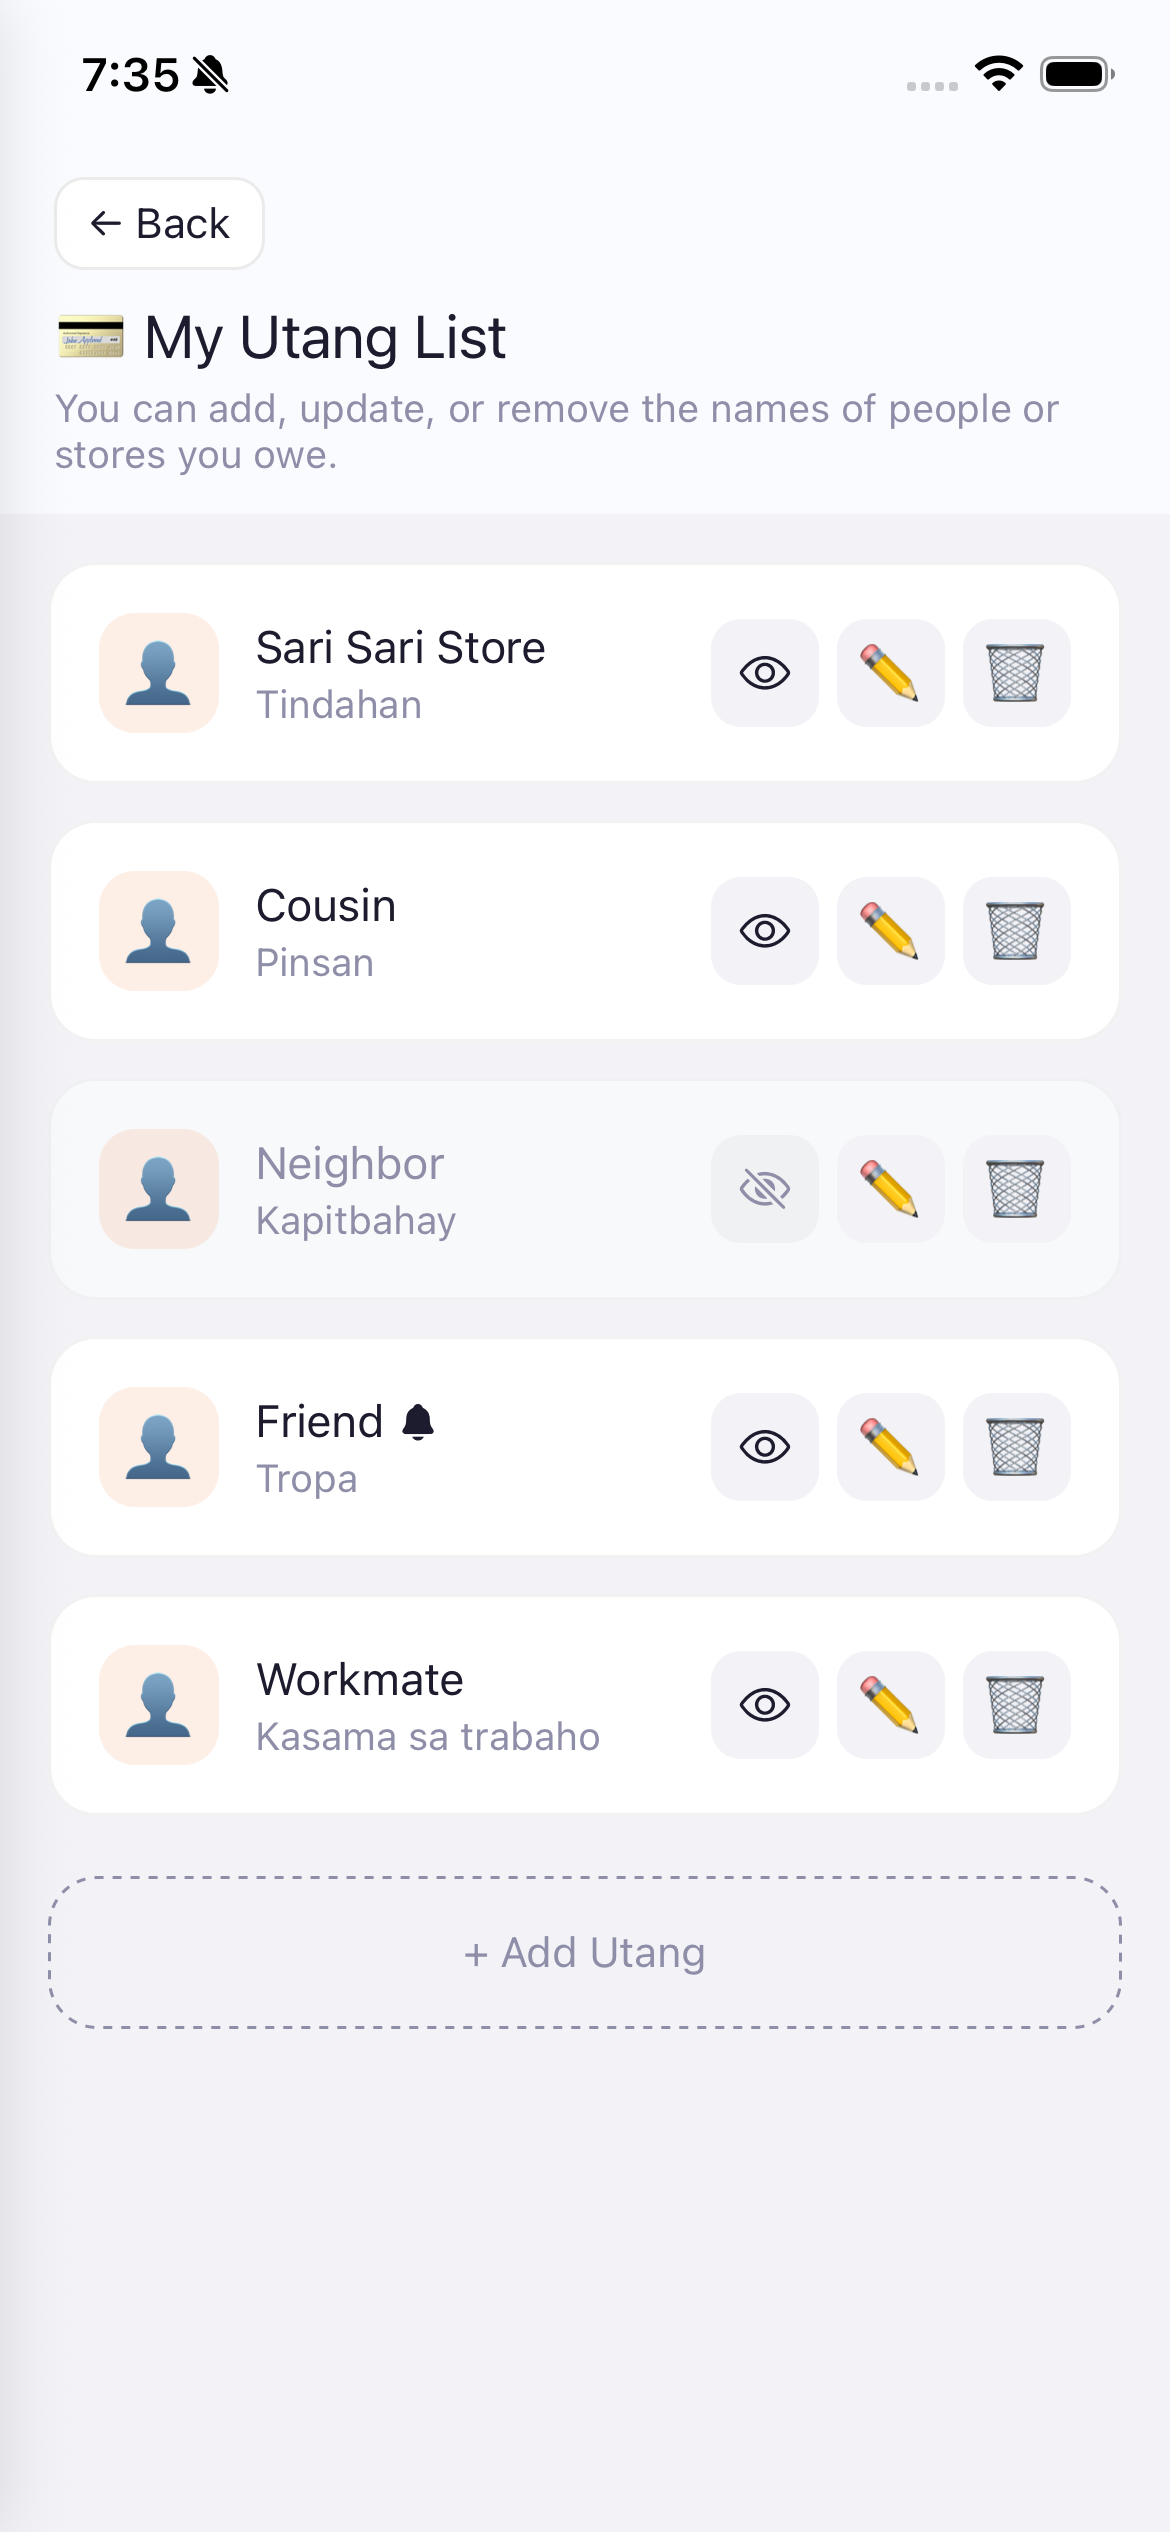
Access via Utang tab > Manage or Settings > Management > My Utang List.
Manage the people or stores you owe money to.
I-access sa Utang tab > Manage o Settings > My Utang List.
I-manage ang mga tao o tindahan na may utang ka.
I-access sa Utang tab > Manage o Settings > My Utang List.
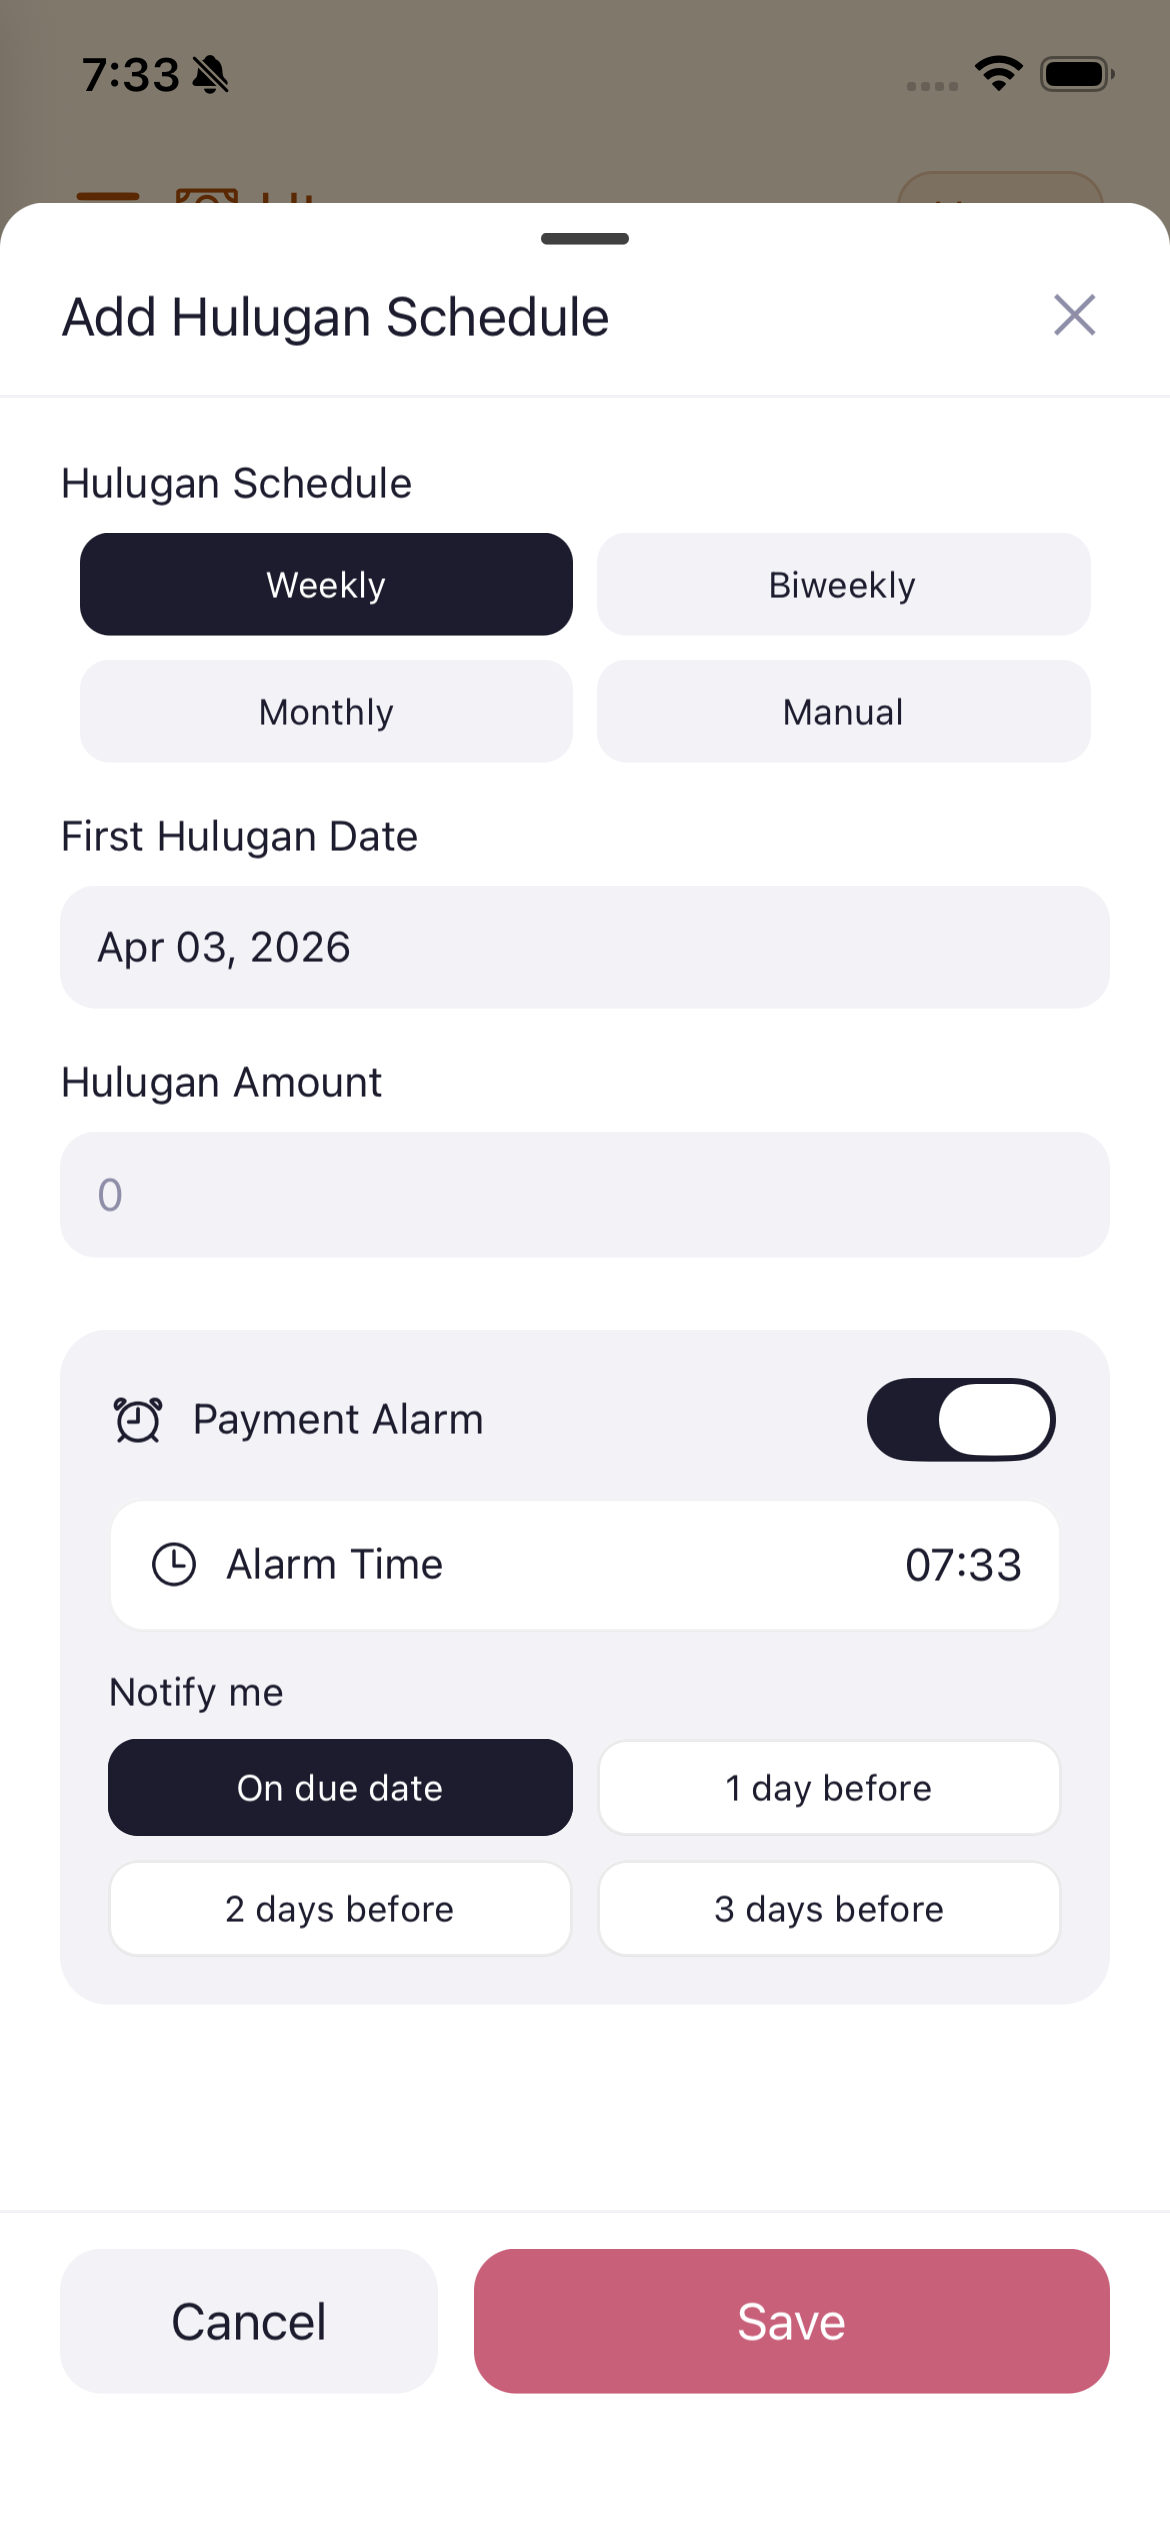
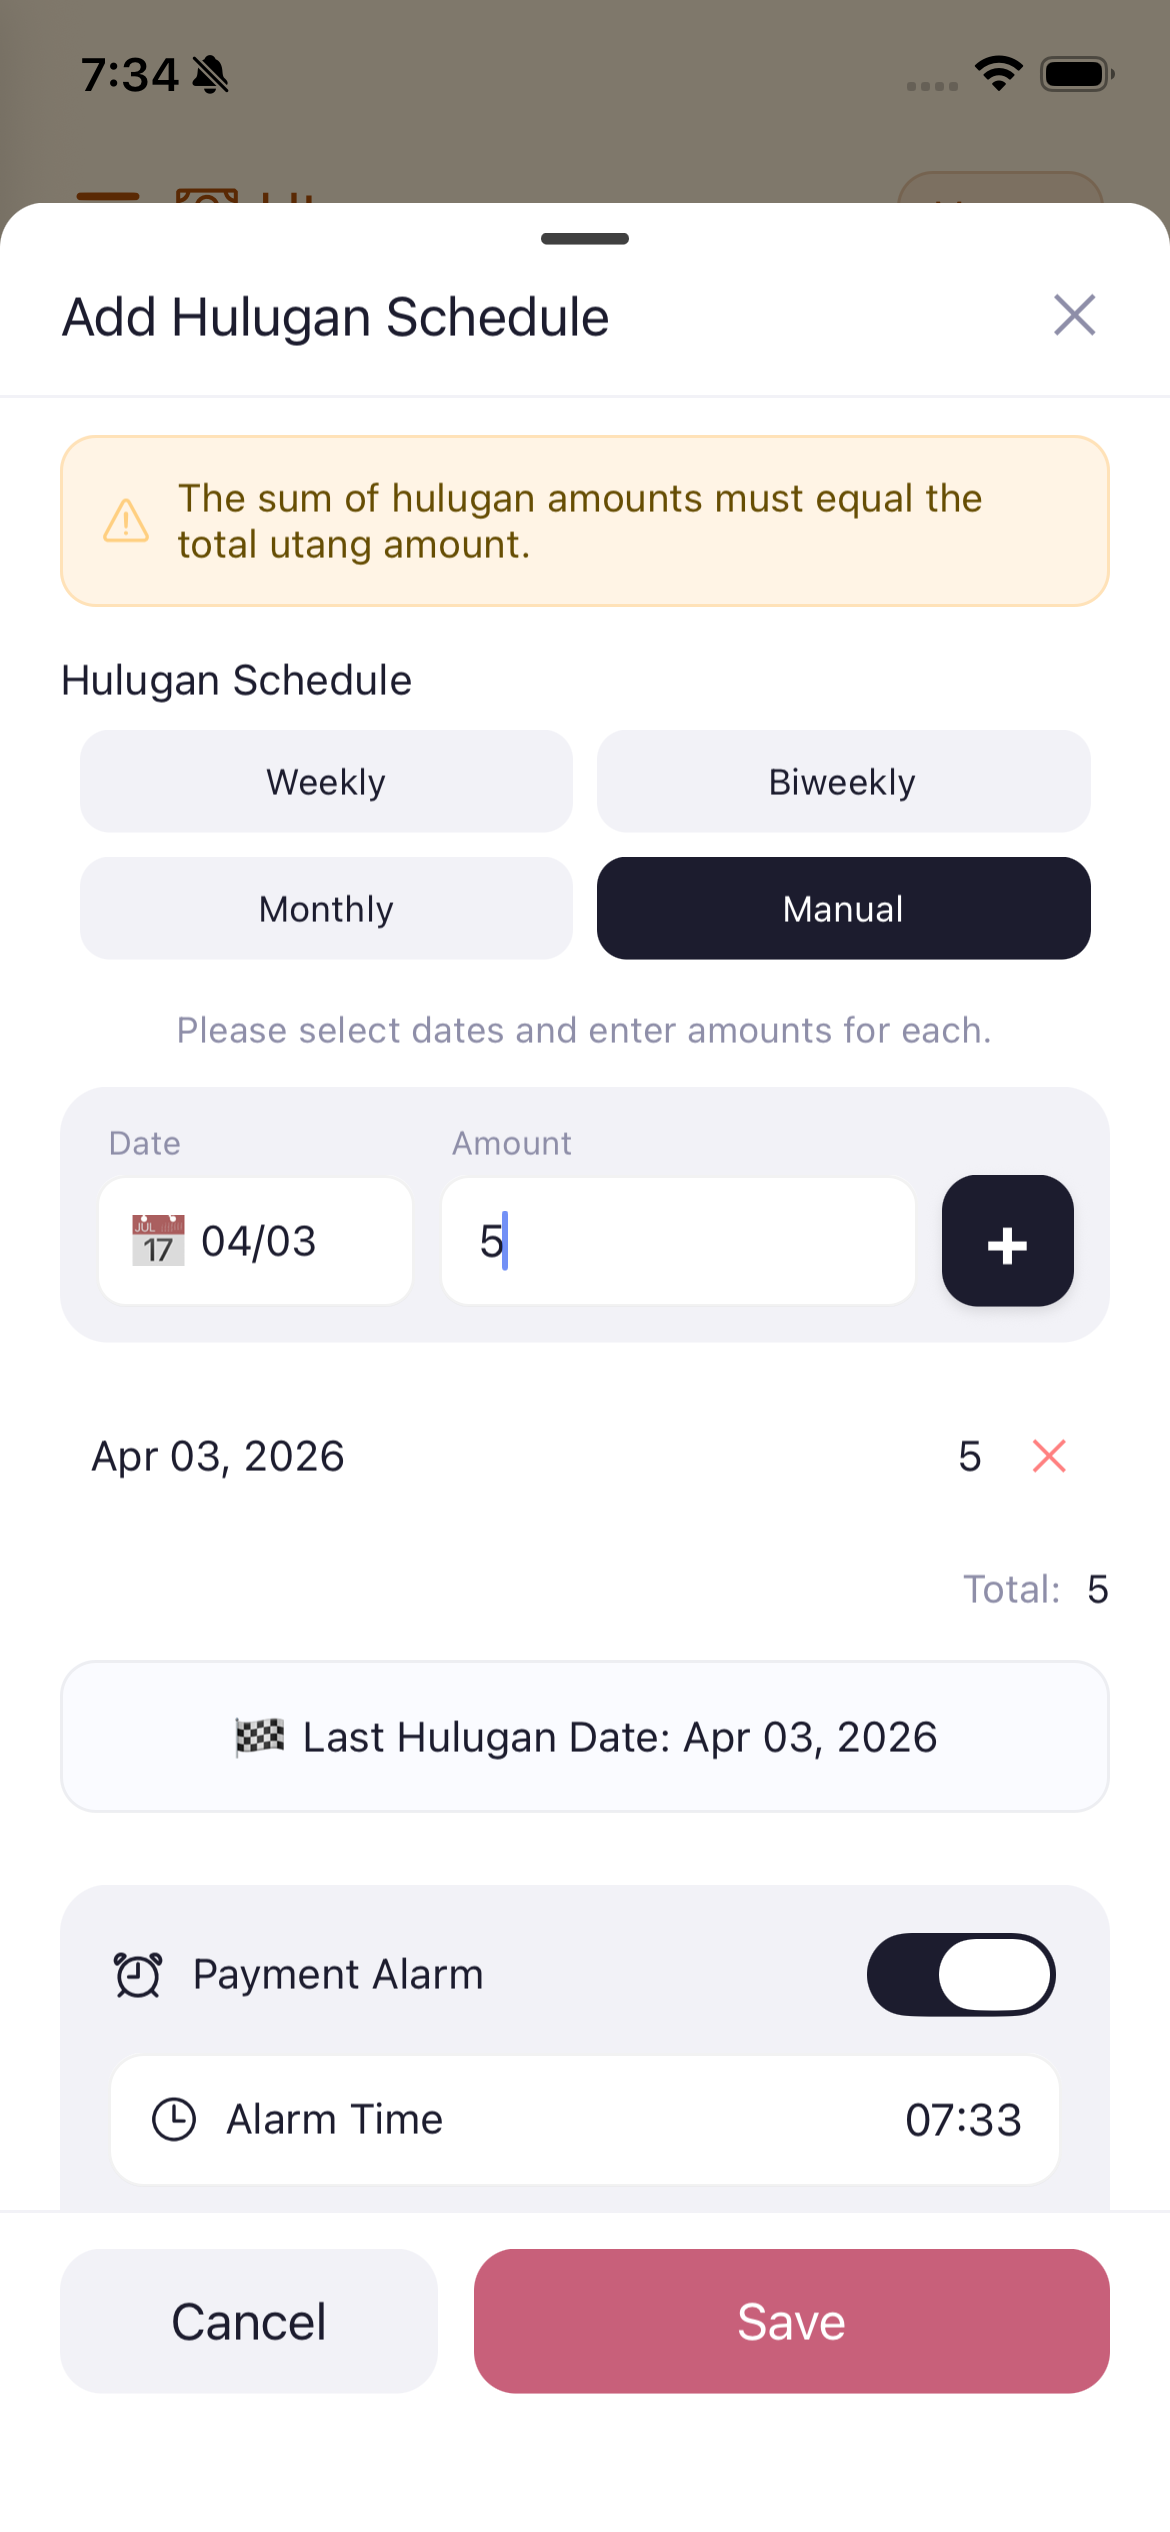
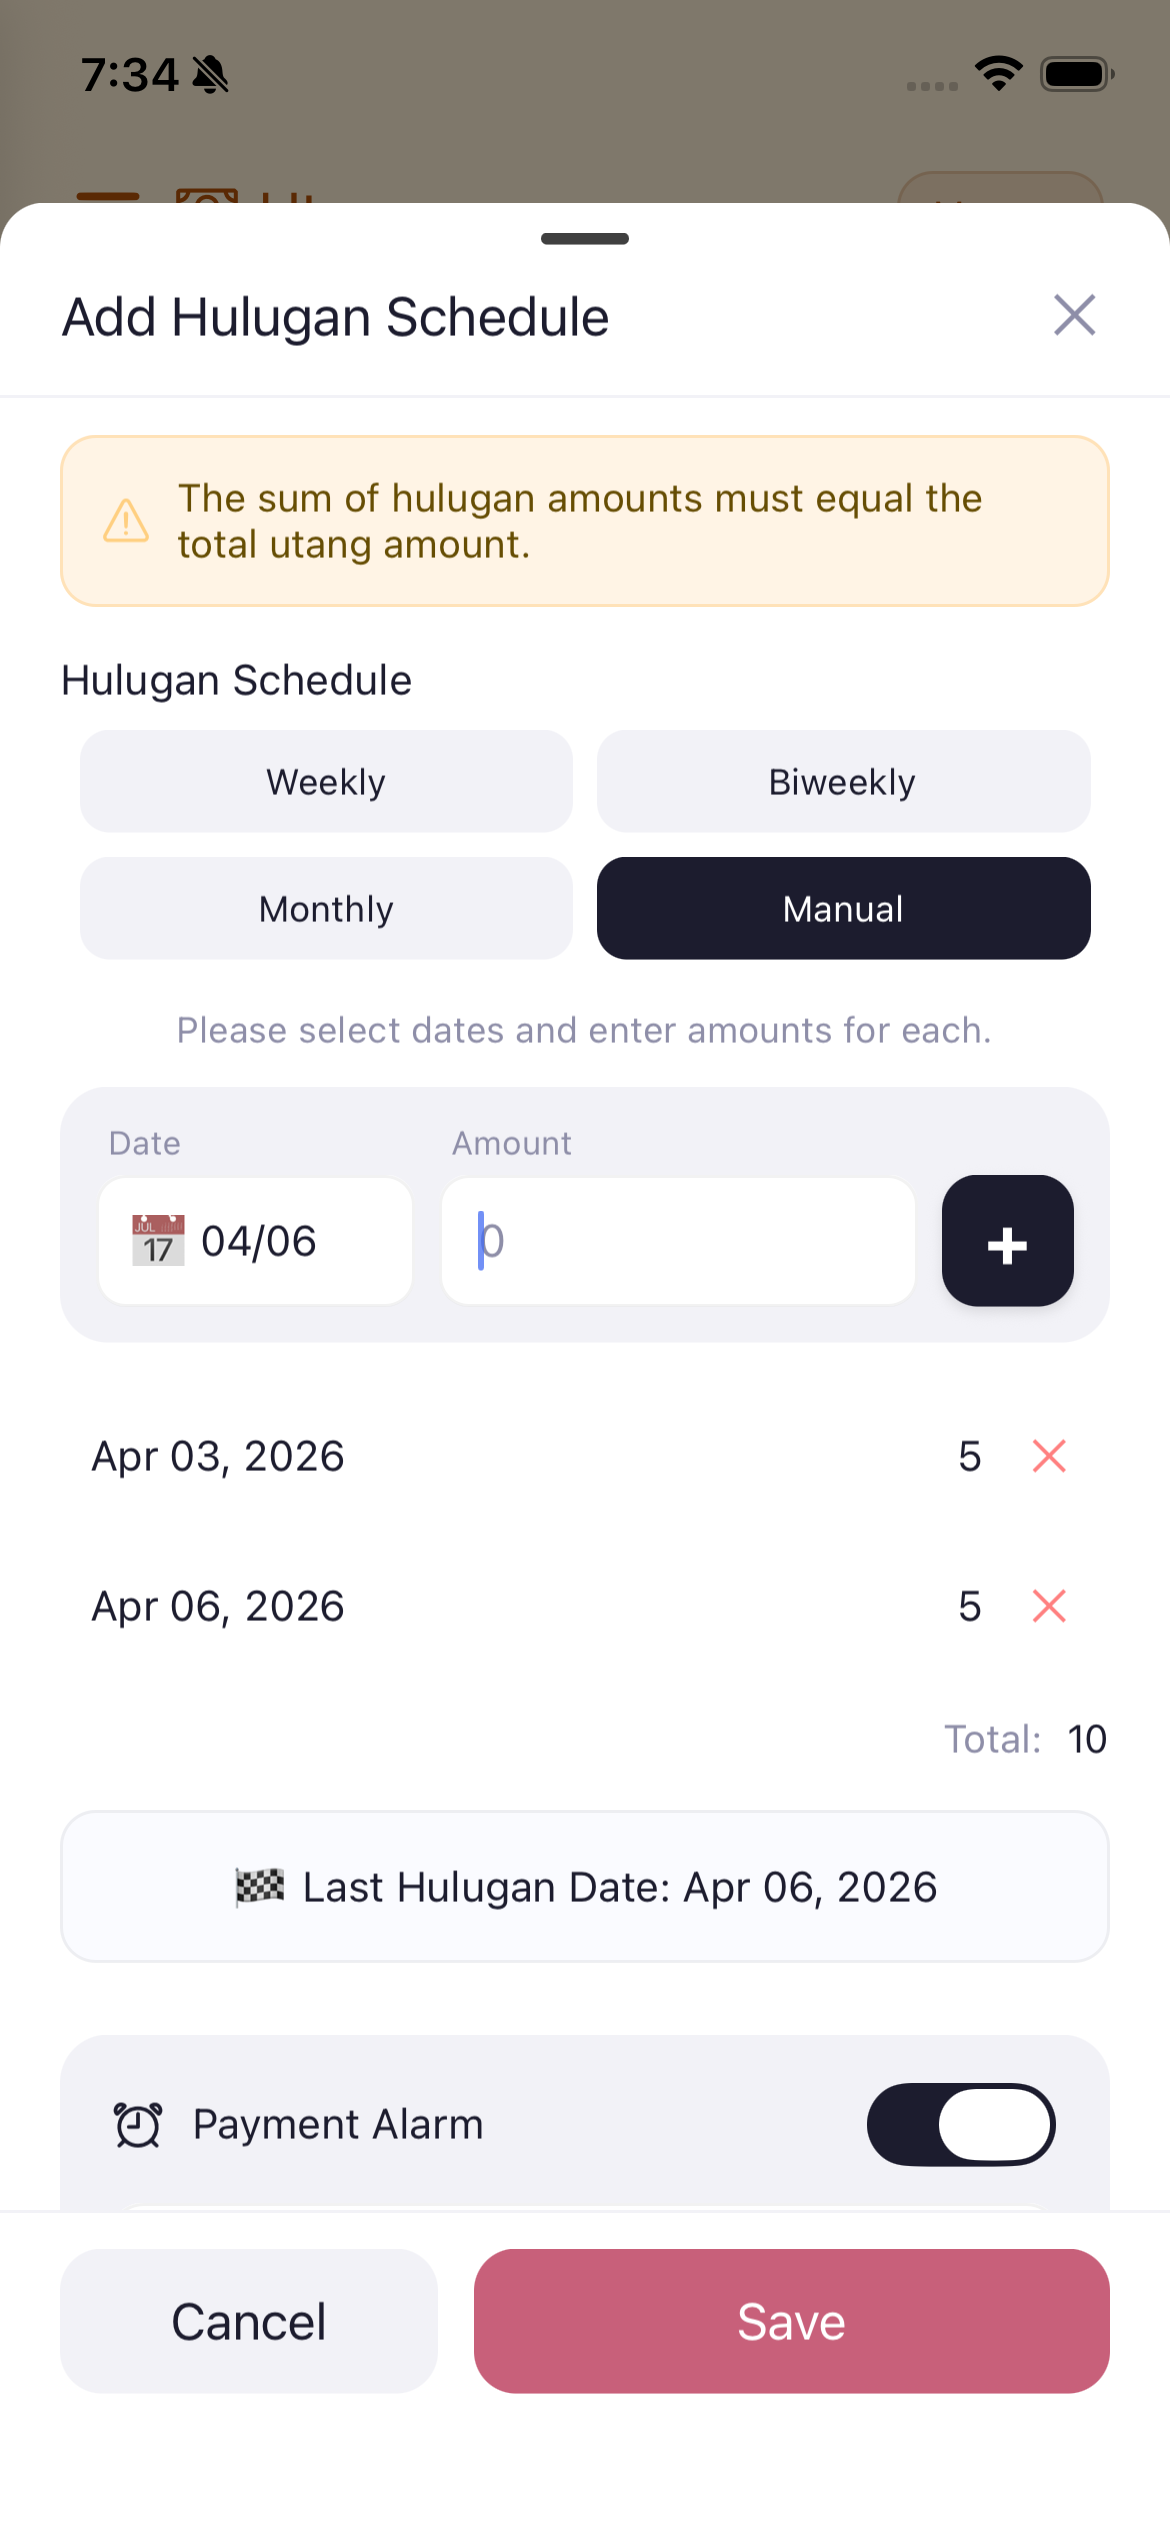
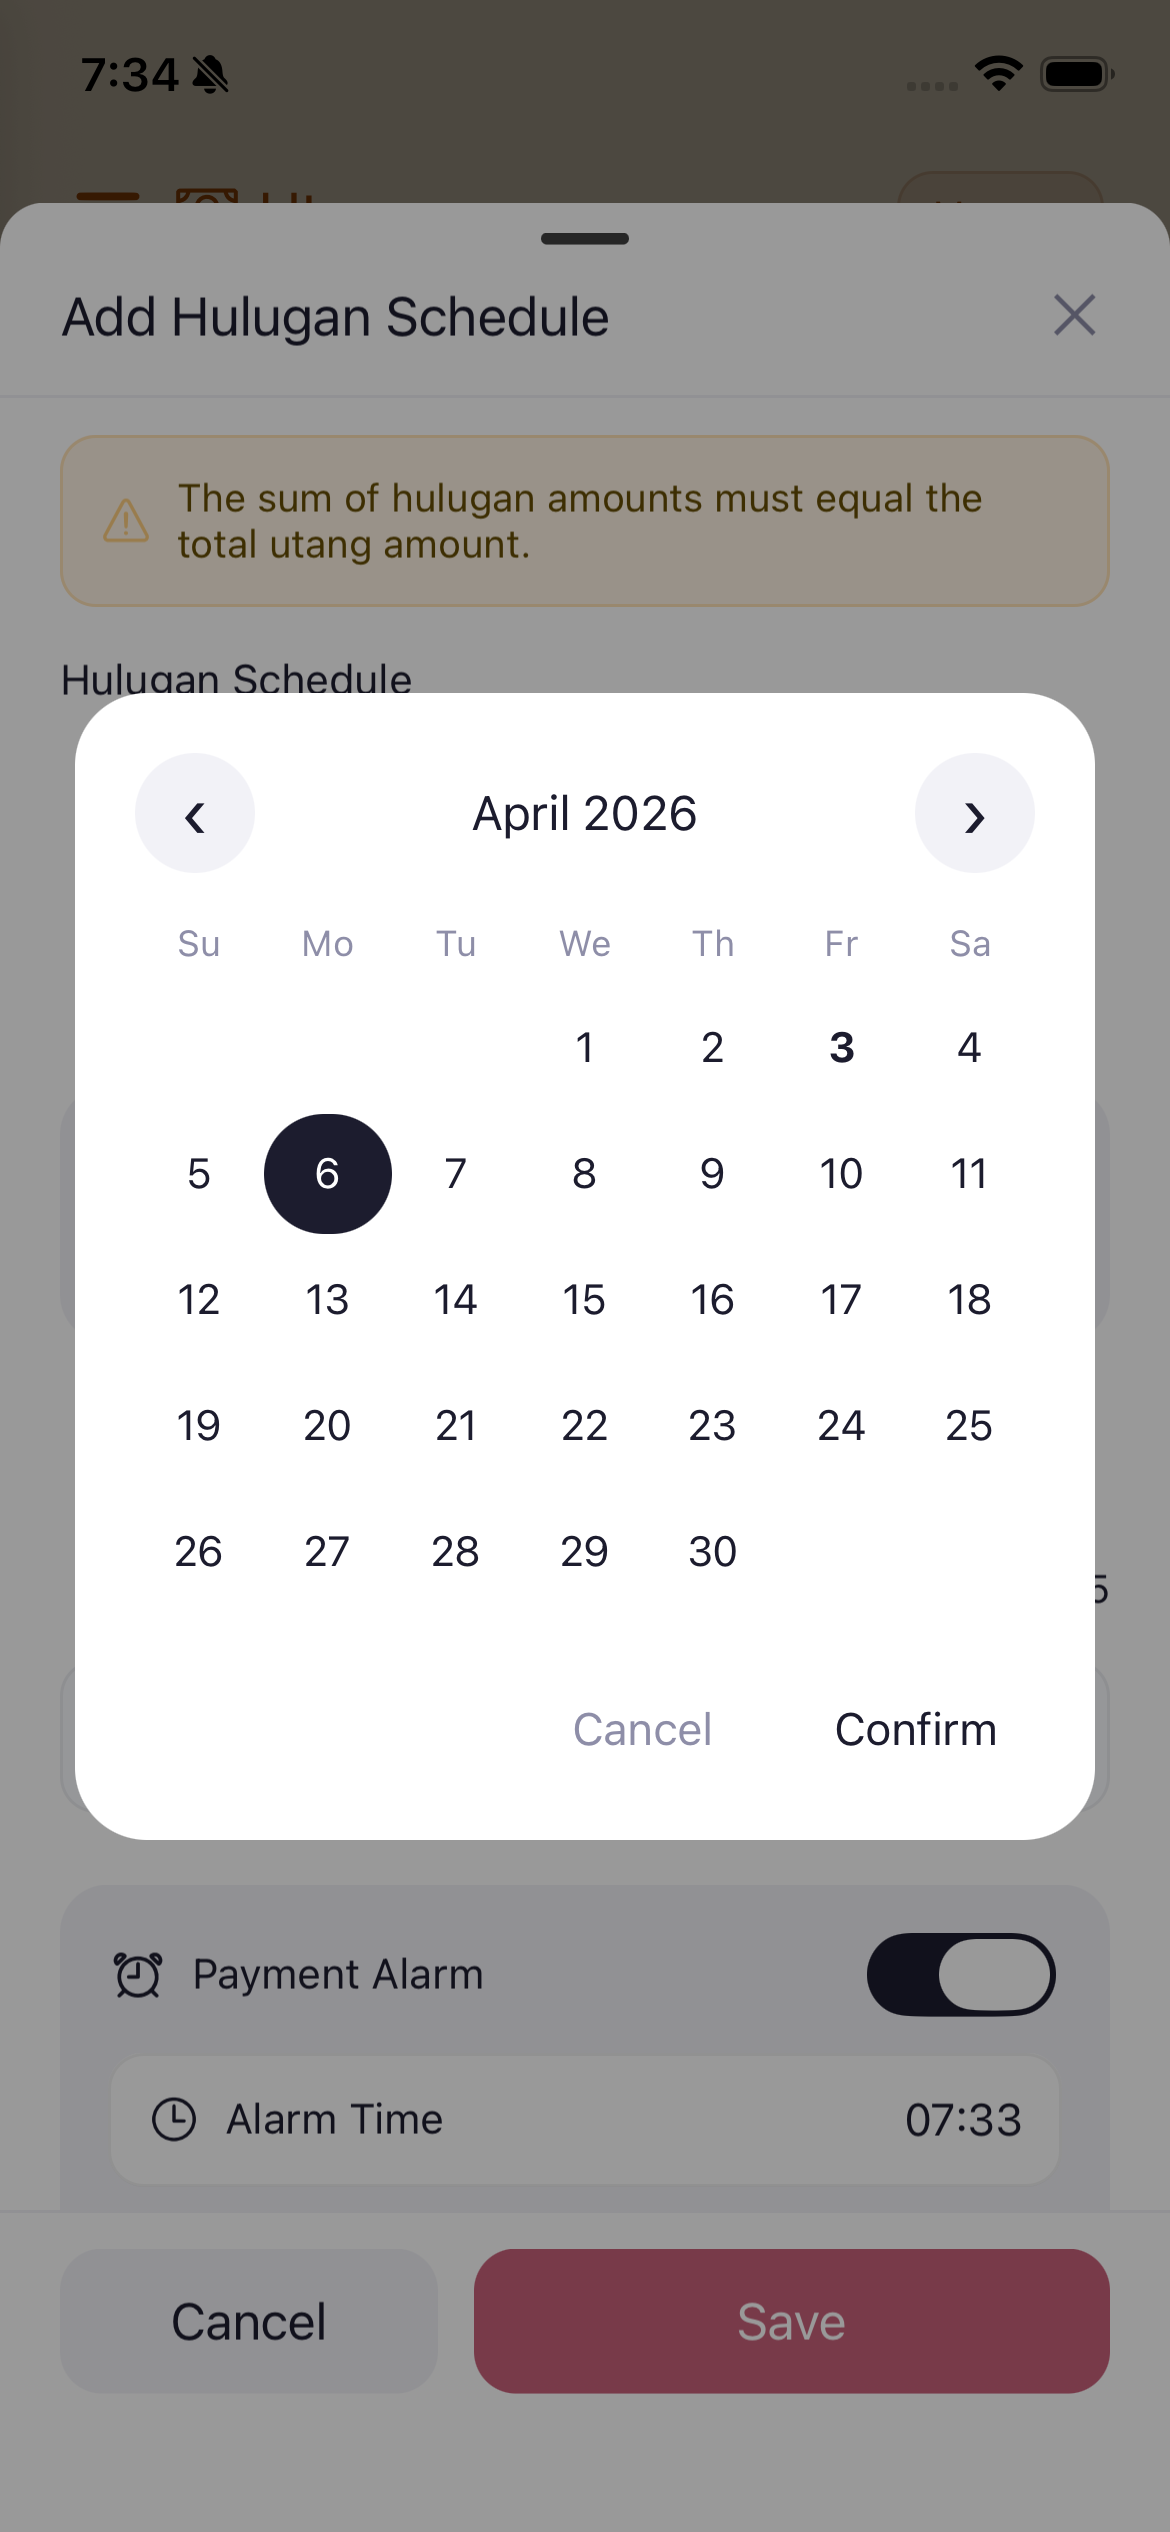
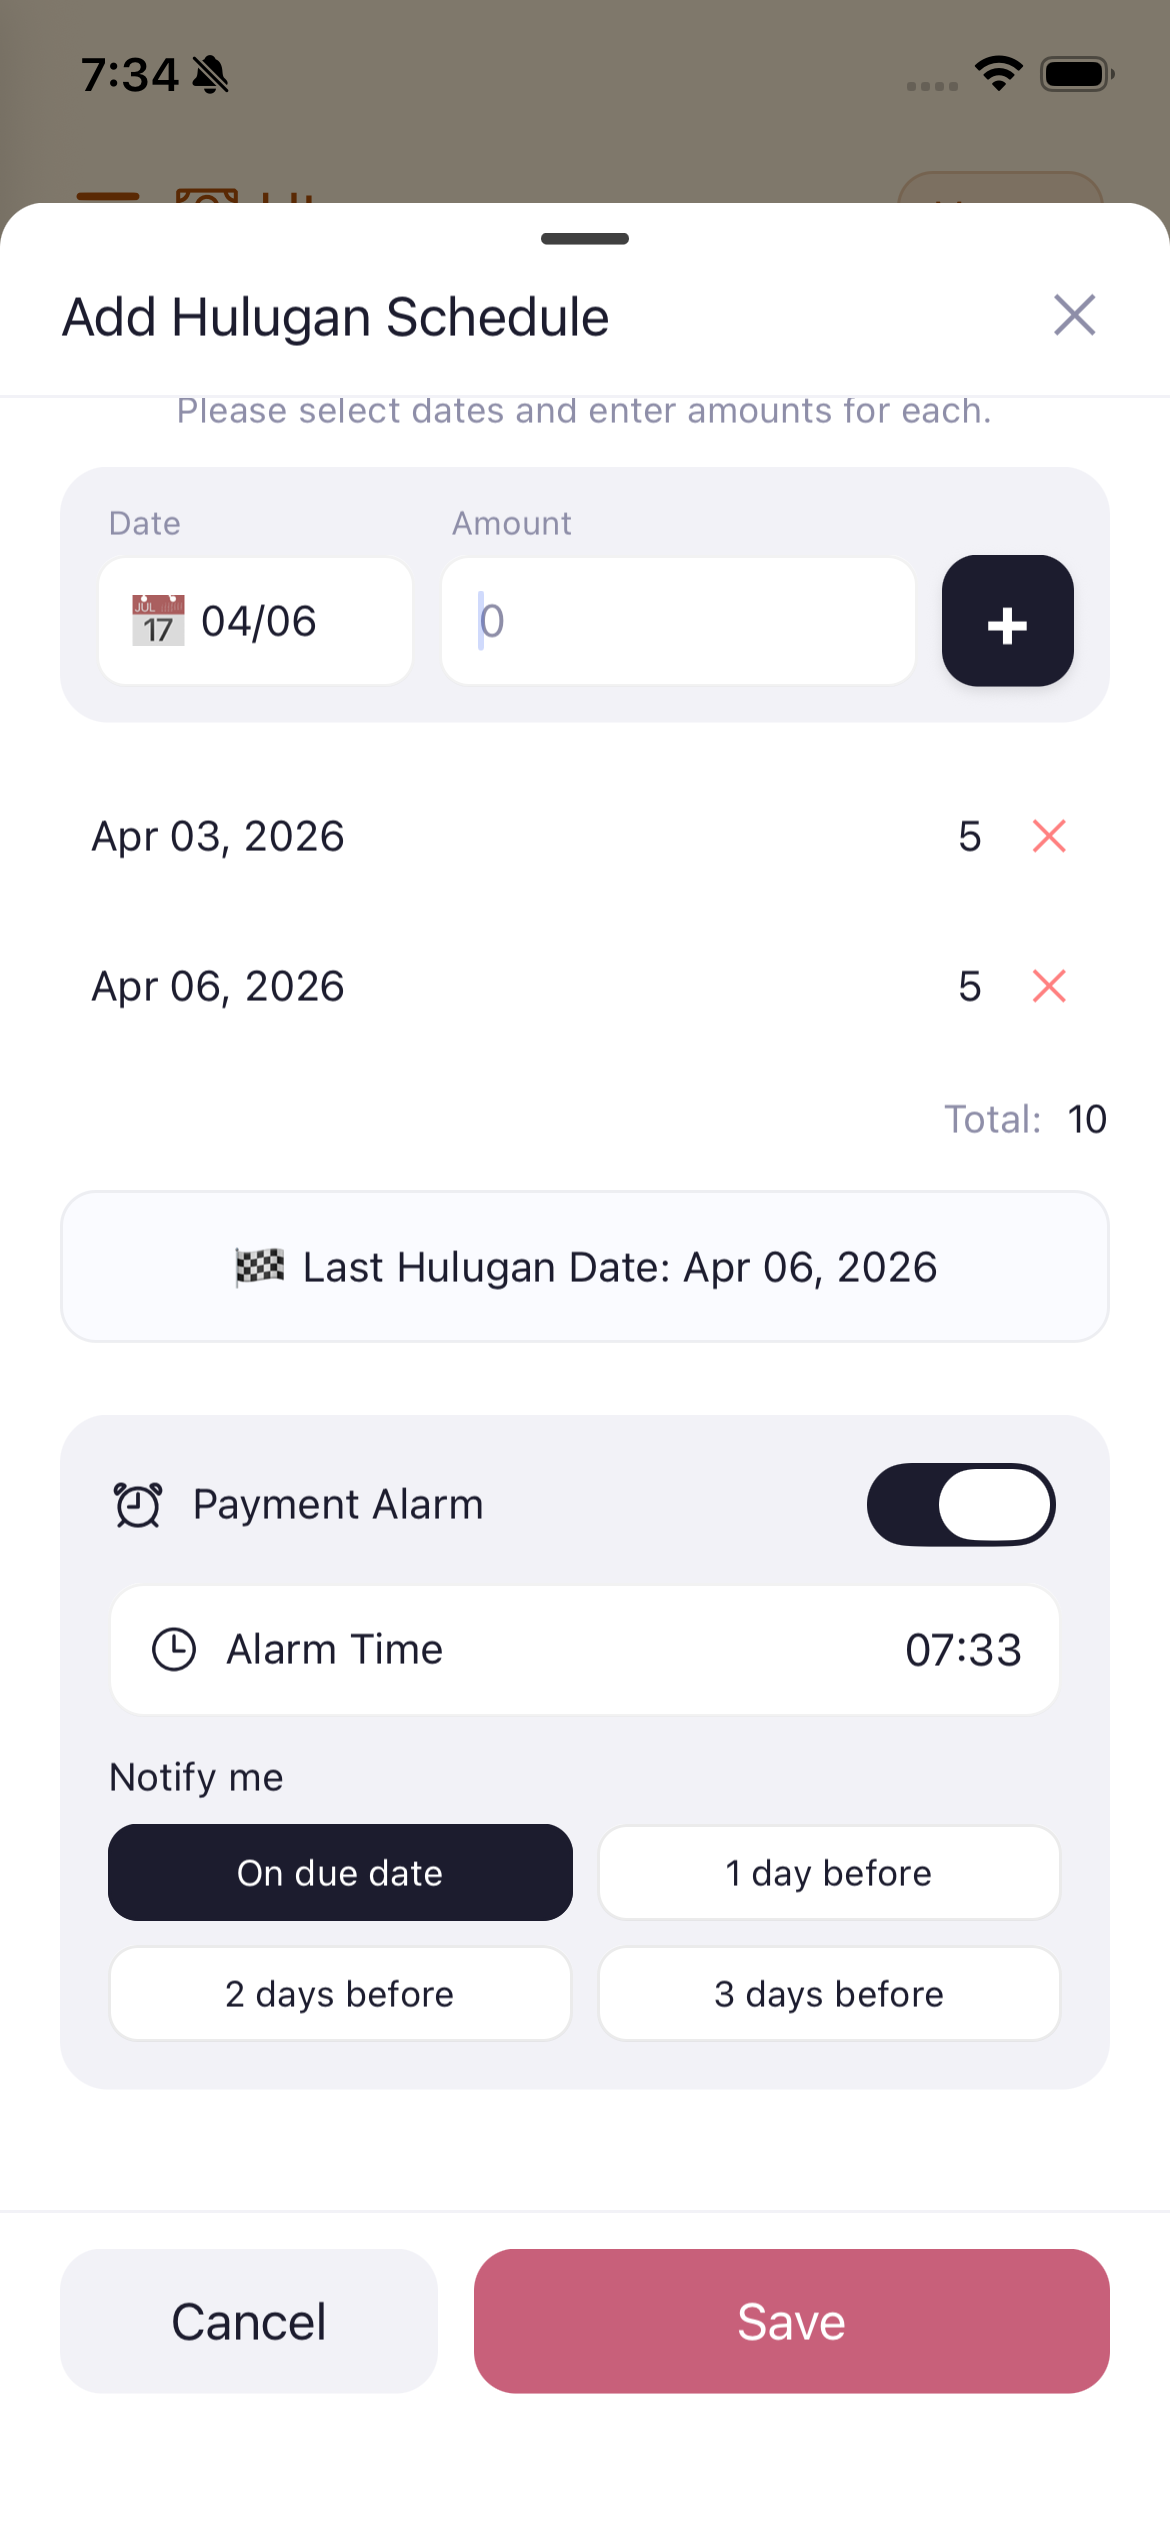
A Hulugan Schedule is a payment plan for paying off your debts in installments. You can set this up for each person/store you owe.
Ang Hulugan Schedule ay isang payment plan para sa pagbabayad ng utang sa installment.
Ang Hulugan Schedule usa ka payment plan para sa pagbayad sa utang sa installment.
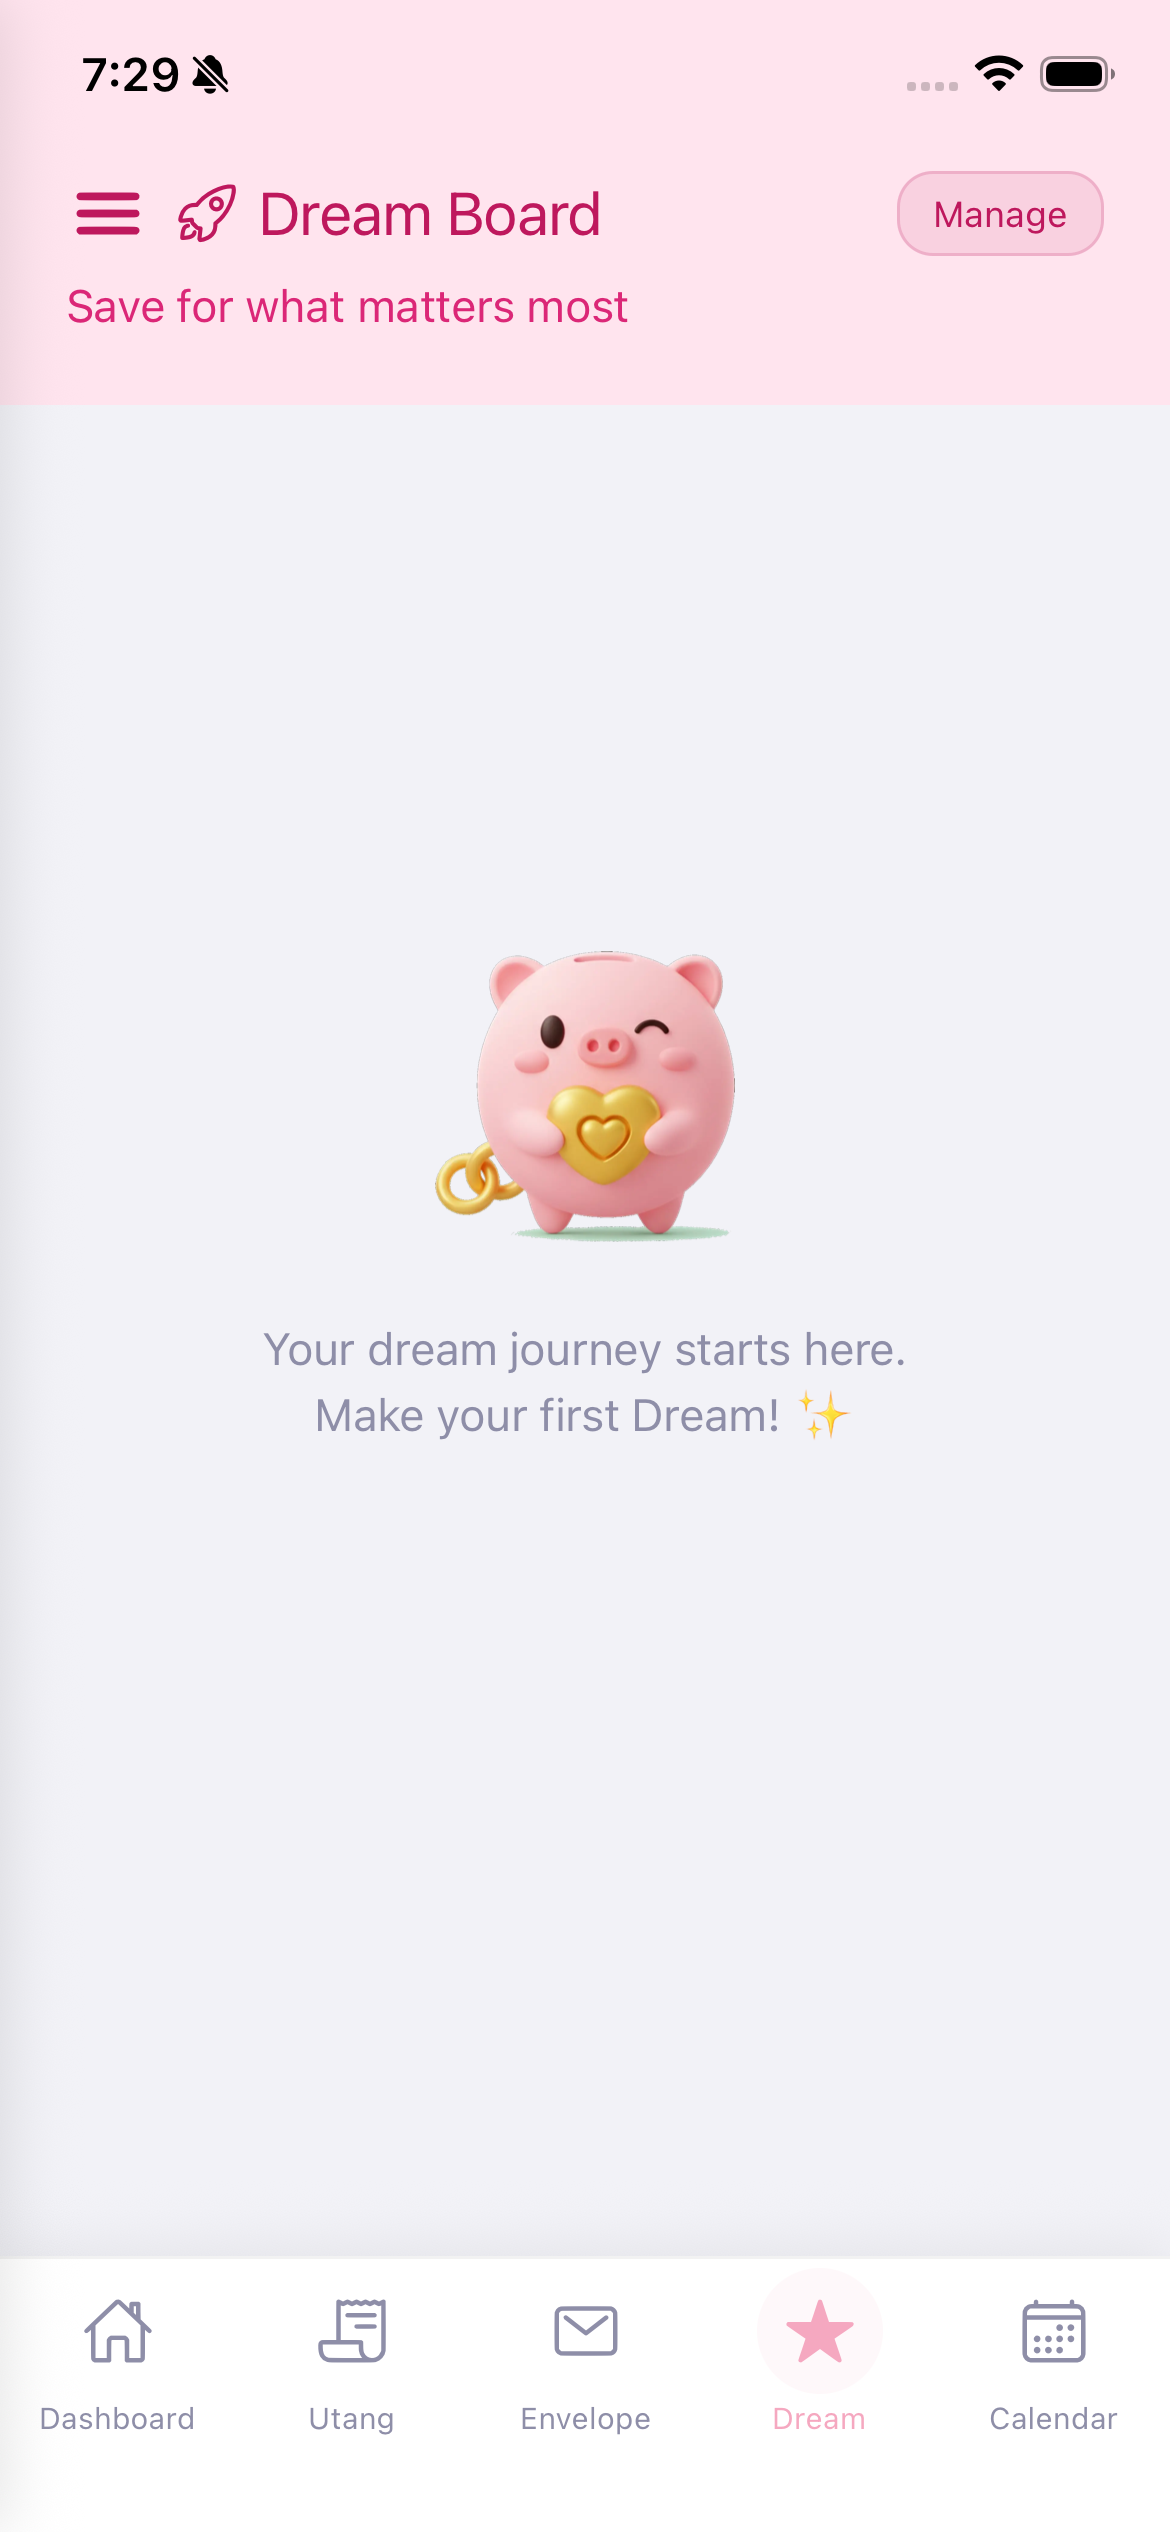
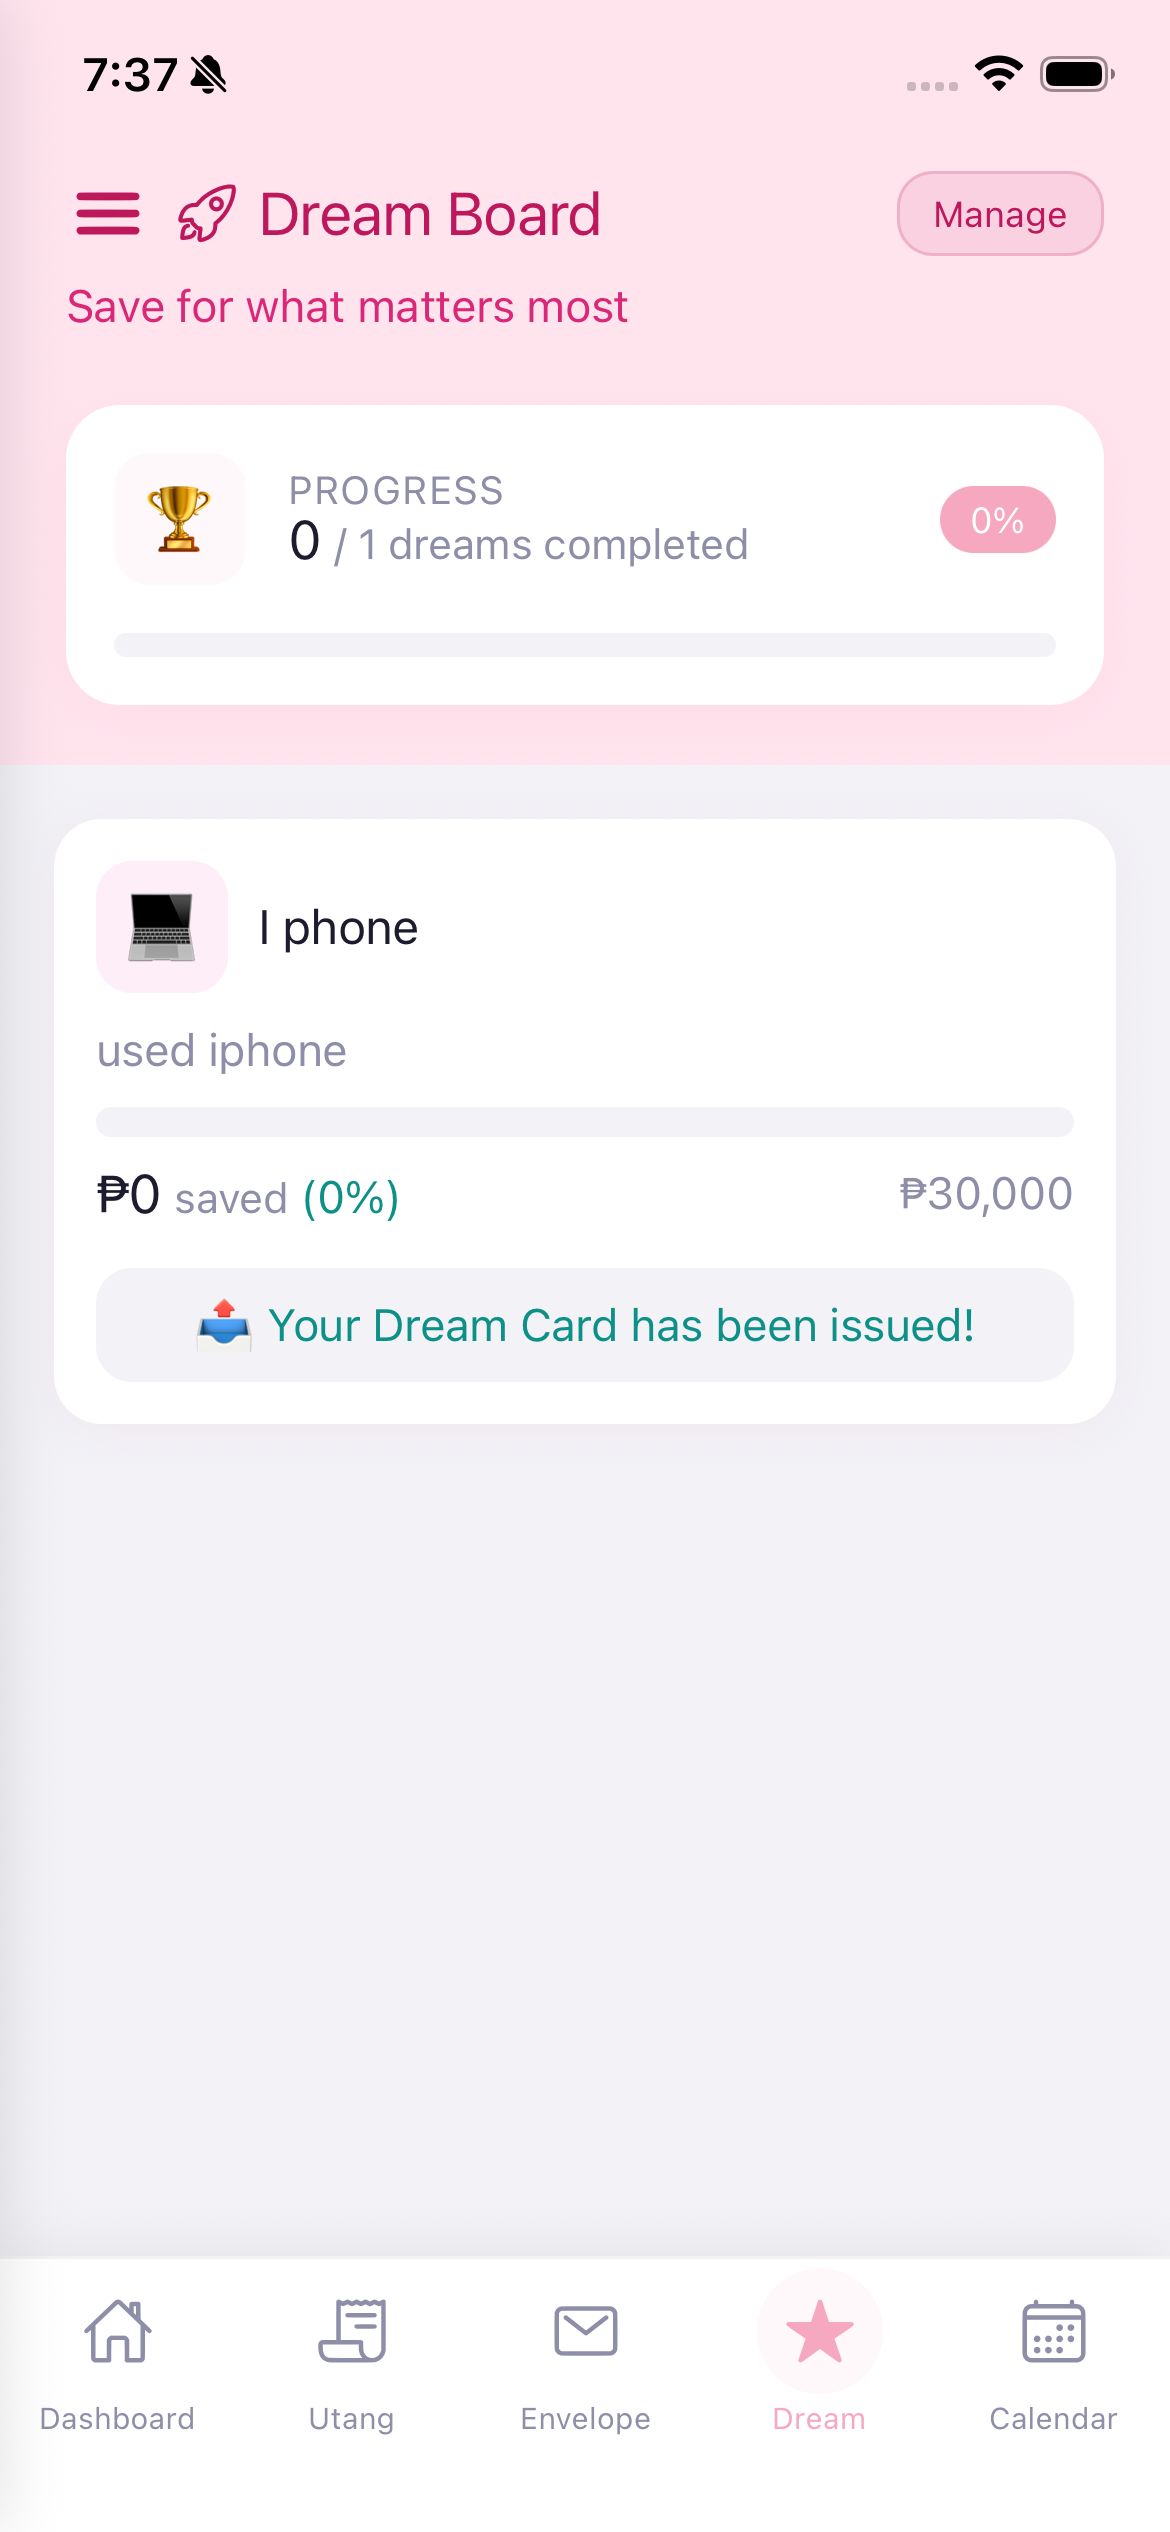

"Save for what matters most" - The Dream Board lets you set savings goals and track your progress toward them.
When empty, Gumi encourages you with "Your dream journey starts here. Make your first Dream!"
"I-save para sa pinaka-mahalaga" - Ang Dream Board ay nagbibigay-daan sa iyo na mag-set ng savings goal at i-track ang iyong progreso.
"I-save para sa pinaka-importante" - Ang Dream Board nagtugot nimo sa pag-set og savings goal.
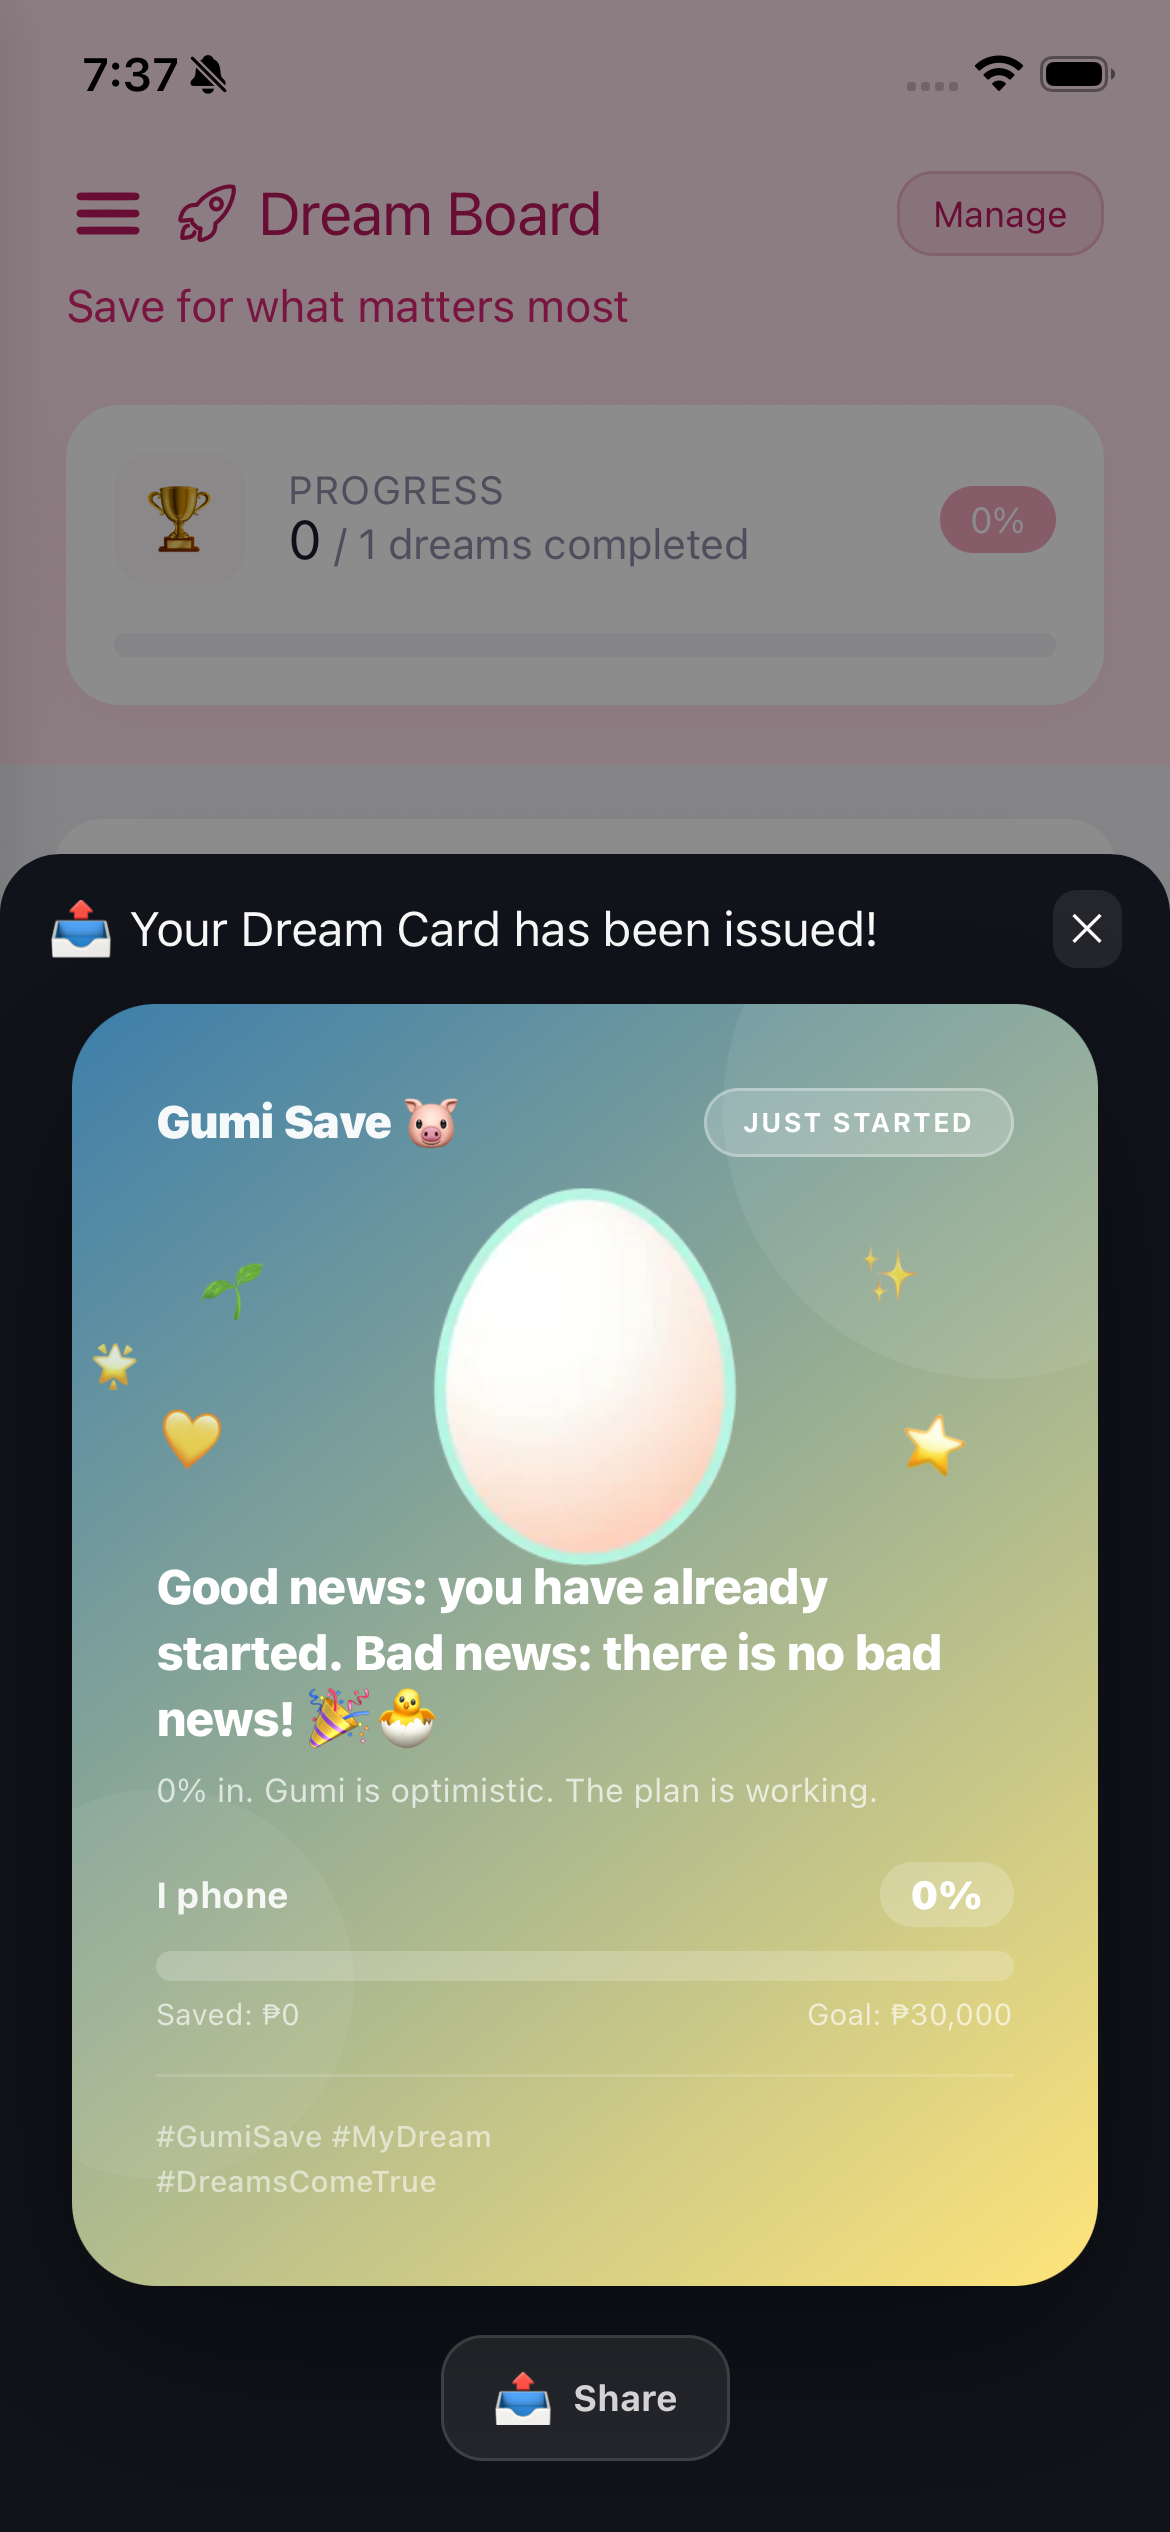
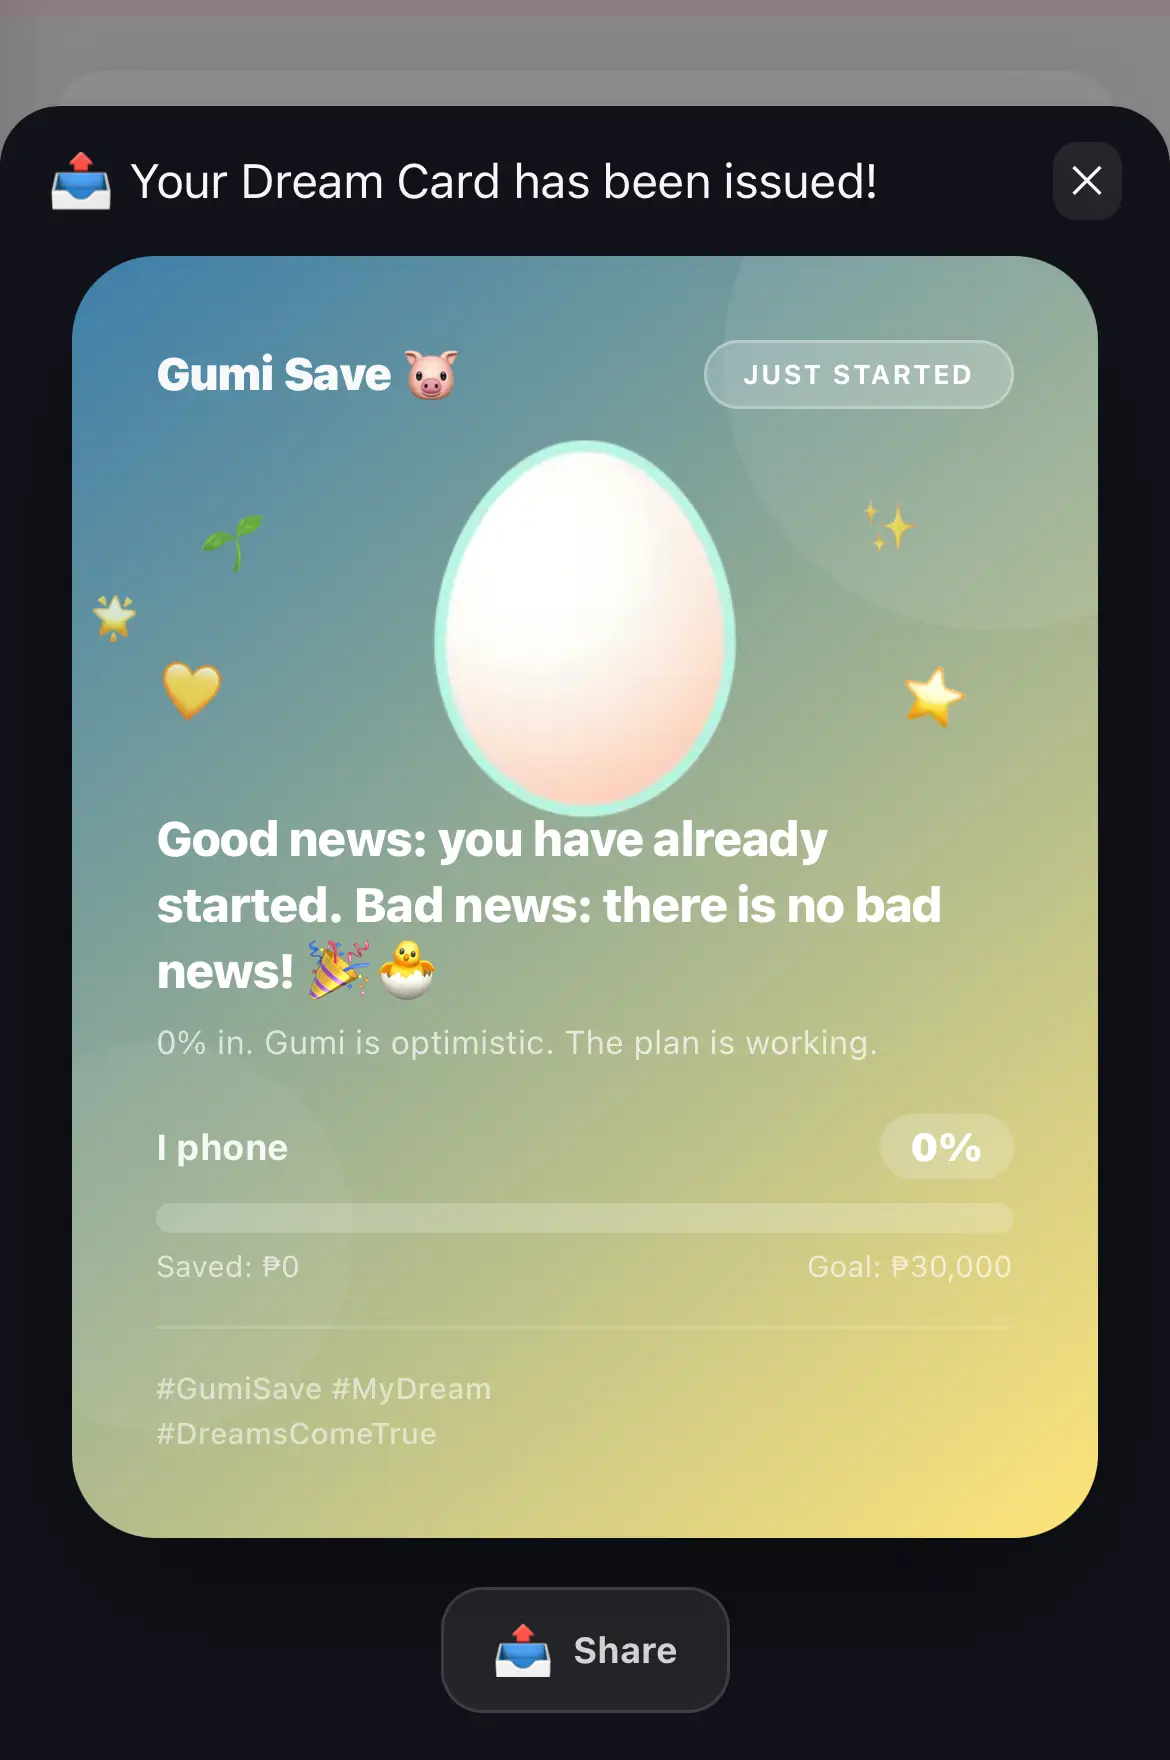
When you create a dream, a beautiful Dream Card is automatically generated. This is a shareable motivational card featuring:
Kapag gumawa ka ng dream, awtomatikong nalilikha ang isang magandang Dream Card. Ito ay isang shareable motivational card.
Kung maghimo ka og dream, awtomatiko nga nahimo ang usa ka nindot nga Dream Card.
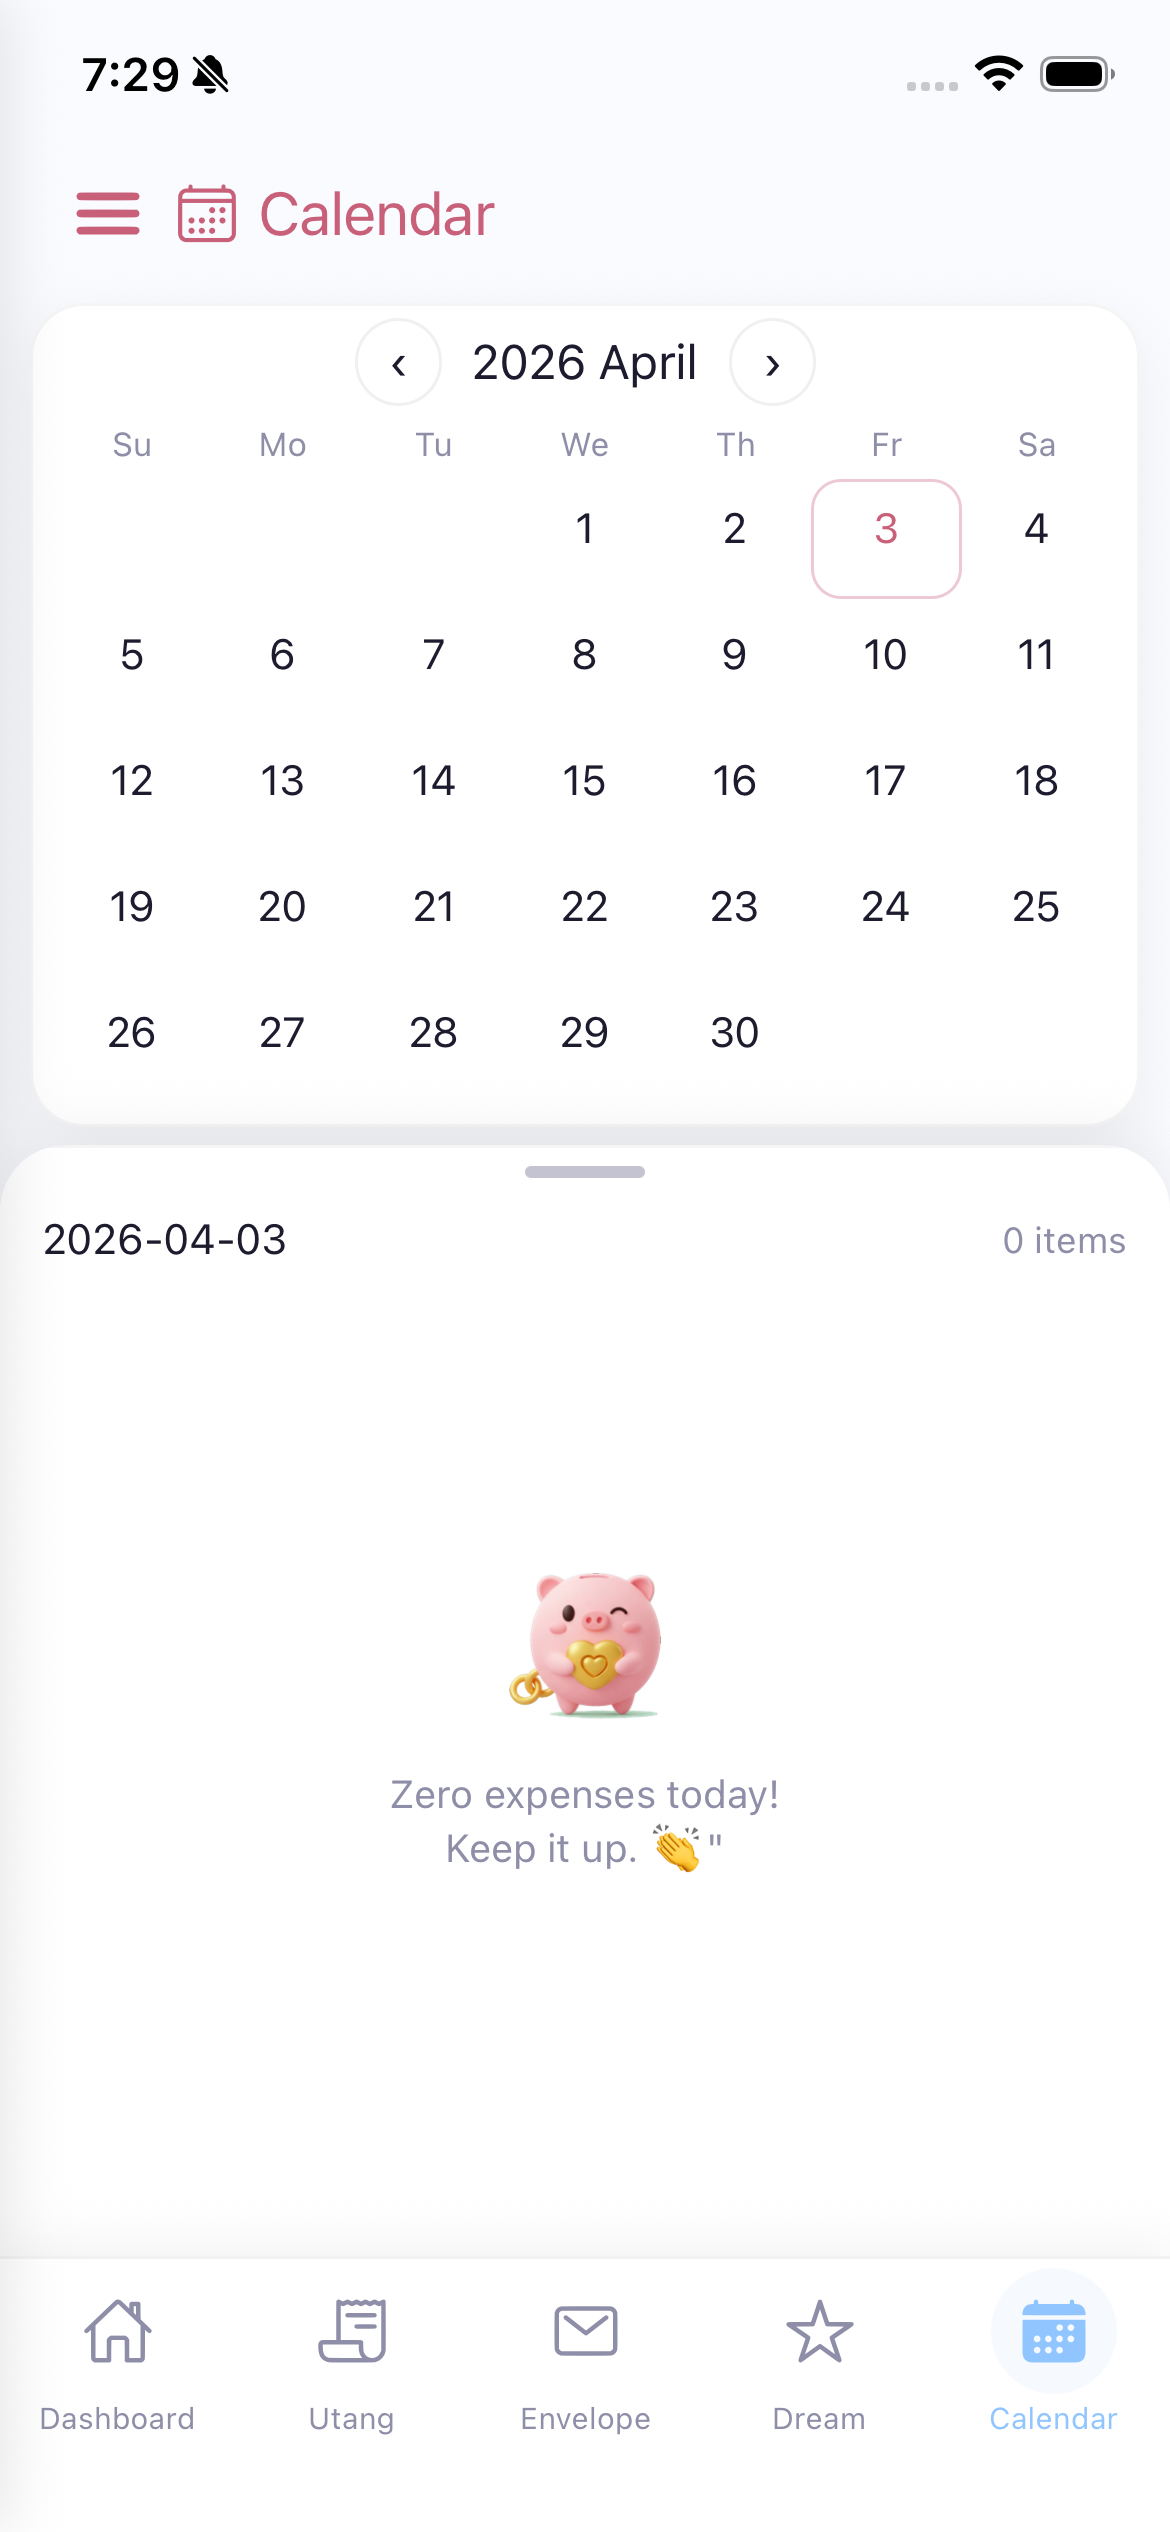
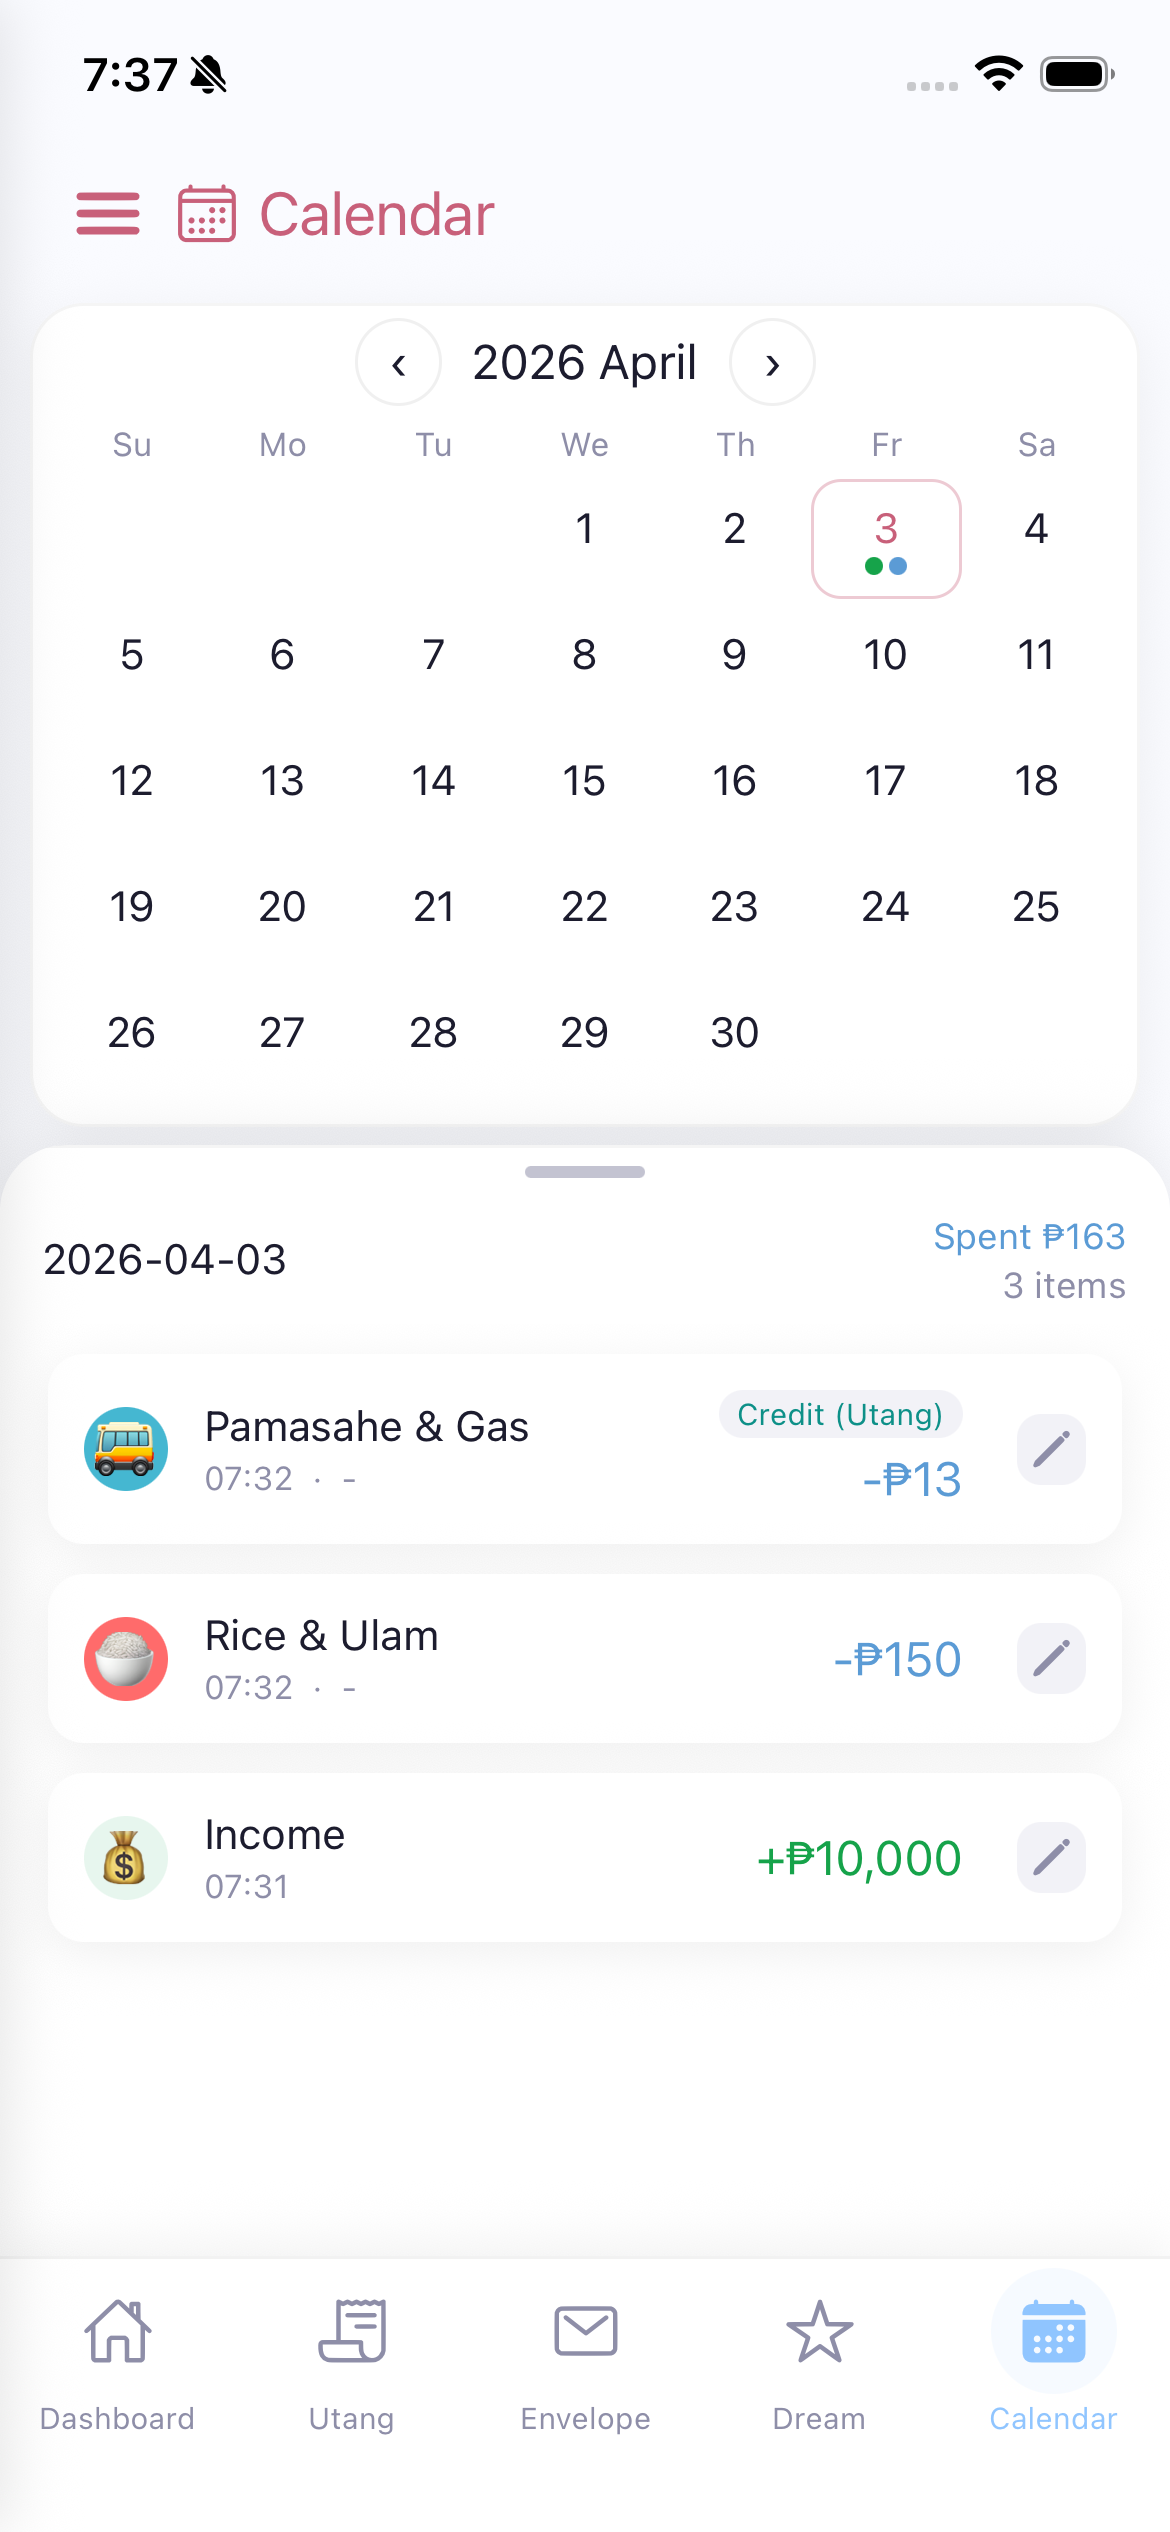
View all your transactions organized by date. The calendar provides a monthly overview of your spending.
When no transactions exist for a date, Gumi says "Zero expenses today! Keep it up."
Tingnan ang lahat ng iyong transaksyon na nakaayos ayon sa petsa.
Tan-awa ang tanan nimong transaksyon nga na-organisa pinaagi sa petsa.
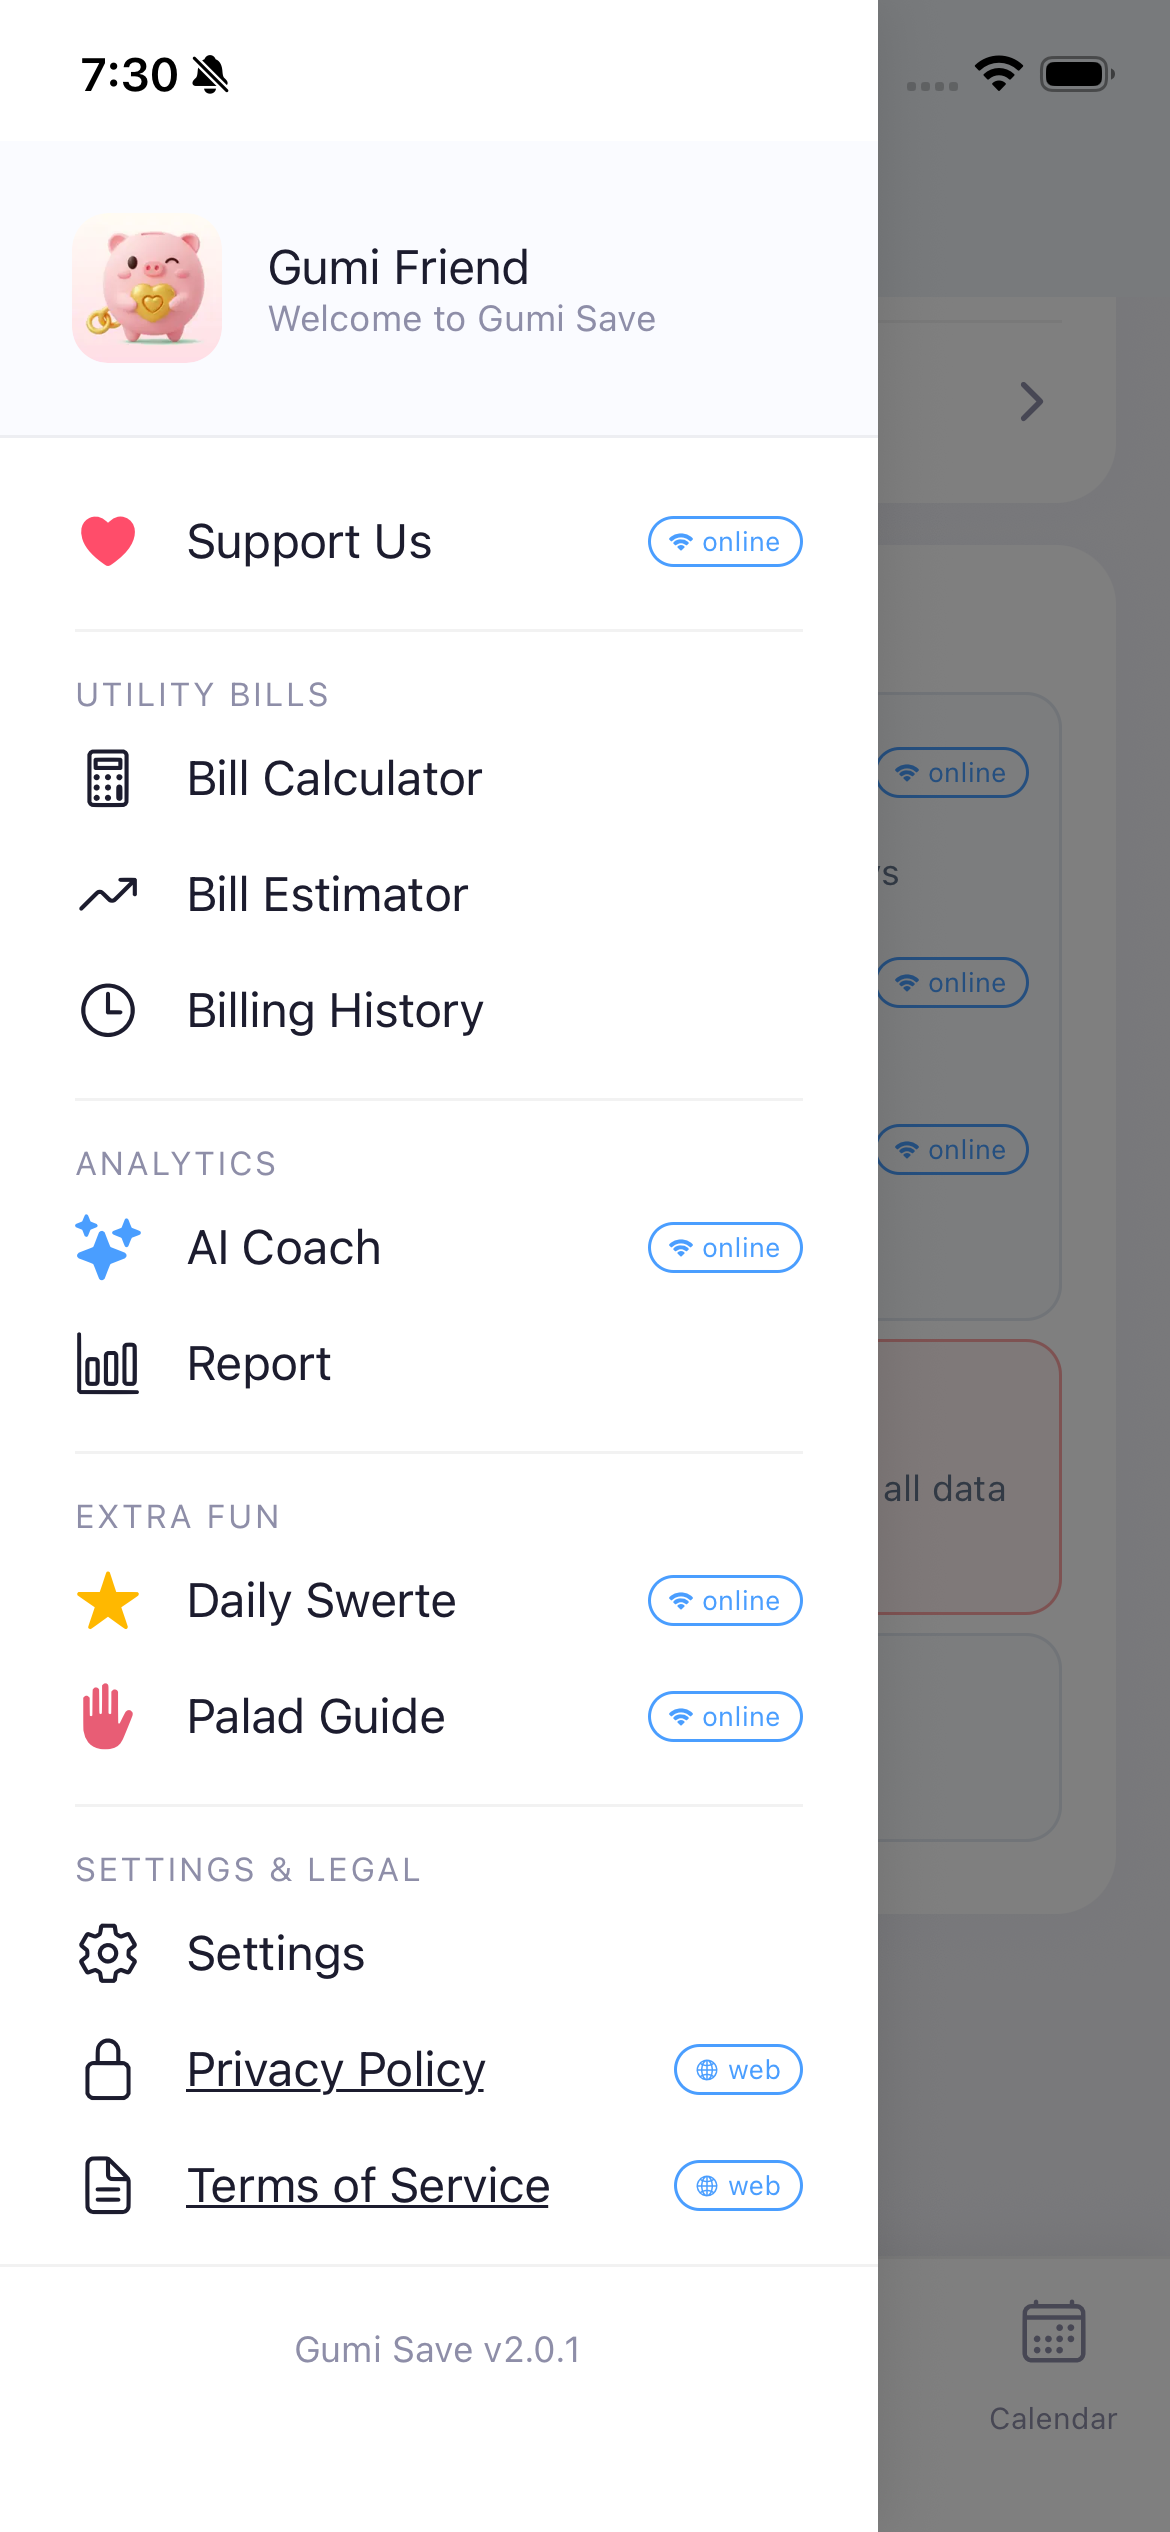
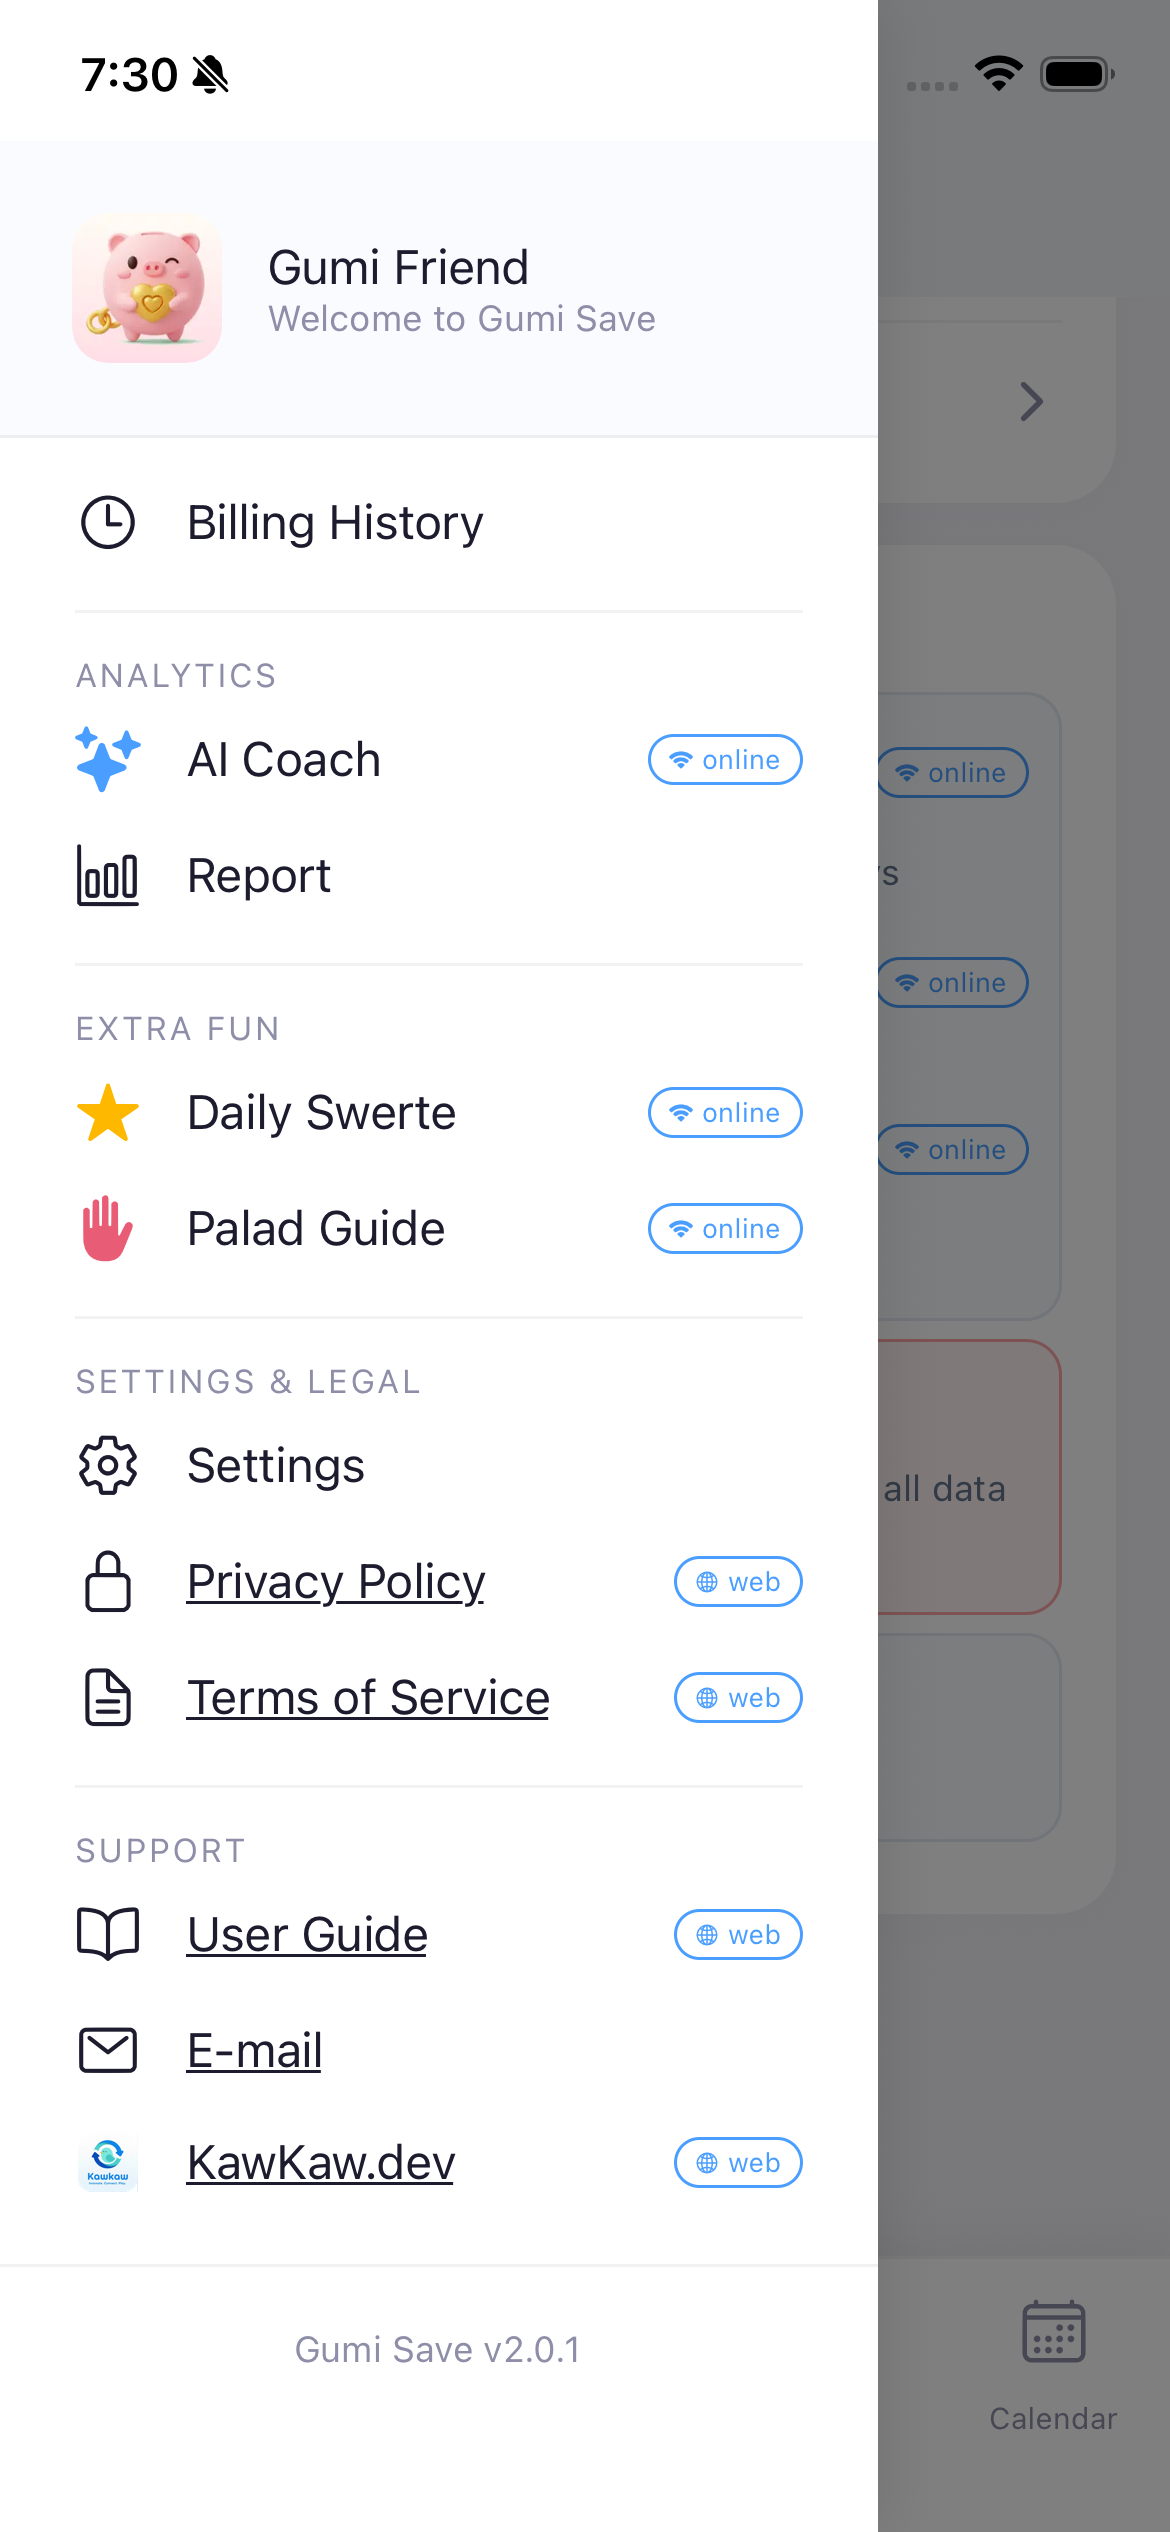
Access by tapping the three-line icon (hamburger menu) at the top-left of any screen.
UTILITY BILLS
ANALYTICS
EXTRA FUN
SETTINGS & LEGAL
SUPPORT
At the bottom: "Gumi Save v2.0.1" - current app version.
I-access sa pamamagitan ng pag-tap sa three-line icon sa itaas-kaliwa.
Kasama ang: Utility Bills (Rate Info, Calculator, Estimator, History), Analytics (AI Coach, Report), Extra Fun (Daily Swerte, Palad Guide), Settings, Privacy Policy, Terms of Service, User Guide, E-mail, Facebook Club, at KawKaw.dev.
I-access pinaagi sa pag-tap sa three-line icon sa ibabaw-wala.
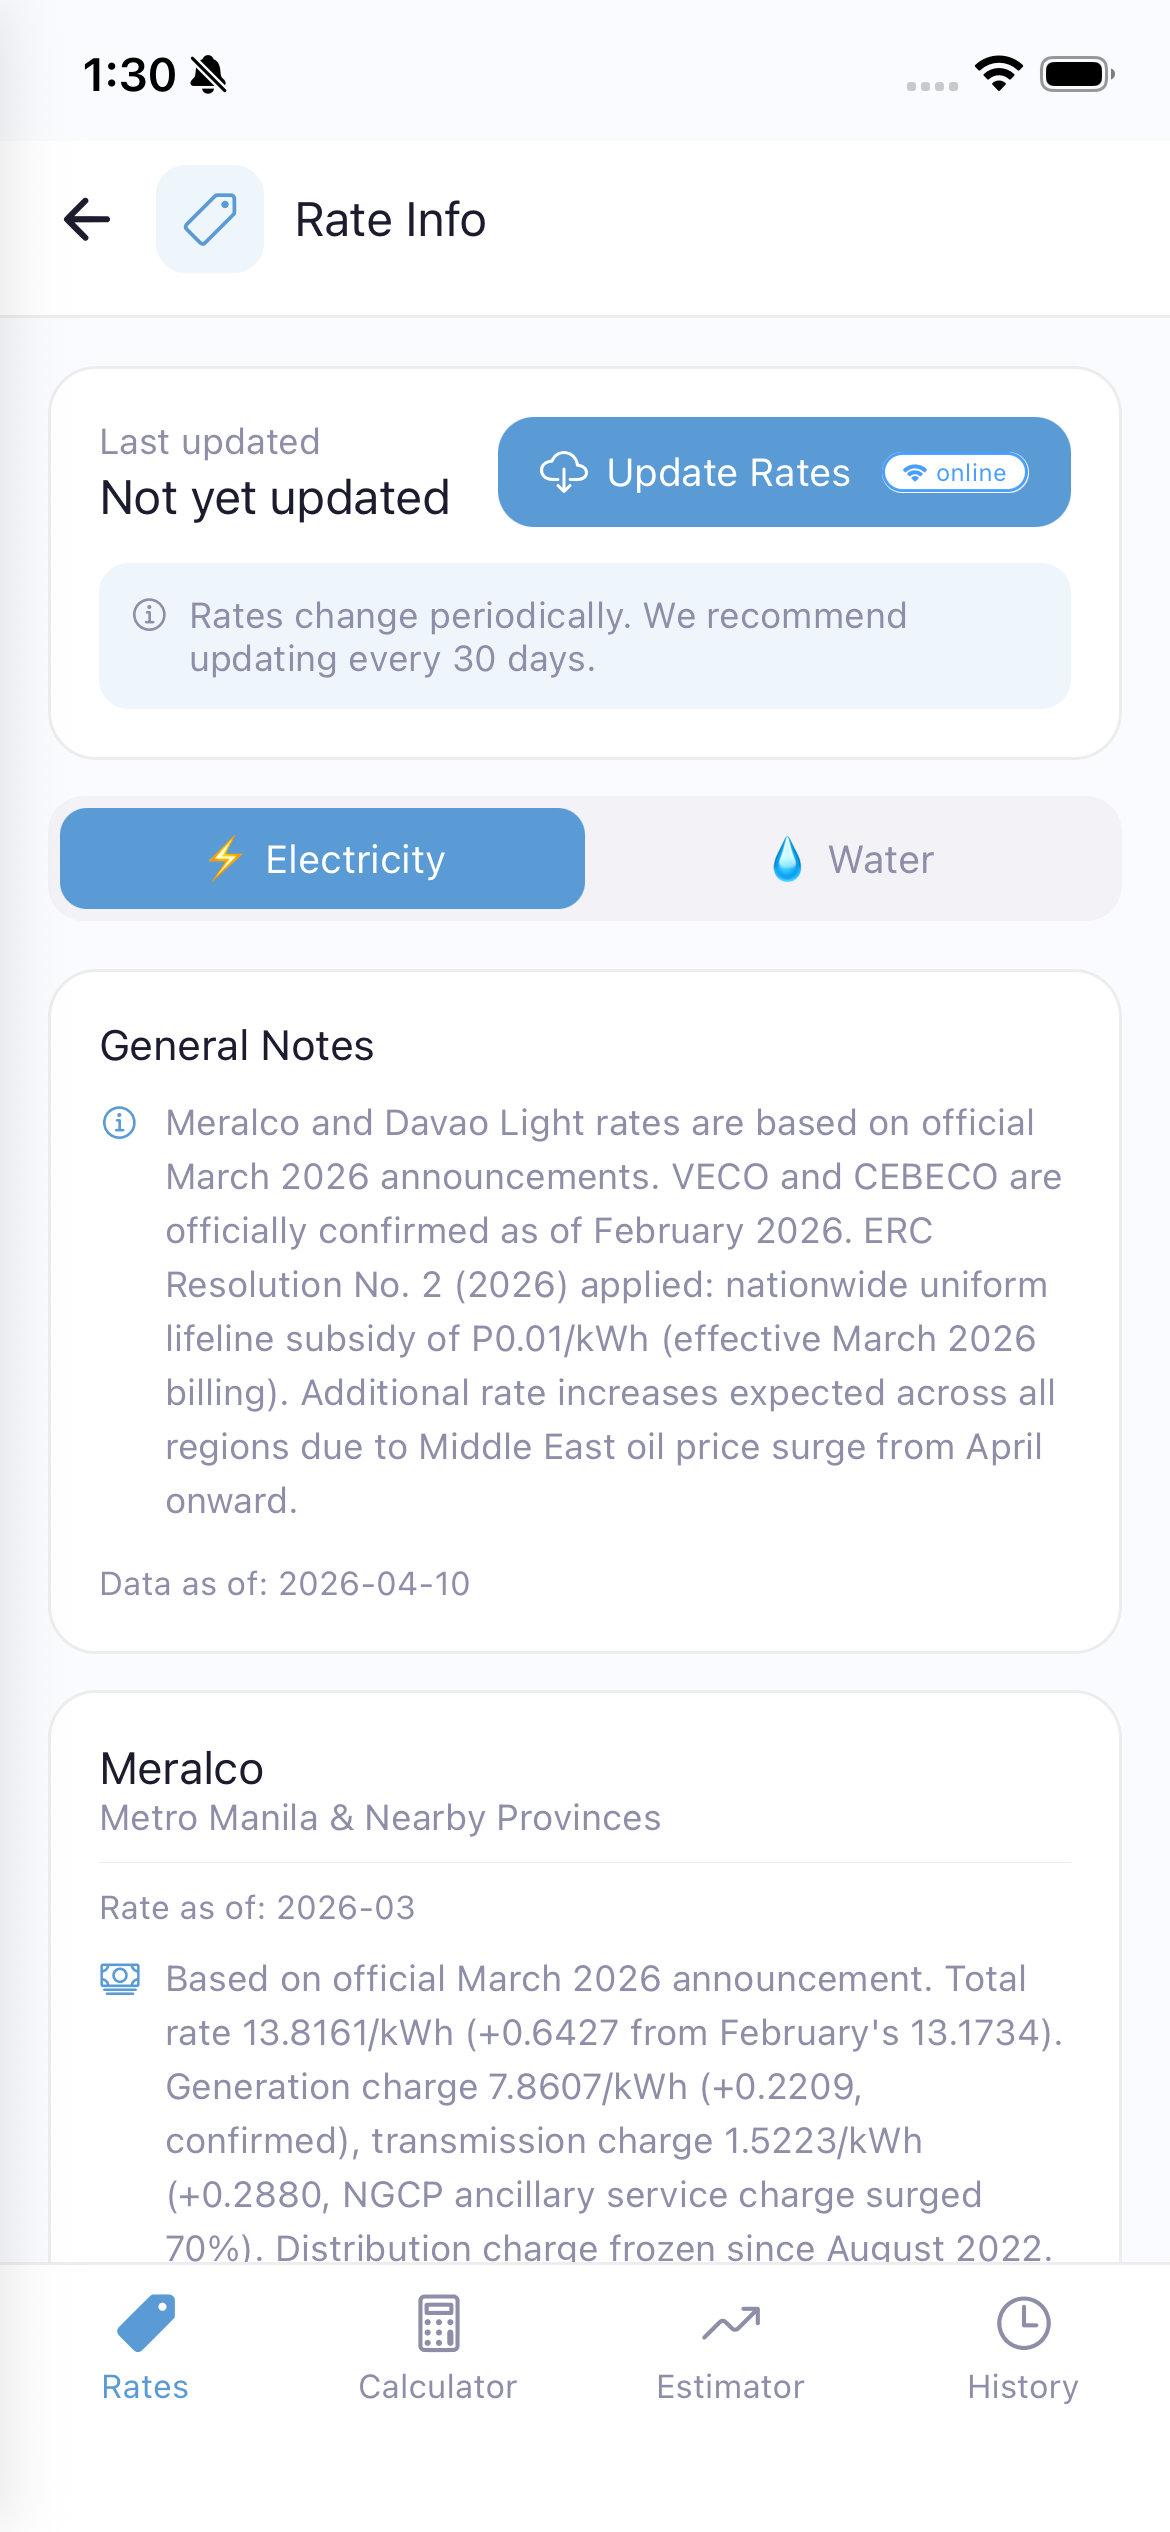
View and update utility rate data used for bill calculations. Rate data is stored locally and can be refreshed from the server without updating the app.
Note: If you never tap "Update Rates", the app uses built-in default rates. After updating, the latest rates are cached locally and used for all calculations — even offline.
Tingnan at i-update ang rate data ng utility na ginagamit sa pagkalkula ng bill. Naka-store ang rate data sa lokal at maaaring i-refresh mula sa server nang hindi ina-update ang app.
Tan-awa ug i-update ang rate data sa utility nga gigamit sa pagkalkula sa bill. Naka-store ang rate data sa lokal ug mahimong i-refresh gikan sa server nga dili mag-update sa app.
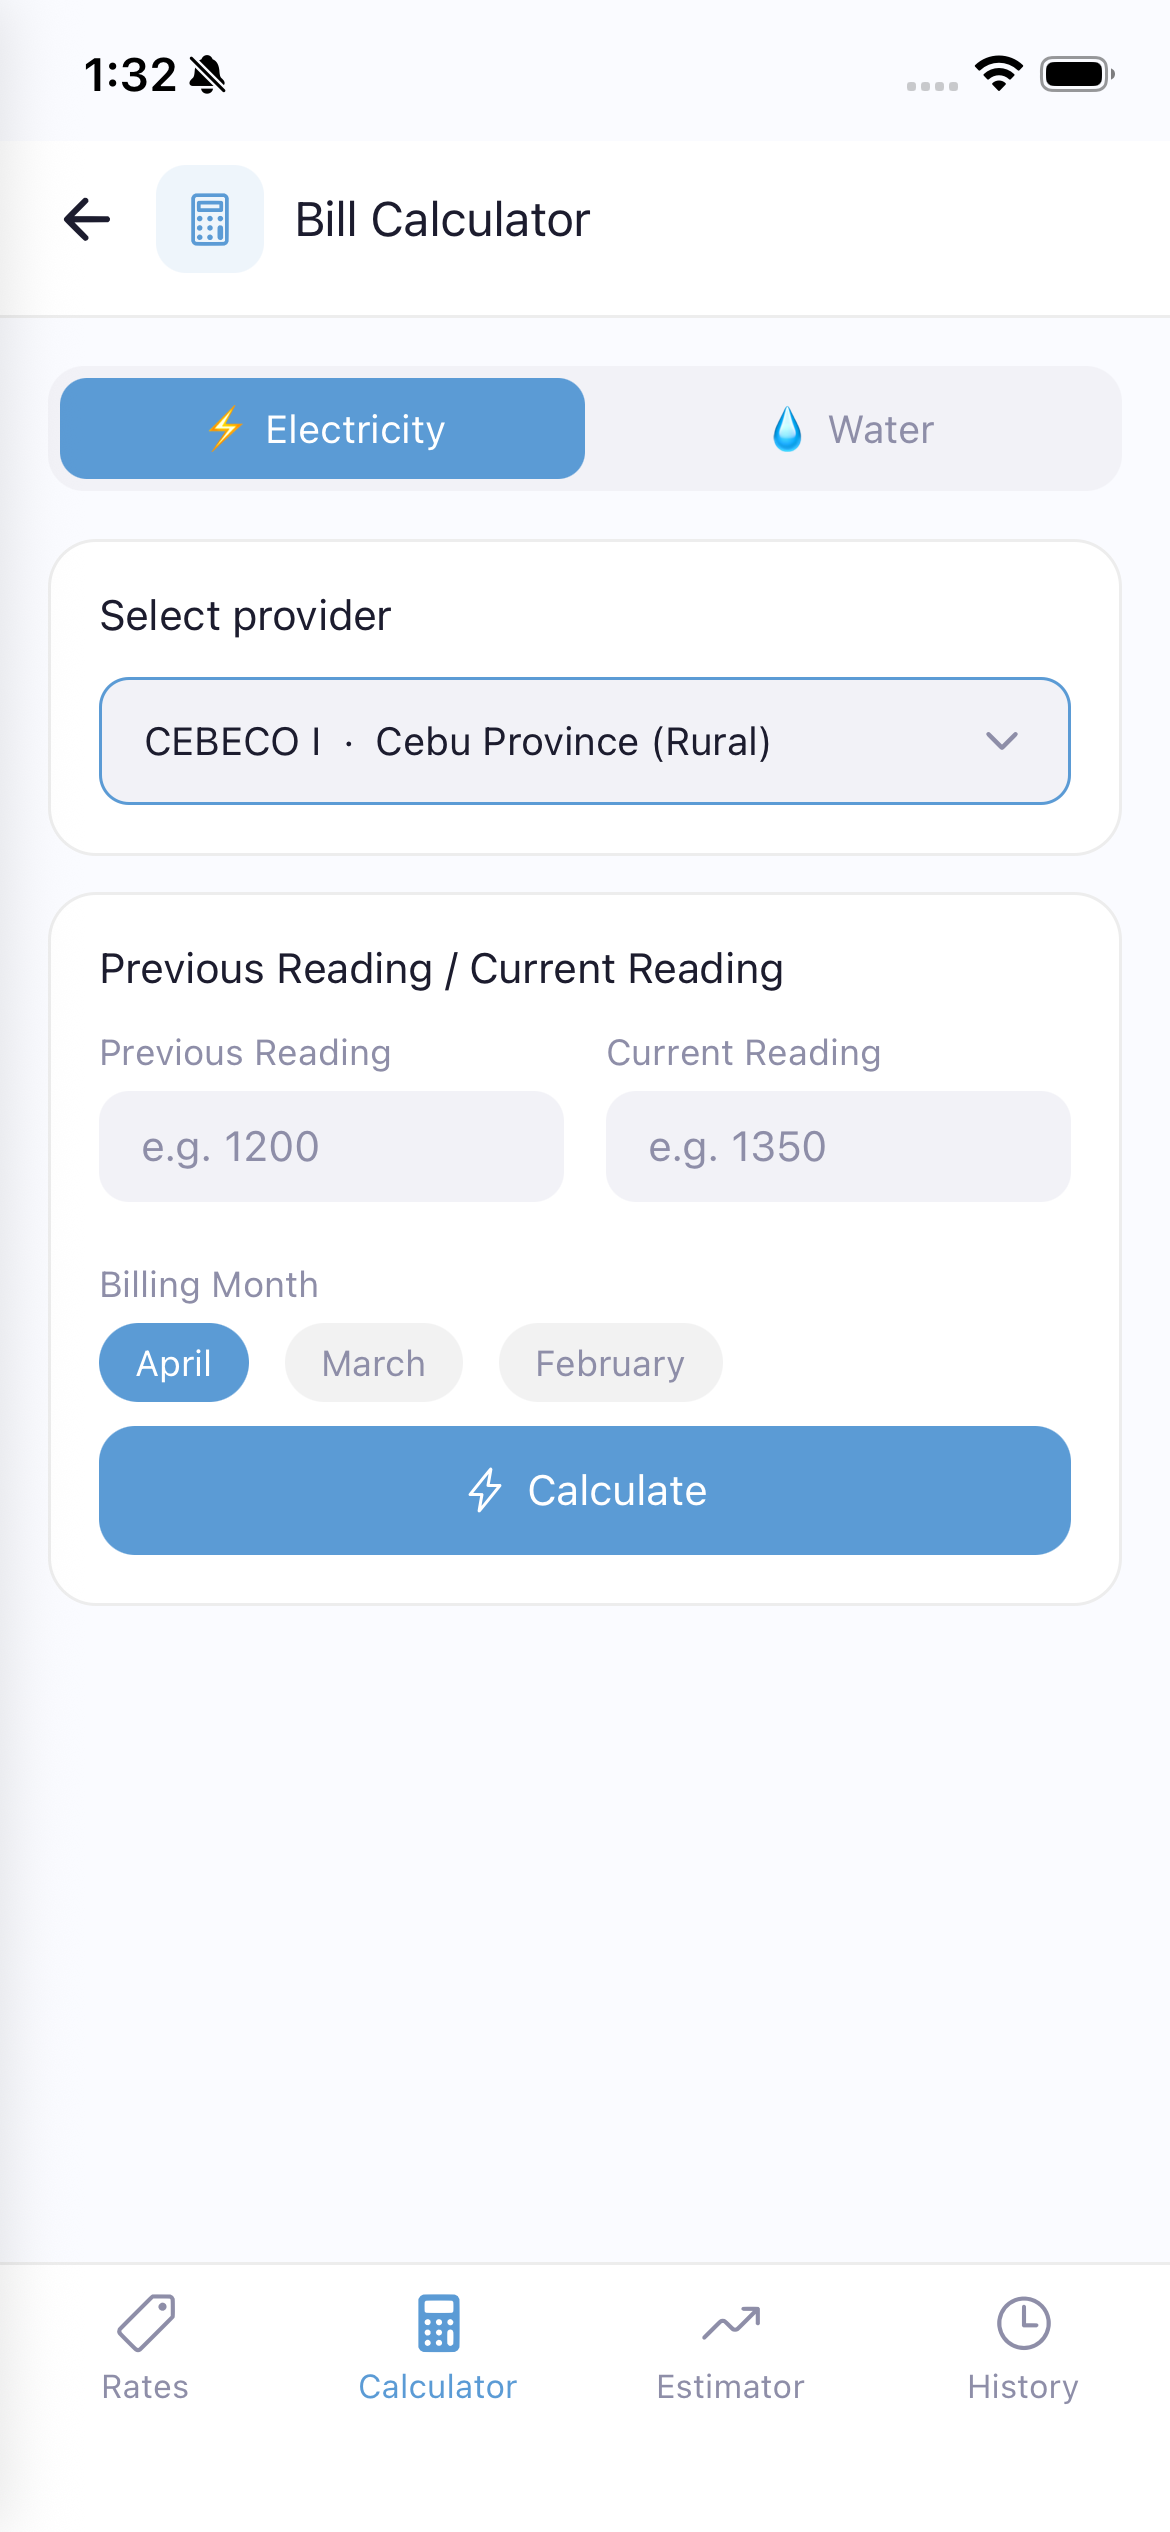
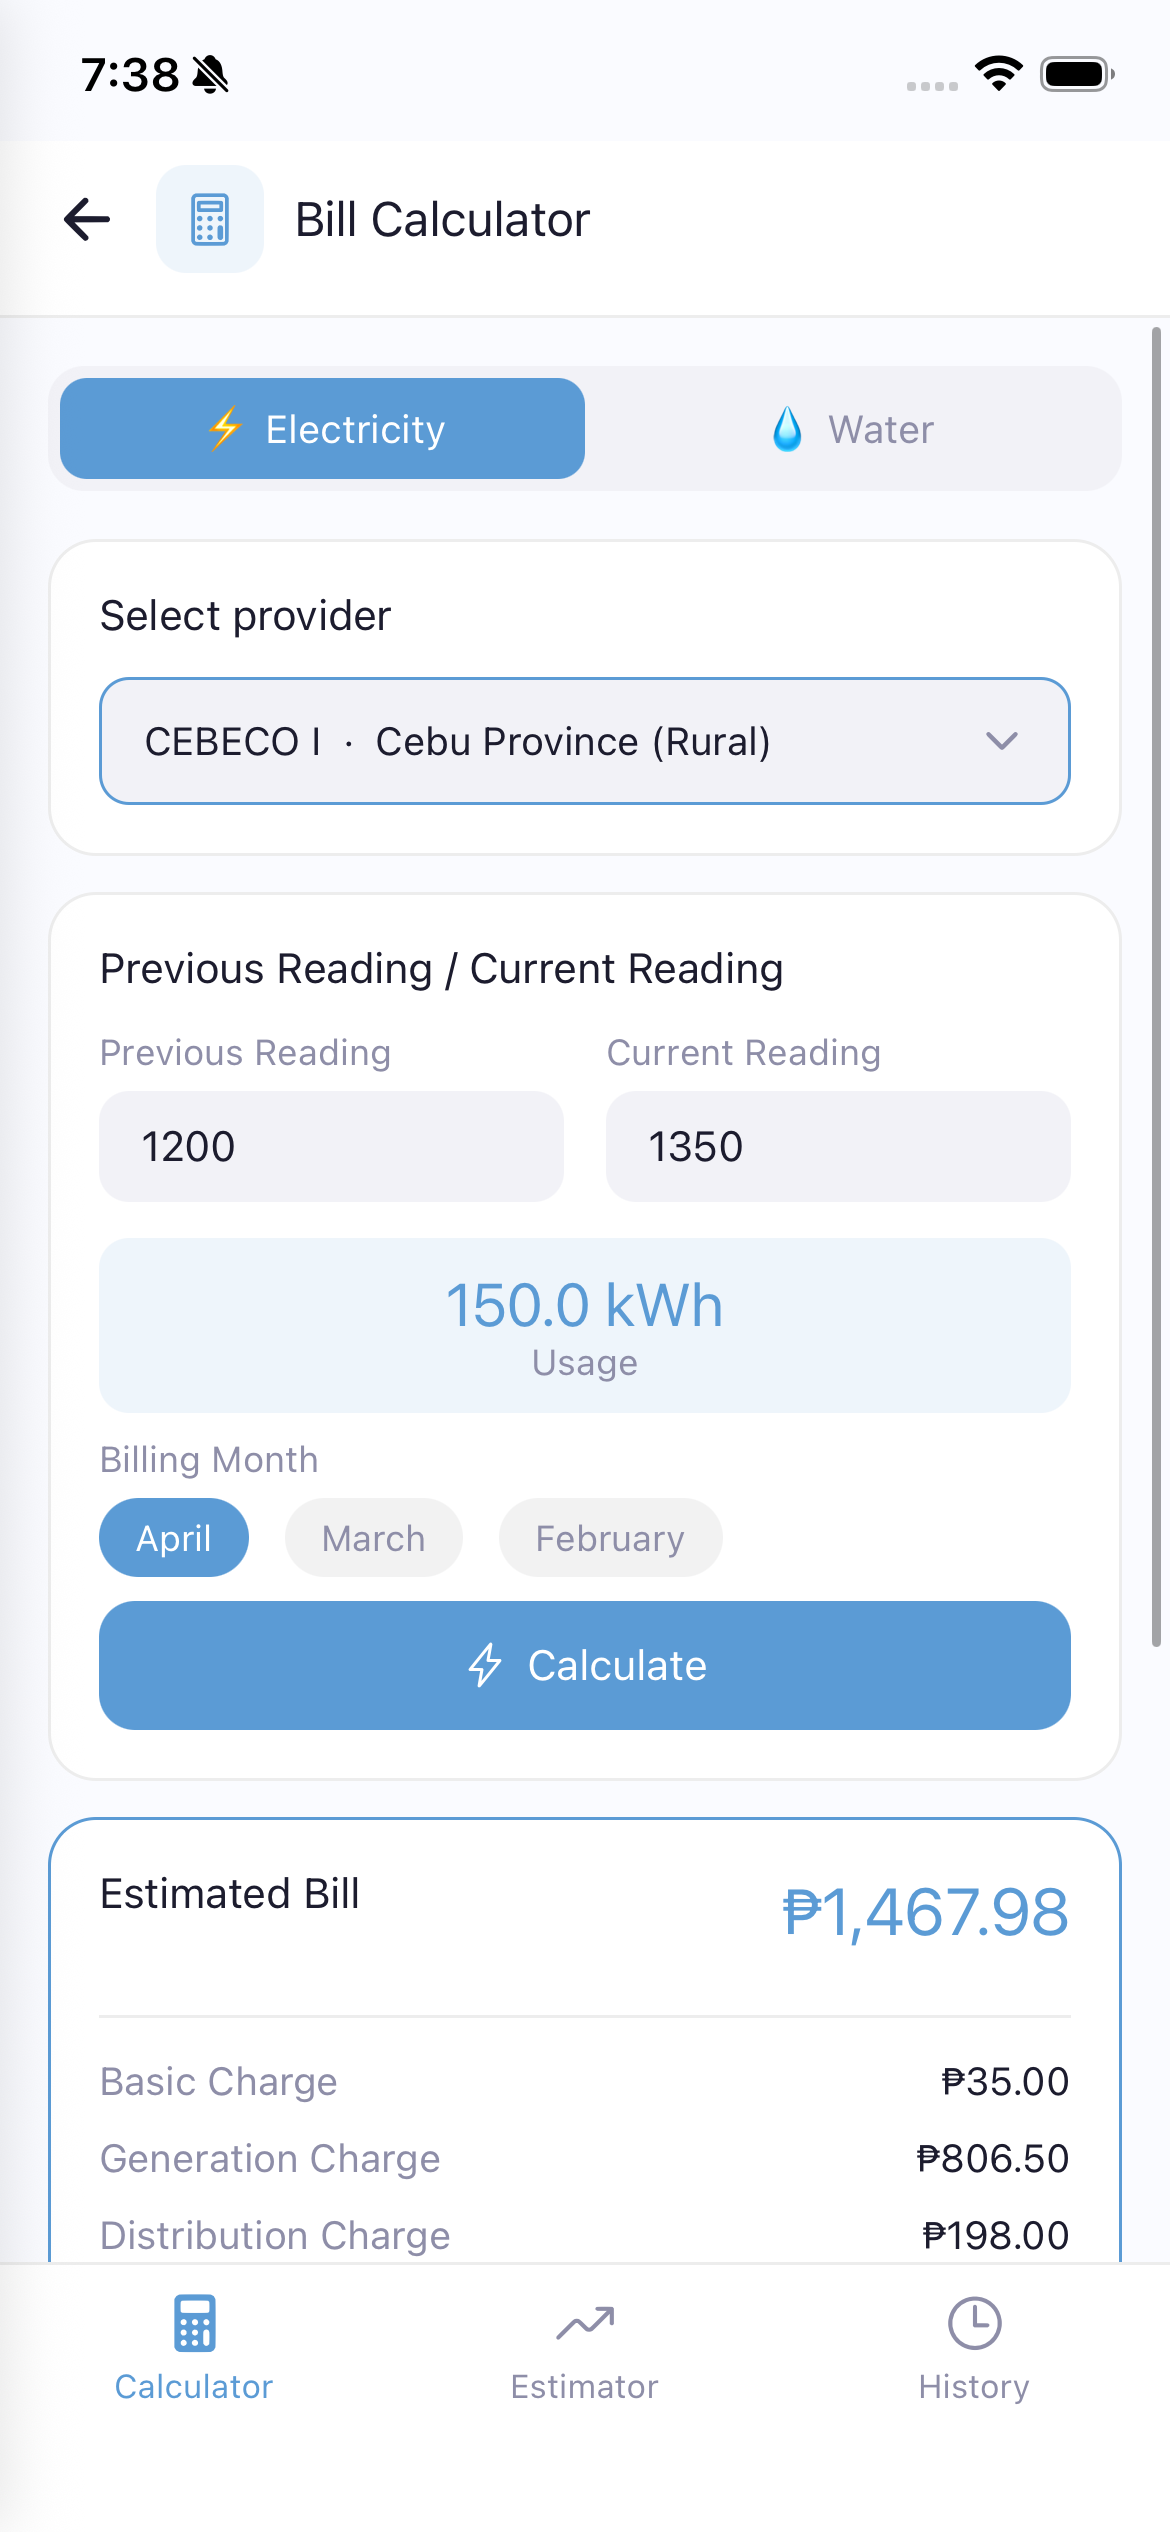
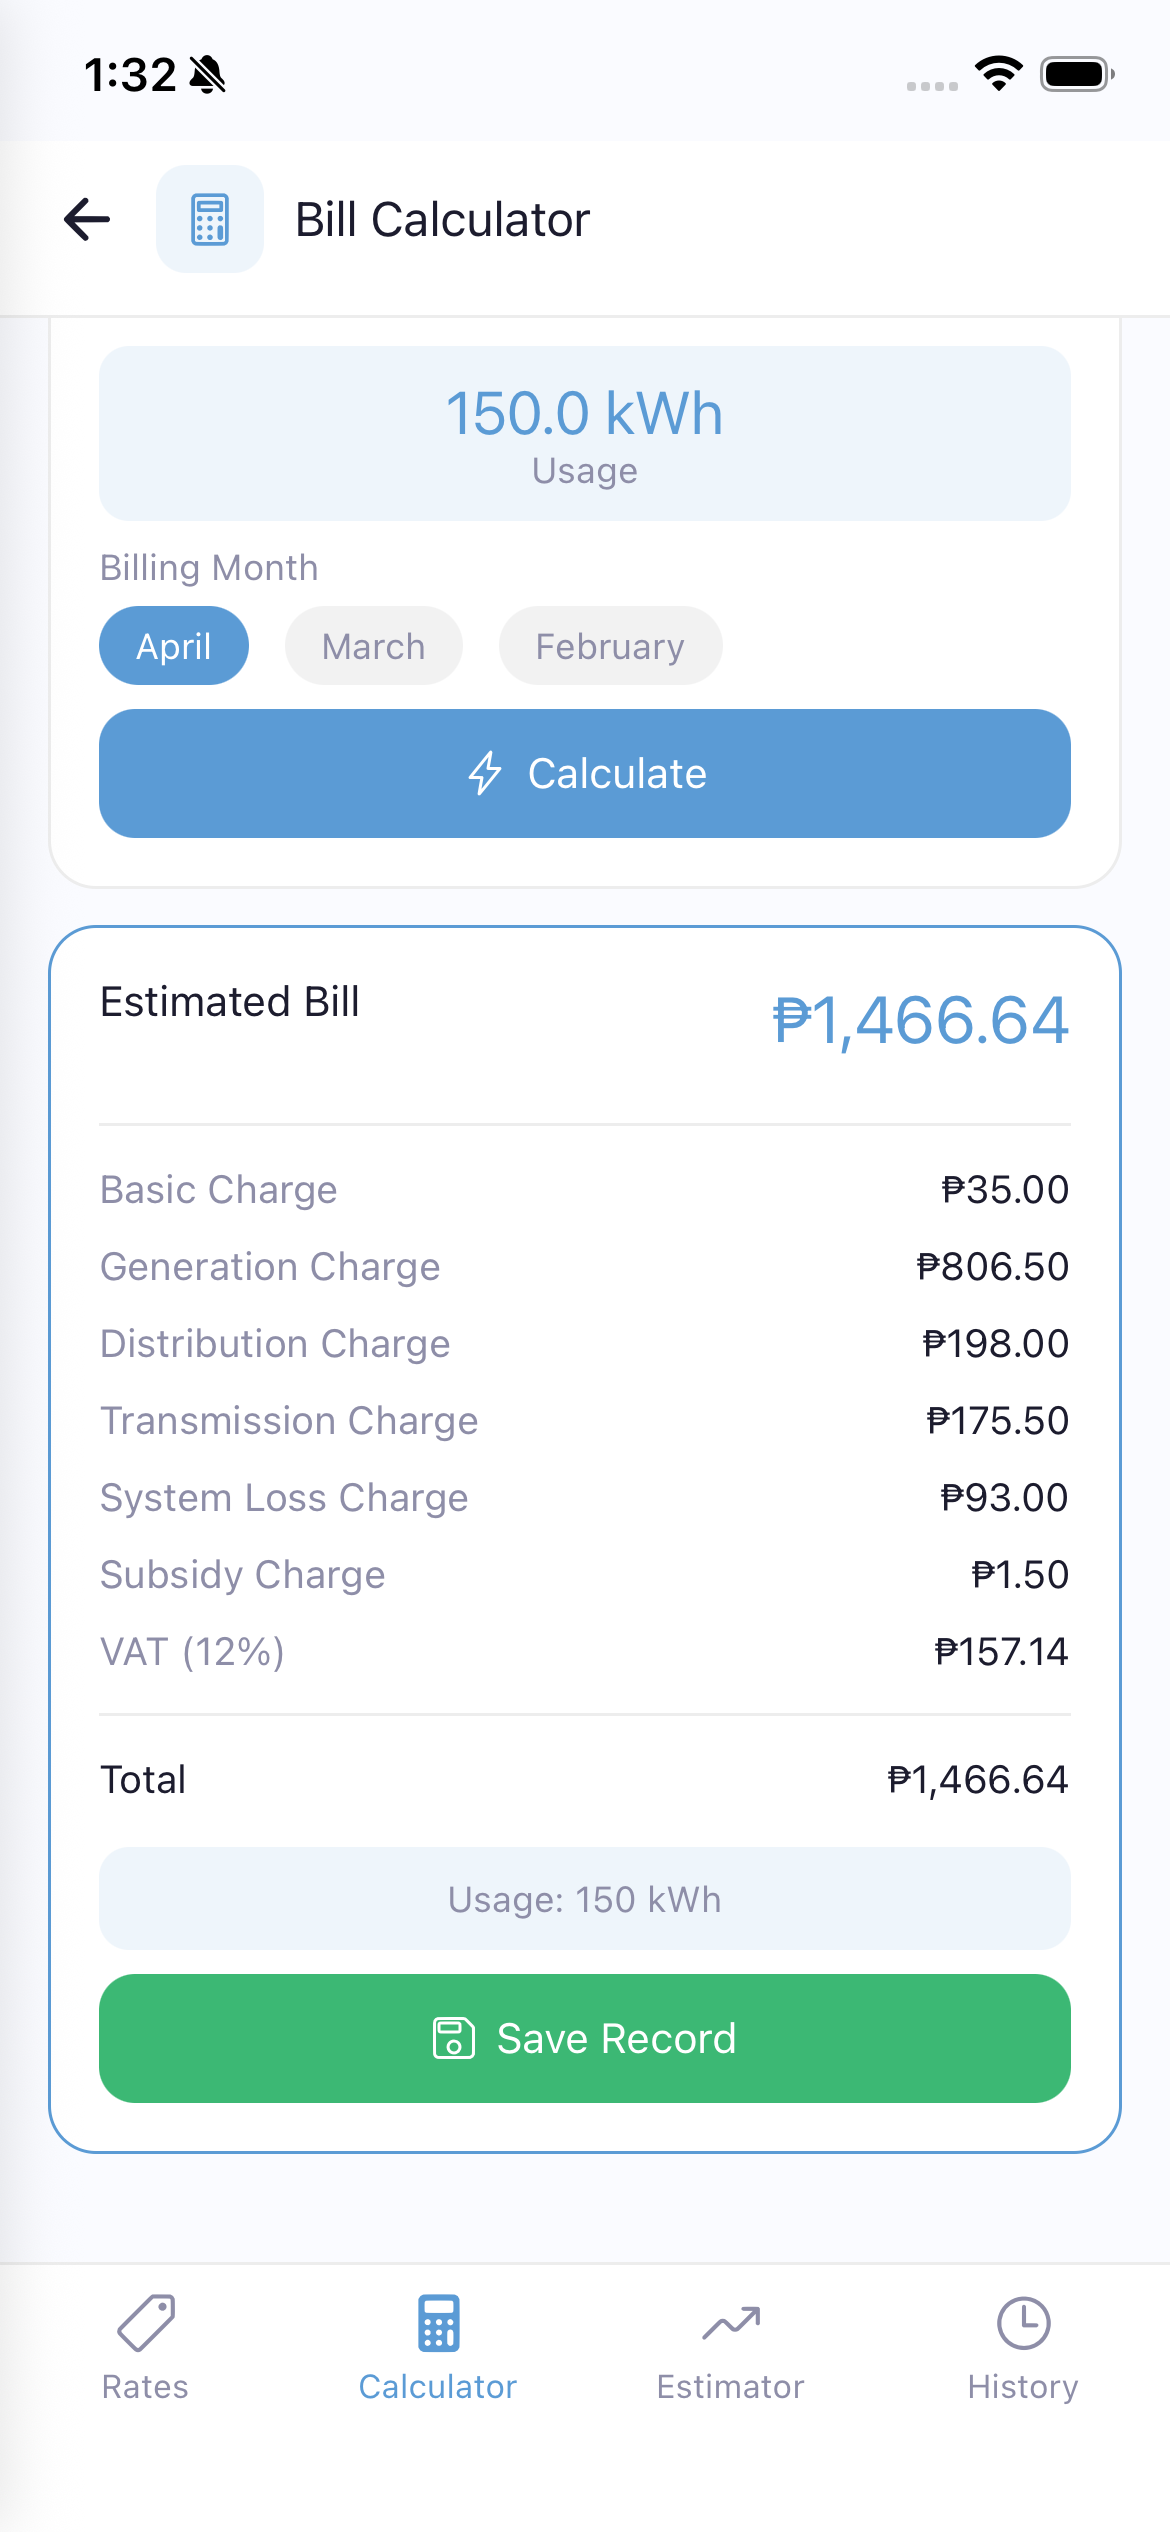
Calculate your electricity or water bill based on meter readings.
Kalkulahin ang iyong bill ng kuryente o tubig batay sa meter readings.
Kuwentaha ang imong bill sa kuryente o tubig base sa meter readings.

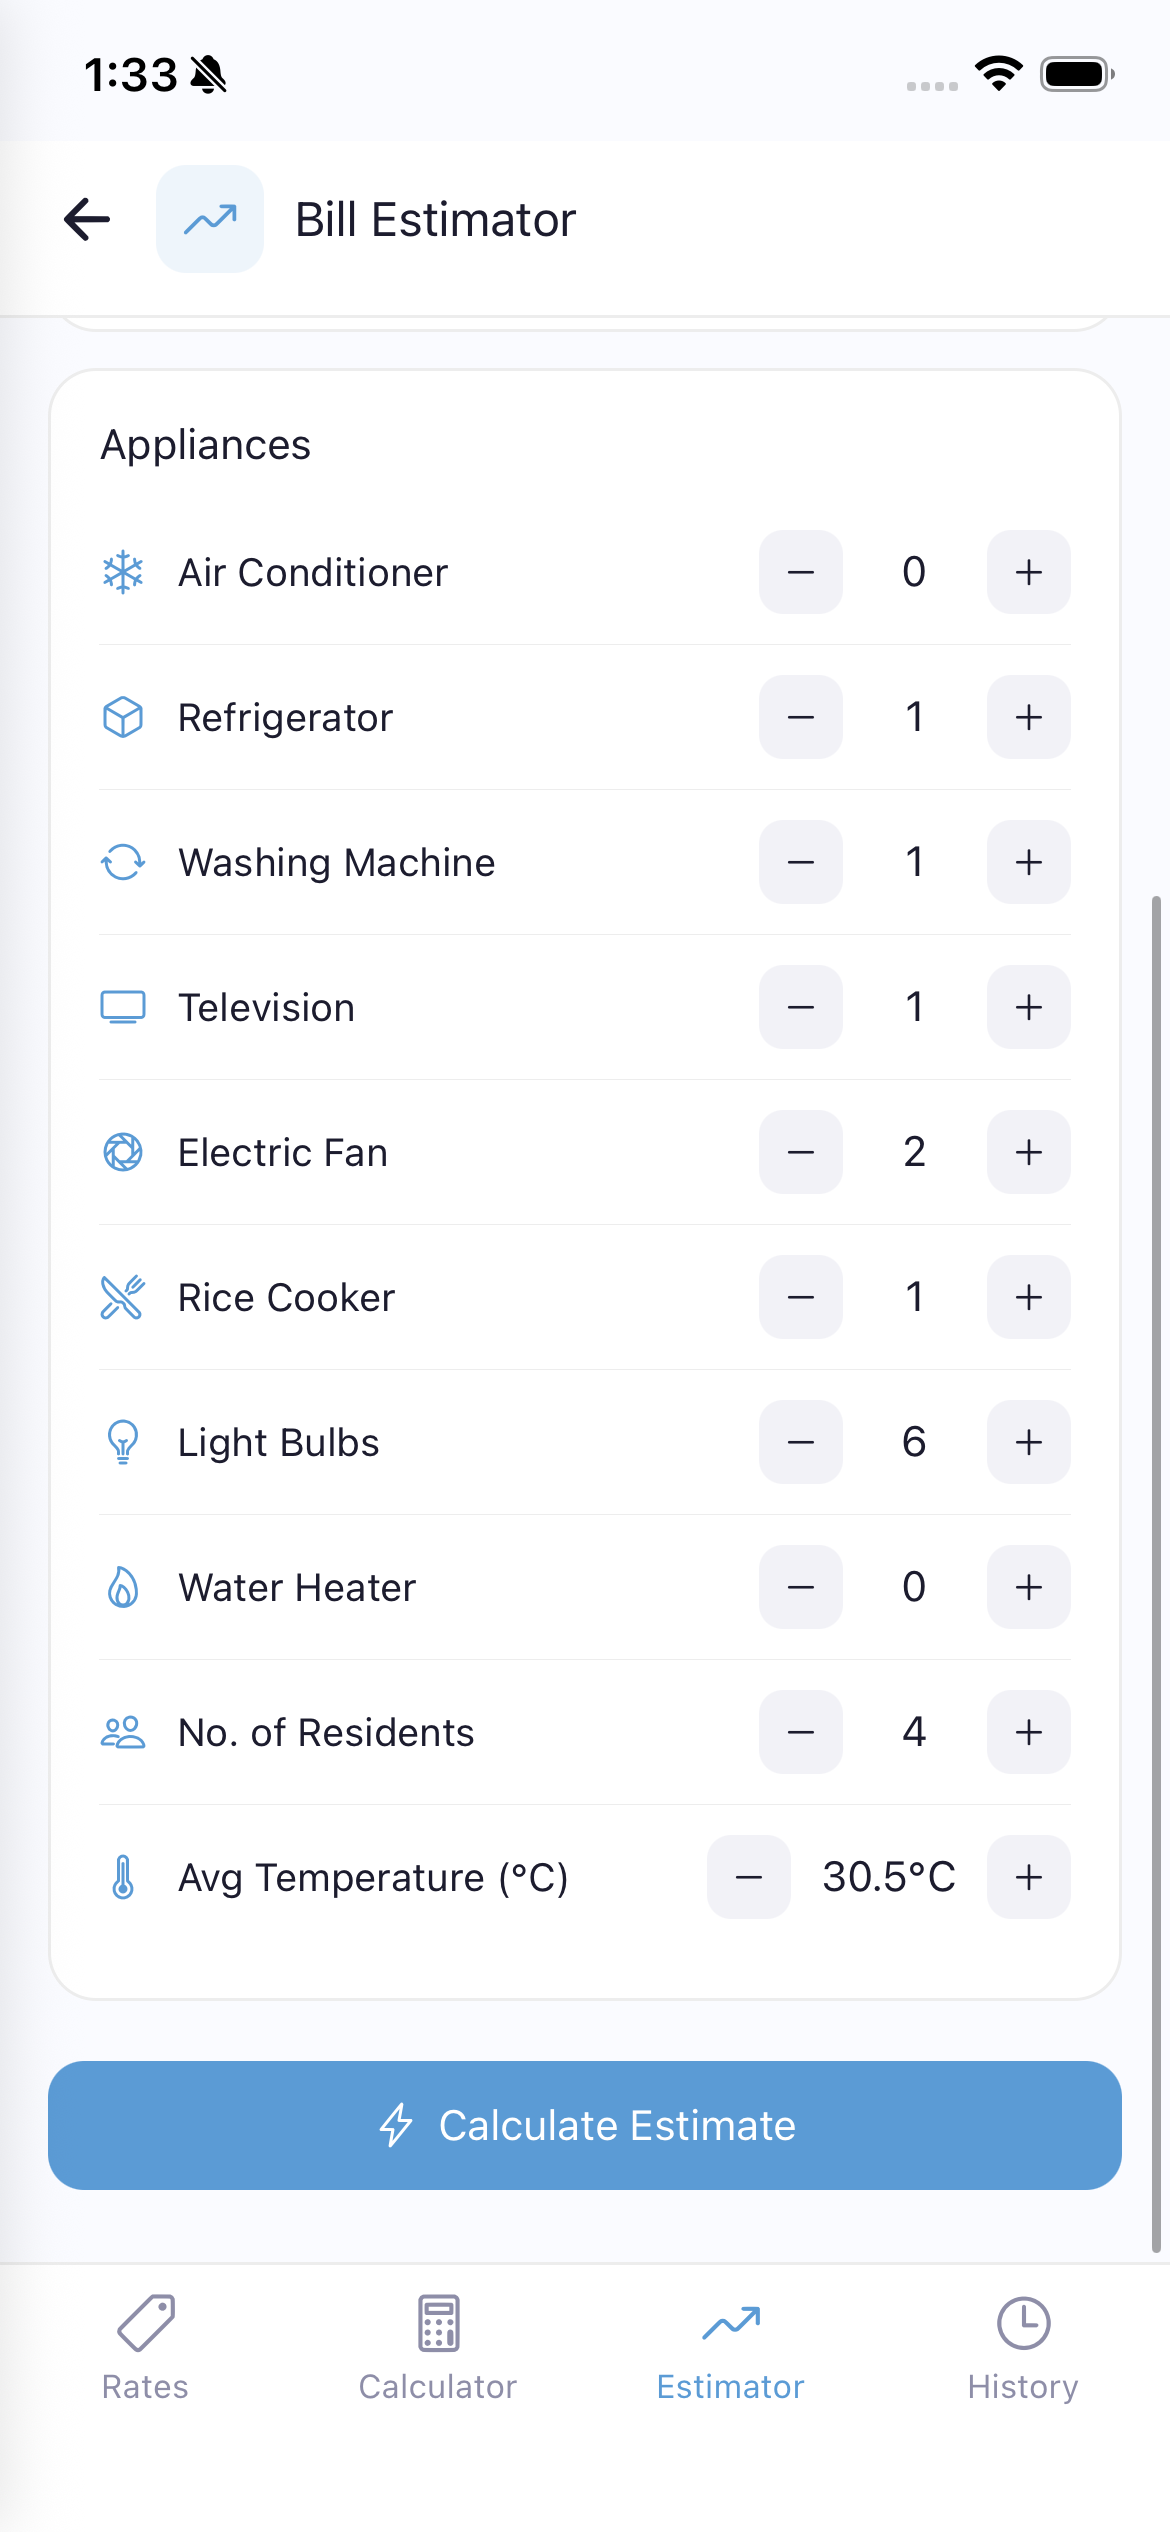
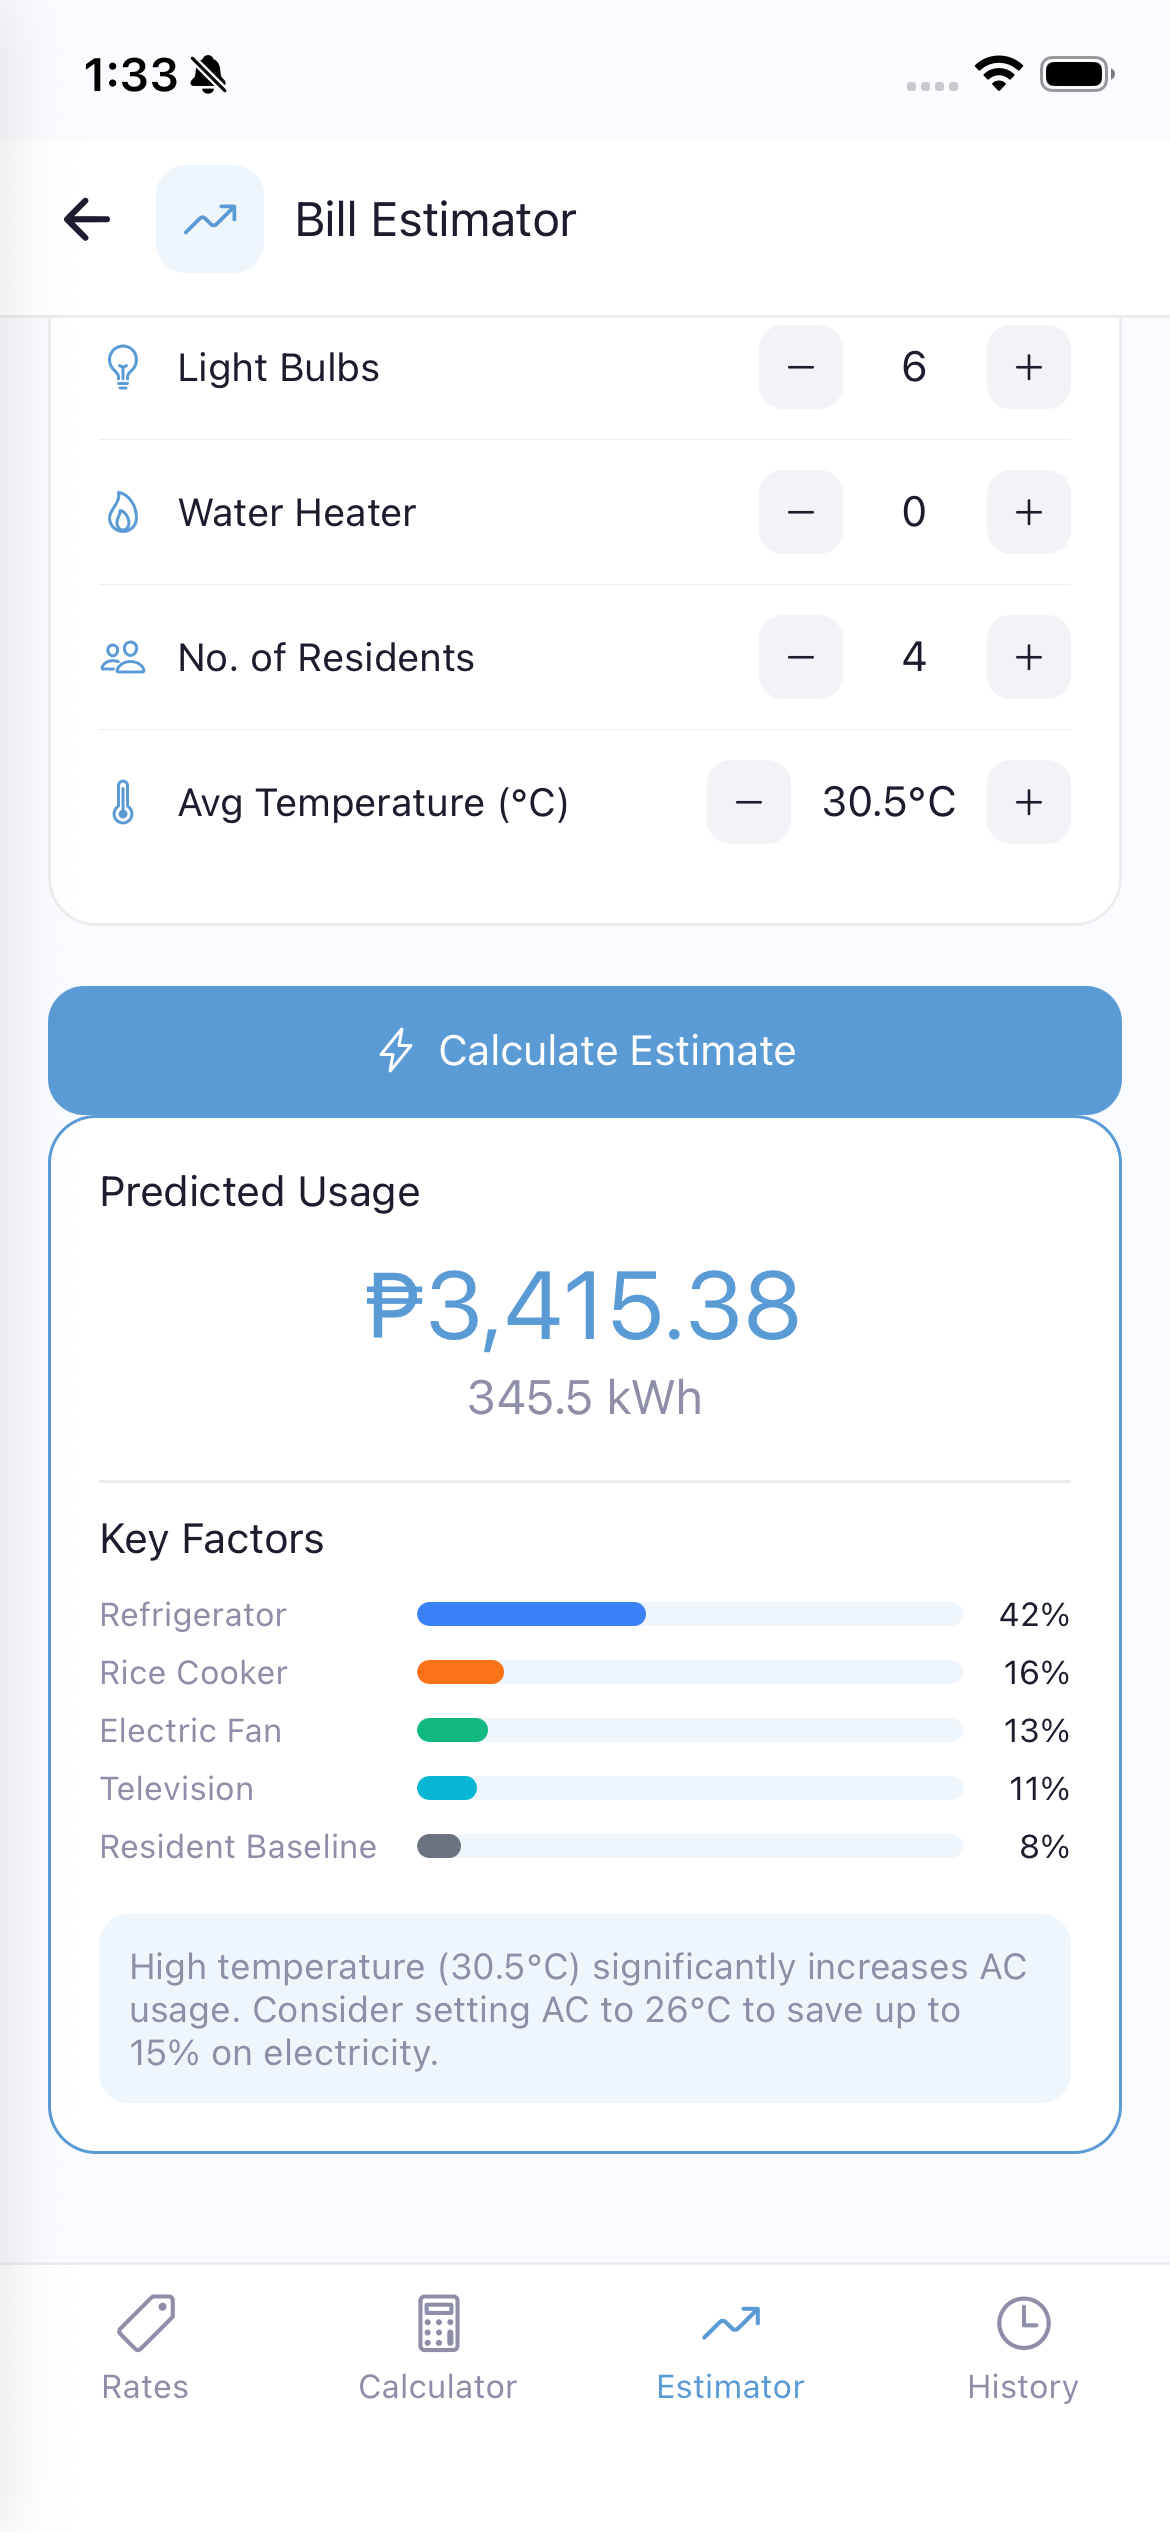
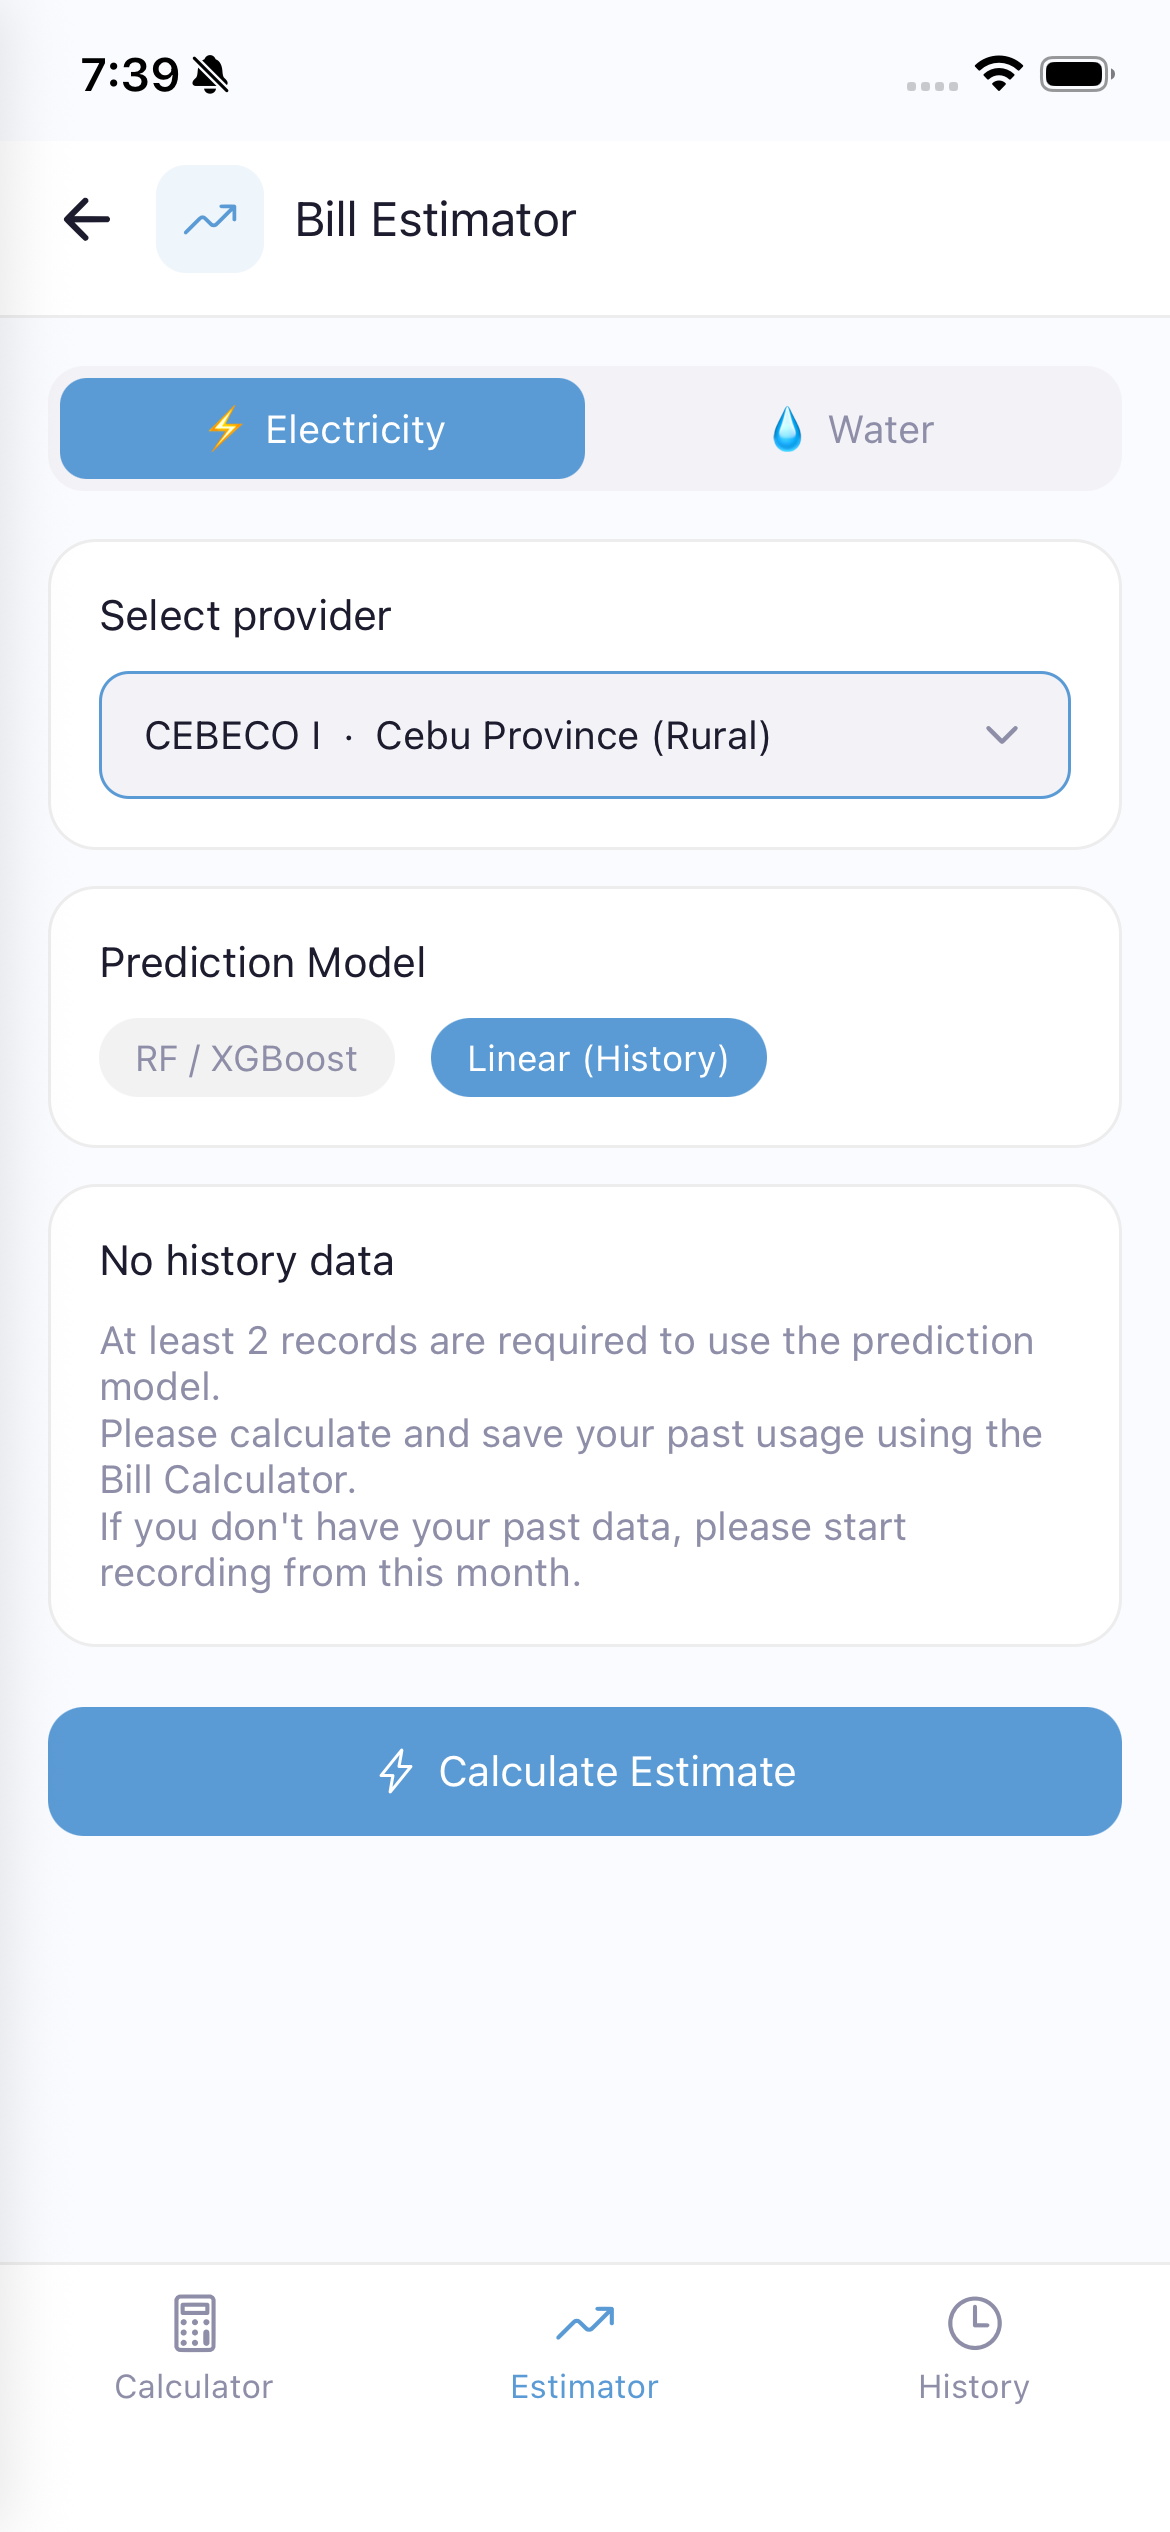
Predict your upcoming electricity or water bill using AI models.
Hulaan ang iyong paparating na bill gamit ang AI models.
Tagnaa ang imong umaabot nga bill gamit ang AI models.
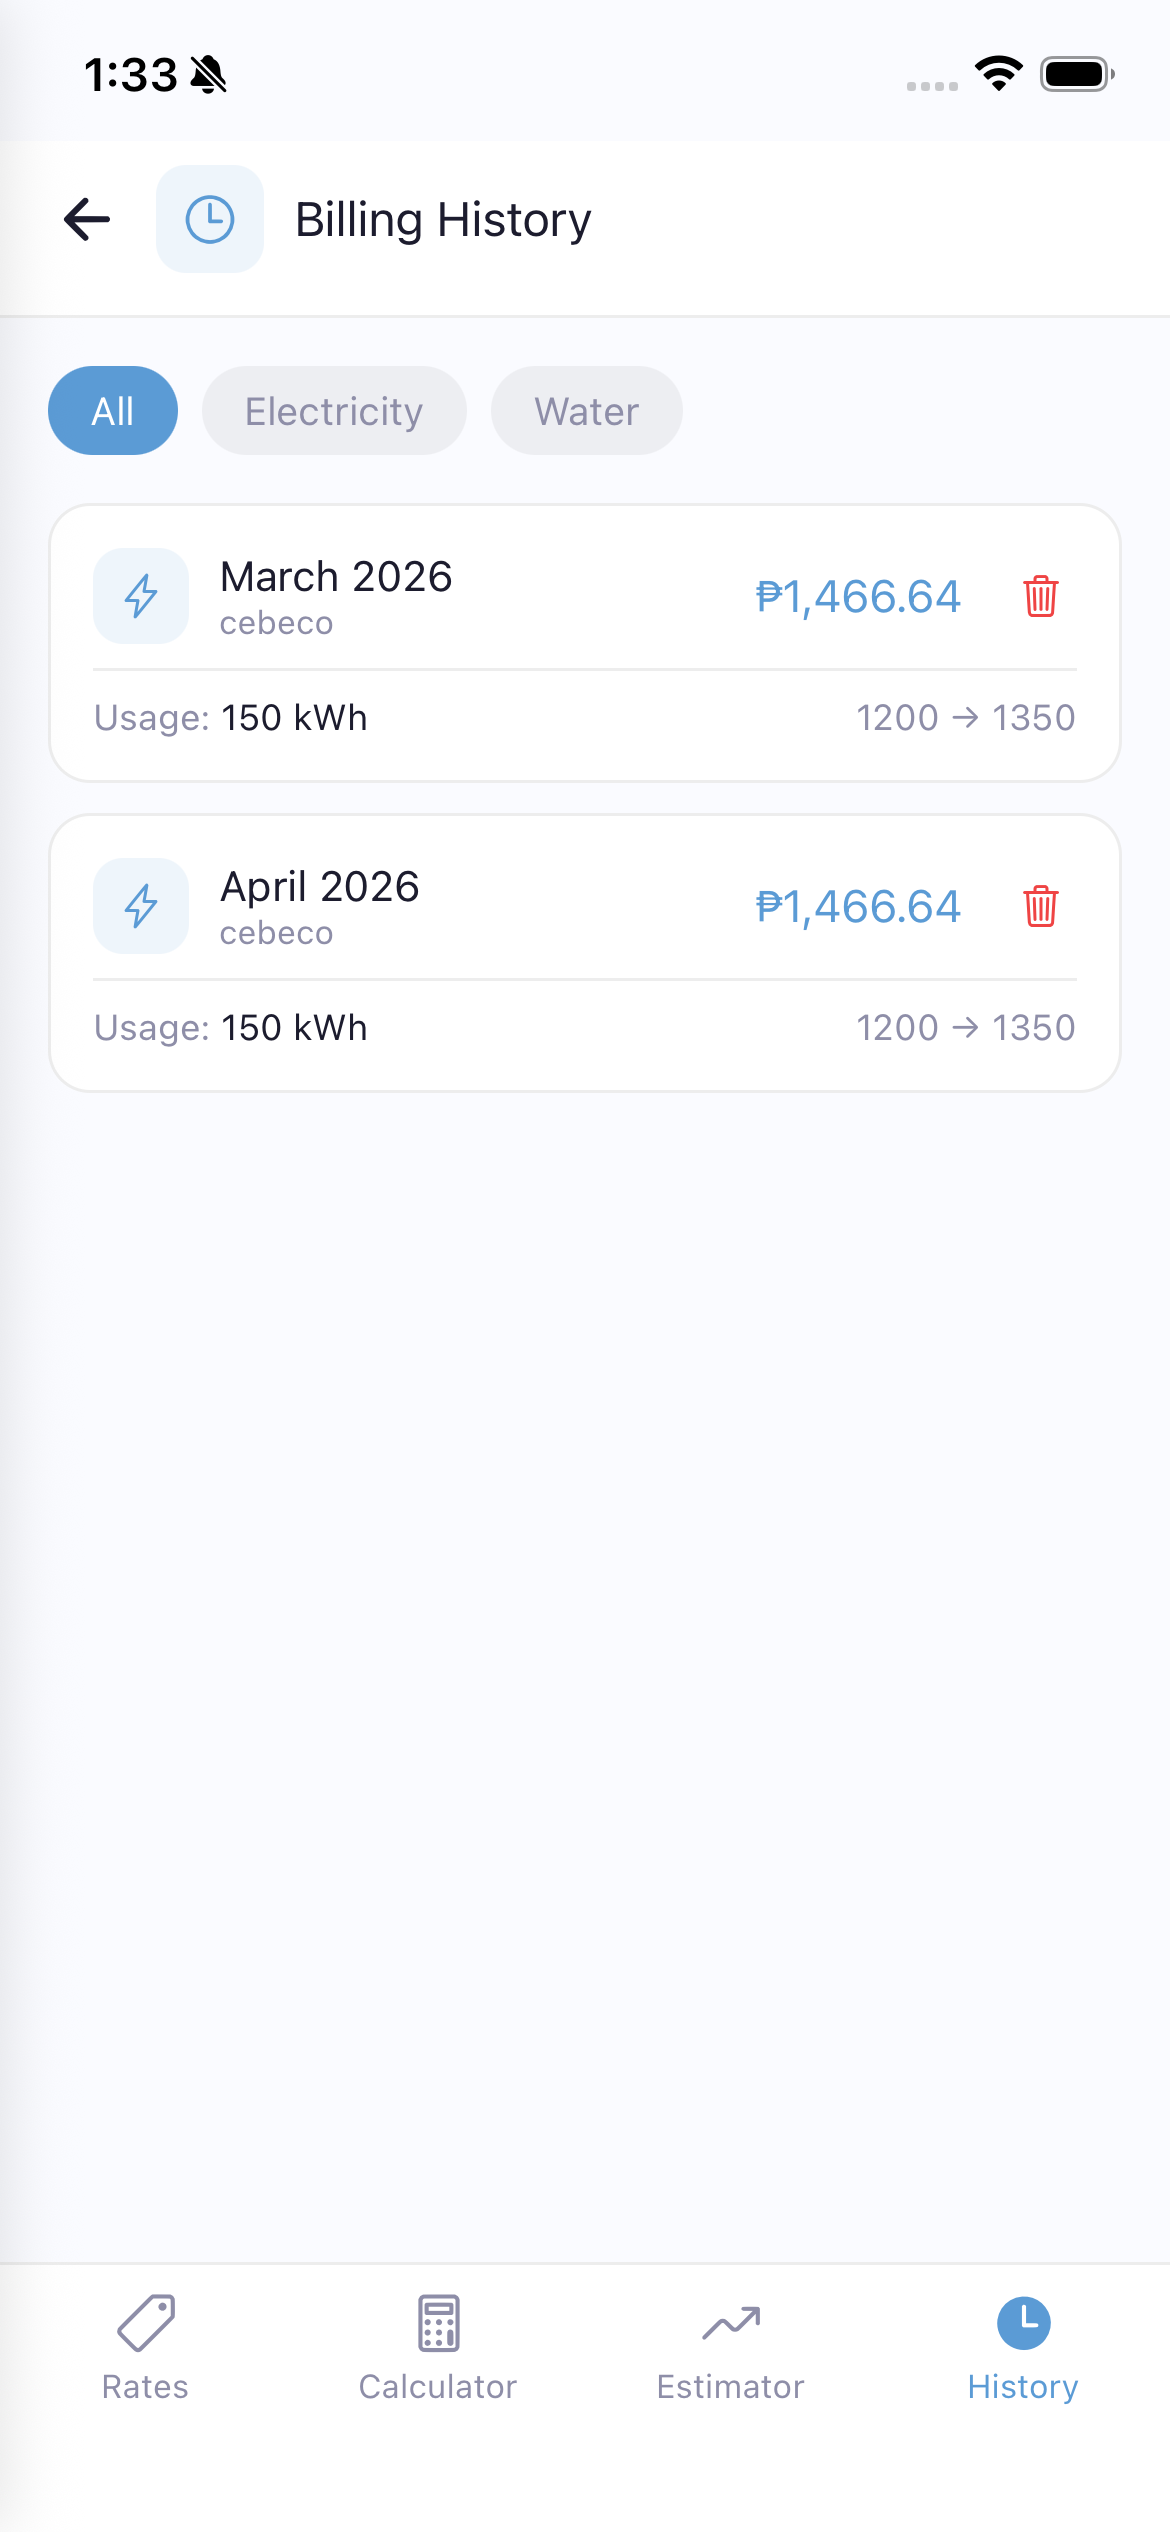
View all your saved bill calculations organized by month.
This data is also used by the Bill Estimator's Linear (History) prediction model.
Tingnan ang lahat ng nai-save na bill calculations.
Tan-awa ang tanan nimong na-save nga bill calculations.
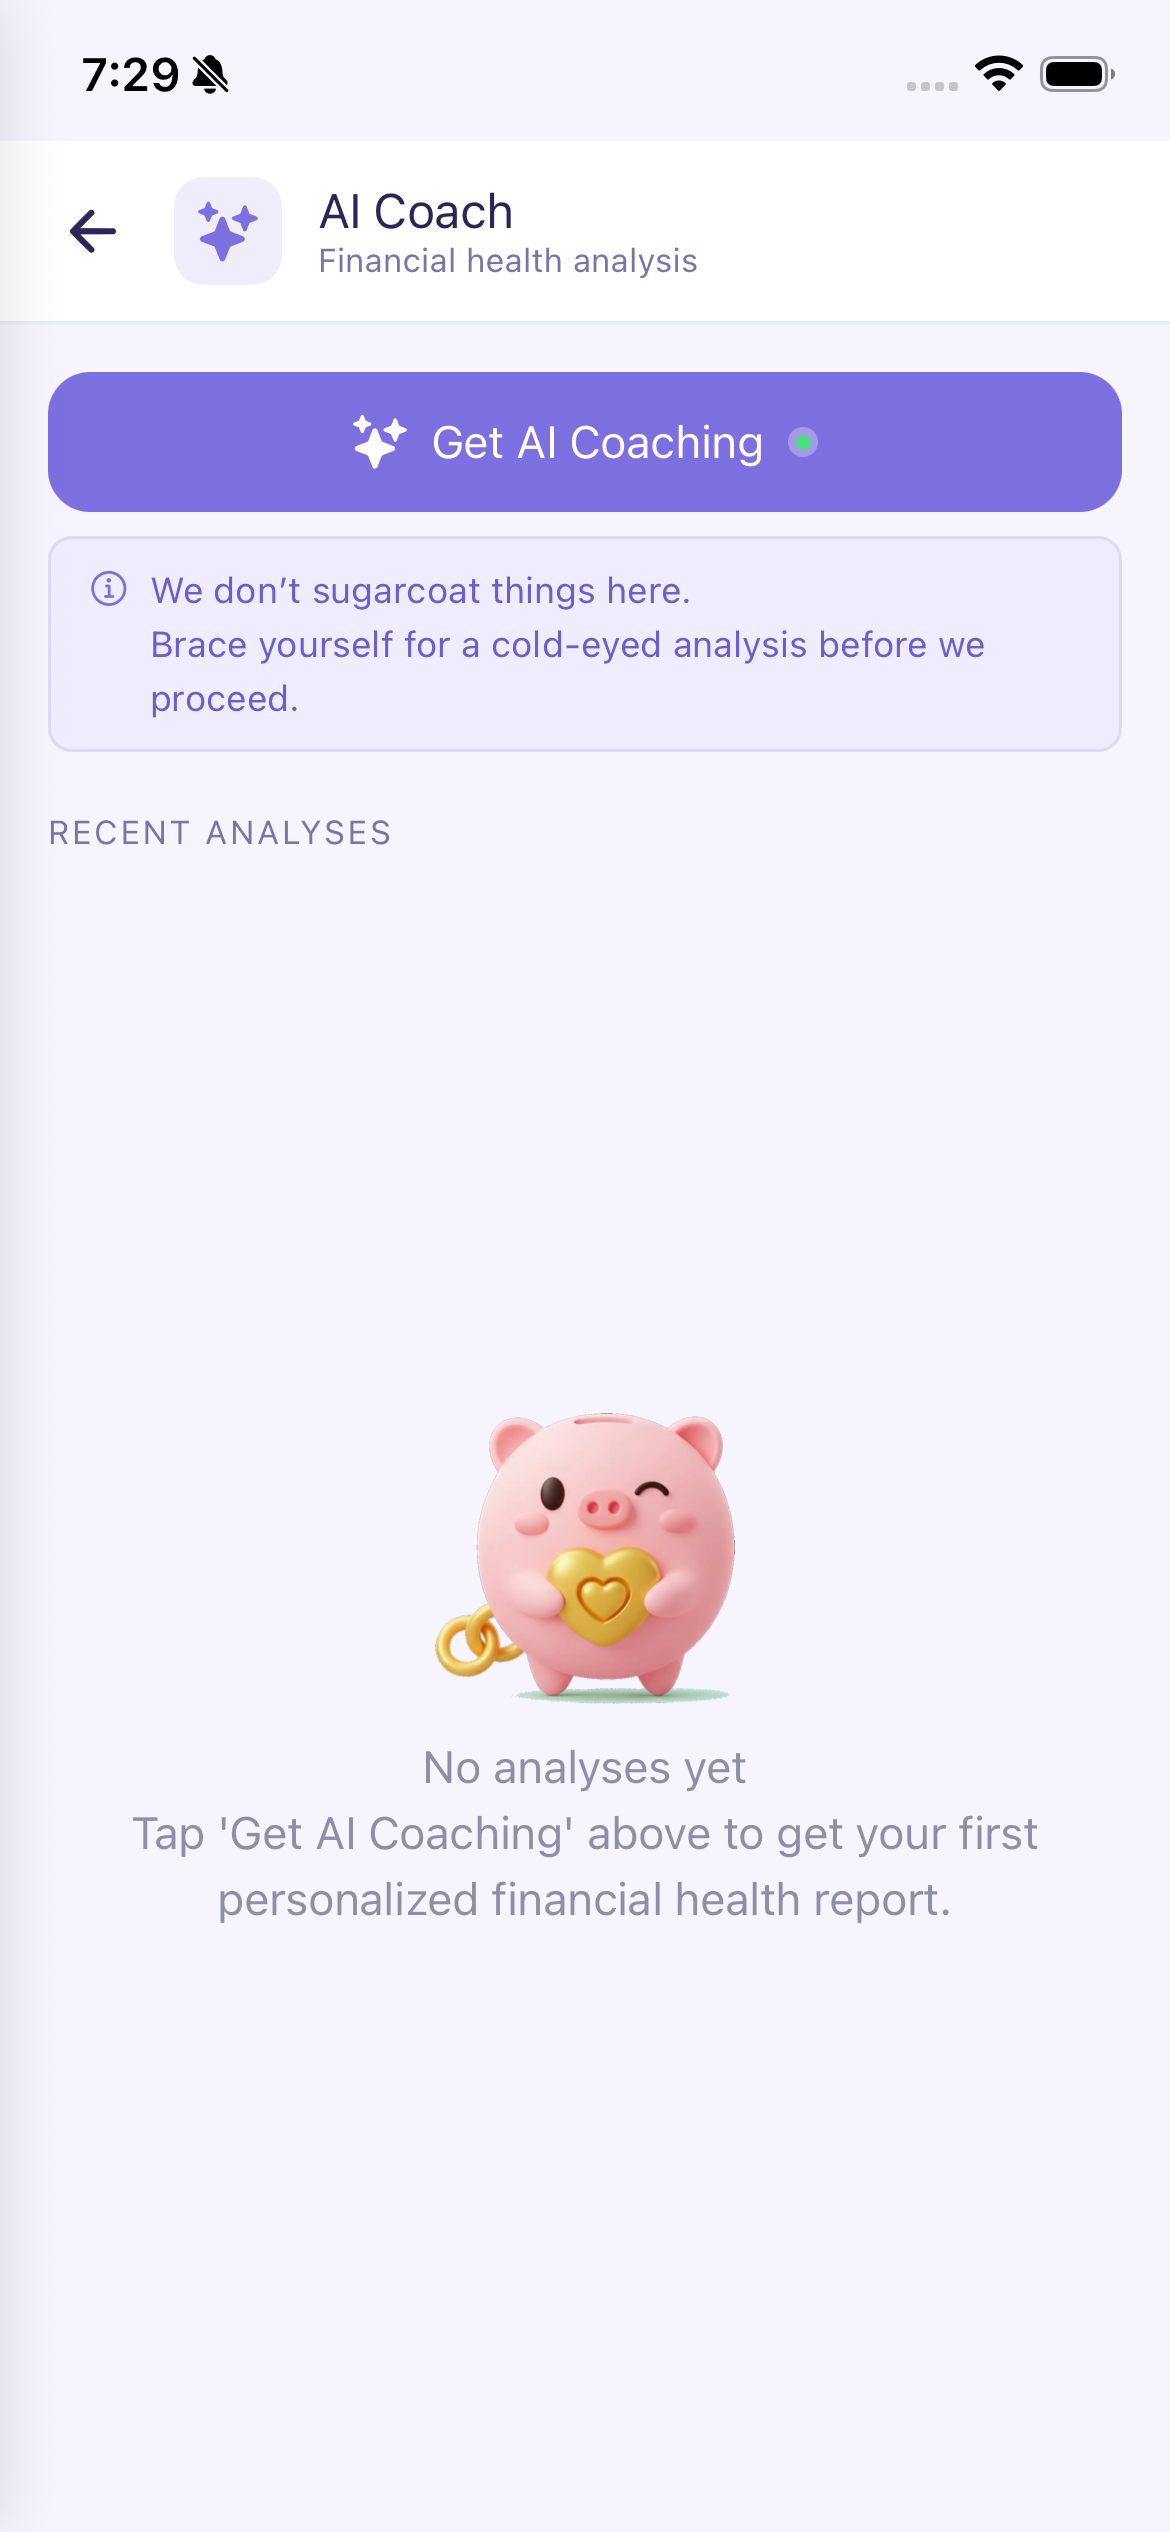
The AI Coach provides personalized financial health analysis based on your spending data.
Important: The AI Coach's last report is saved on the server. This saved report is used as context information when you request your next AI coaching session, helping the AI provide more relevant and continuous advice.
This feature requires an internet connection as it uses AI to analyze your data. Data usage is minimal.
Ang AI Coach ay nagbibigay ng personalized financial health analysis batay sa iyong spending data.
Mahalaga: Ang huling report ng AI Coach ay naka-save sa server. Ginagamit ito bilang context kapag humiling ka ng bagong coaching session.
Kailangan ng internet connection ang feature na ito. Minimal ang data usage.
Ang AI Coach naghatag og personalized financial health analysis base sa imong spending data.
Importante: Ang katapusang report sa AI Coach na-save sa server. Gigamit kini isip context kung mag-request ka og bag-ong coaching session.

View comprehensive monthly spending reports and analytics.
Tingnan ang buwanang spending reports at analytics.
Tan-awa ang binulan nga spending reports ug analytics.
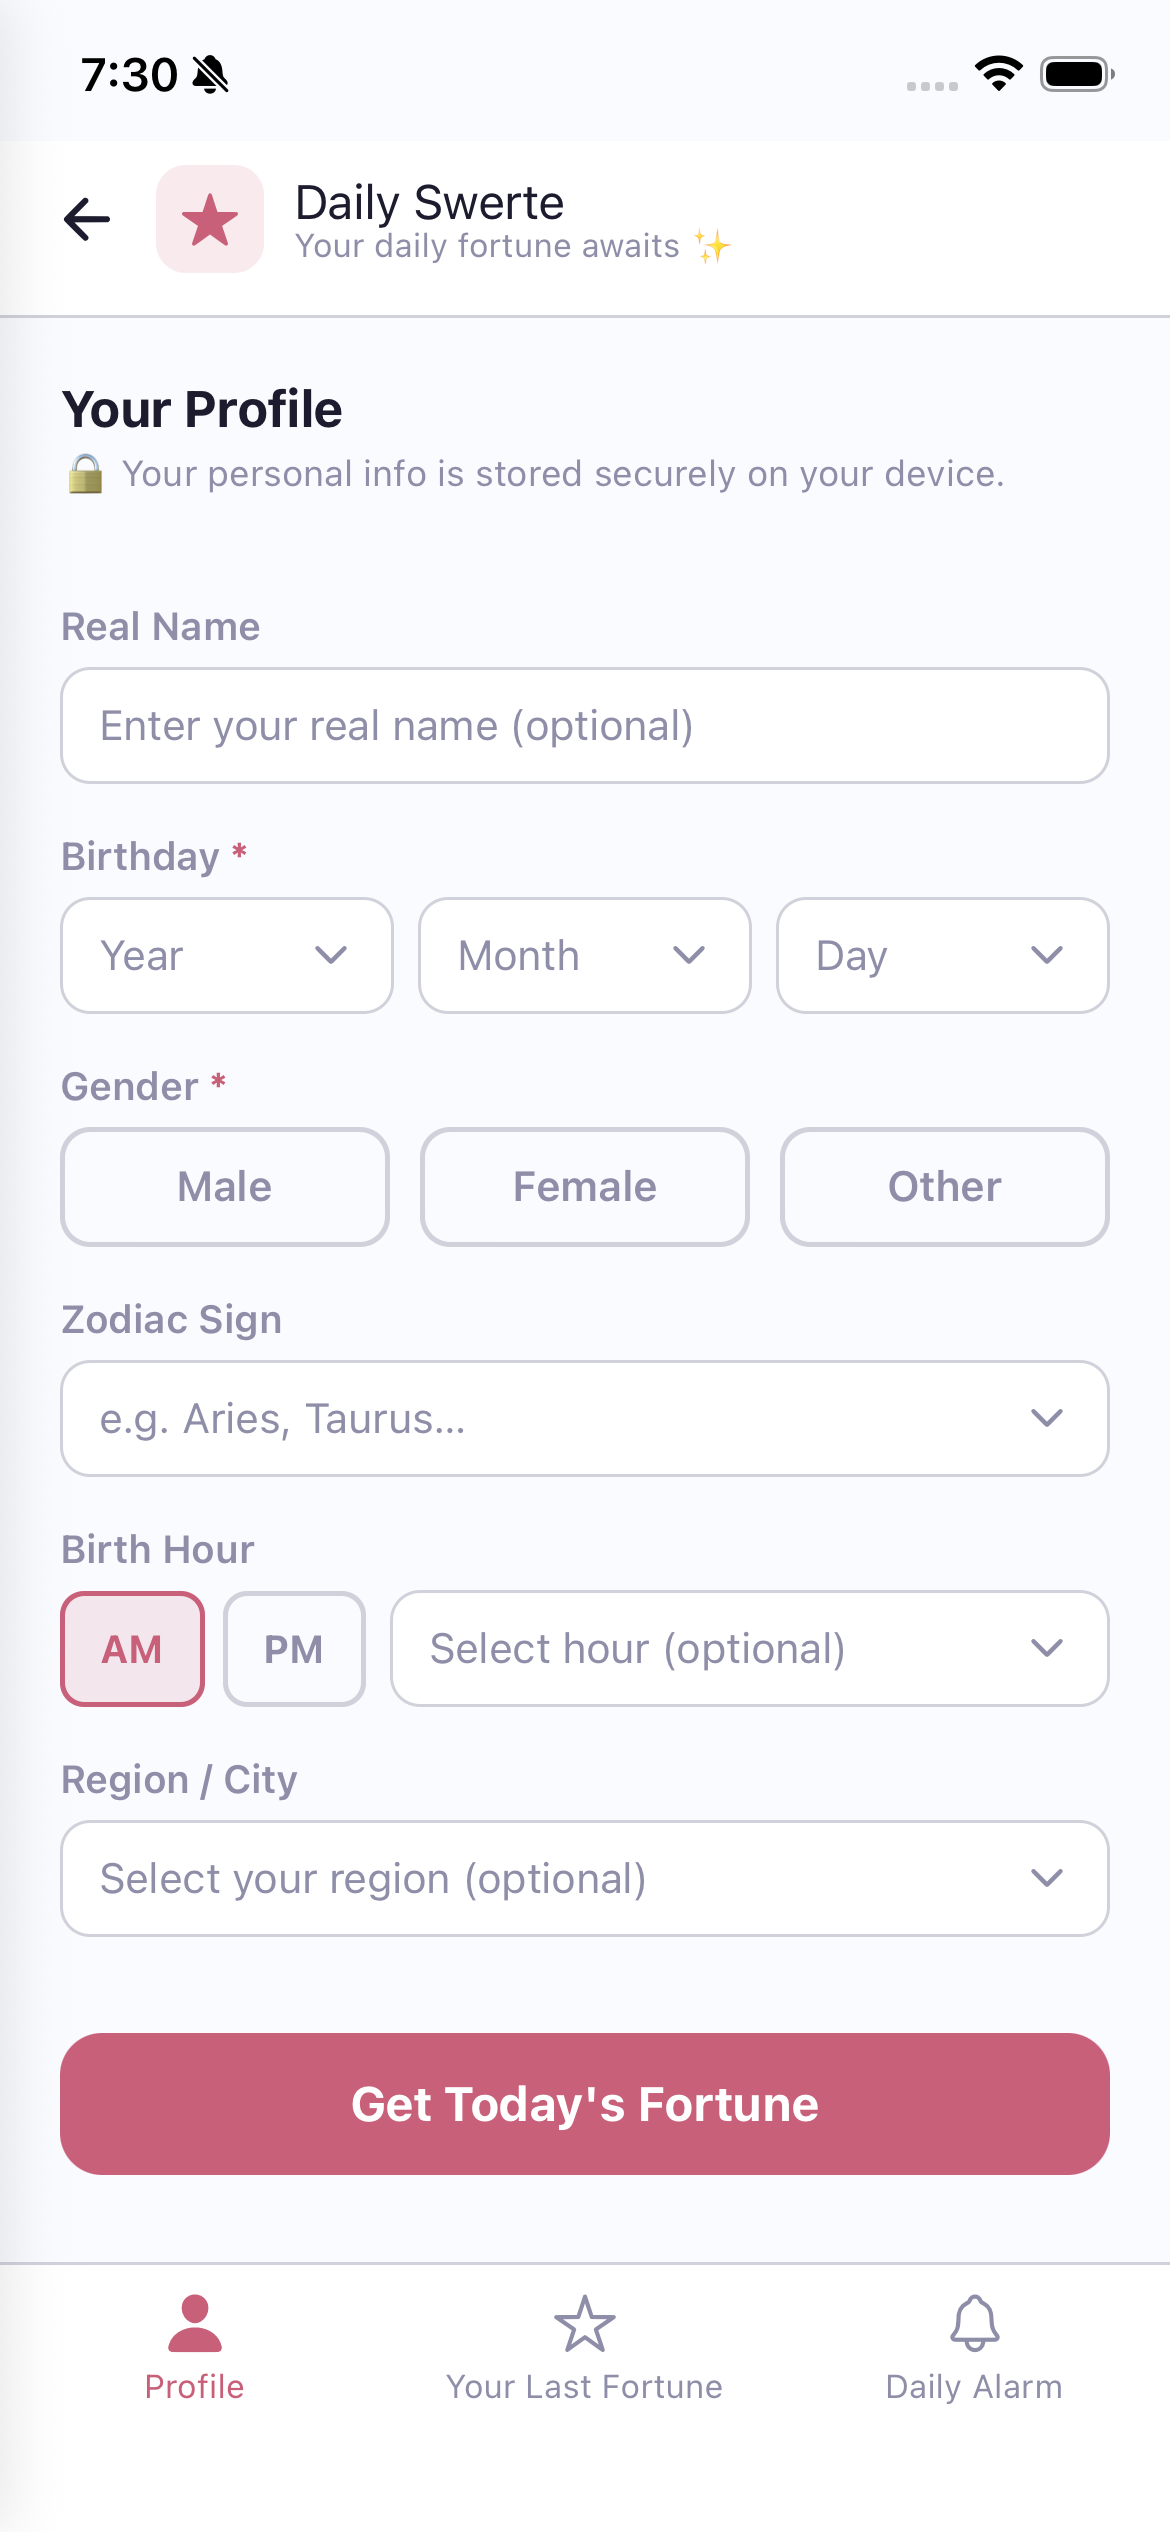
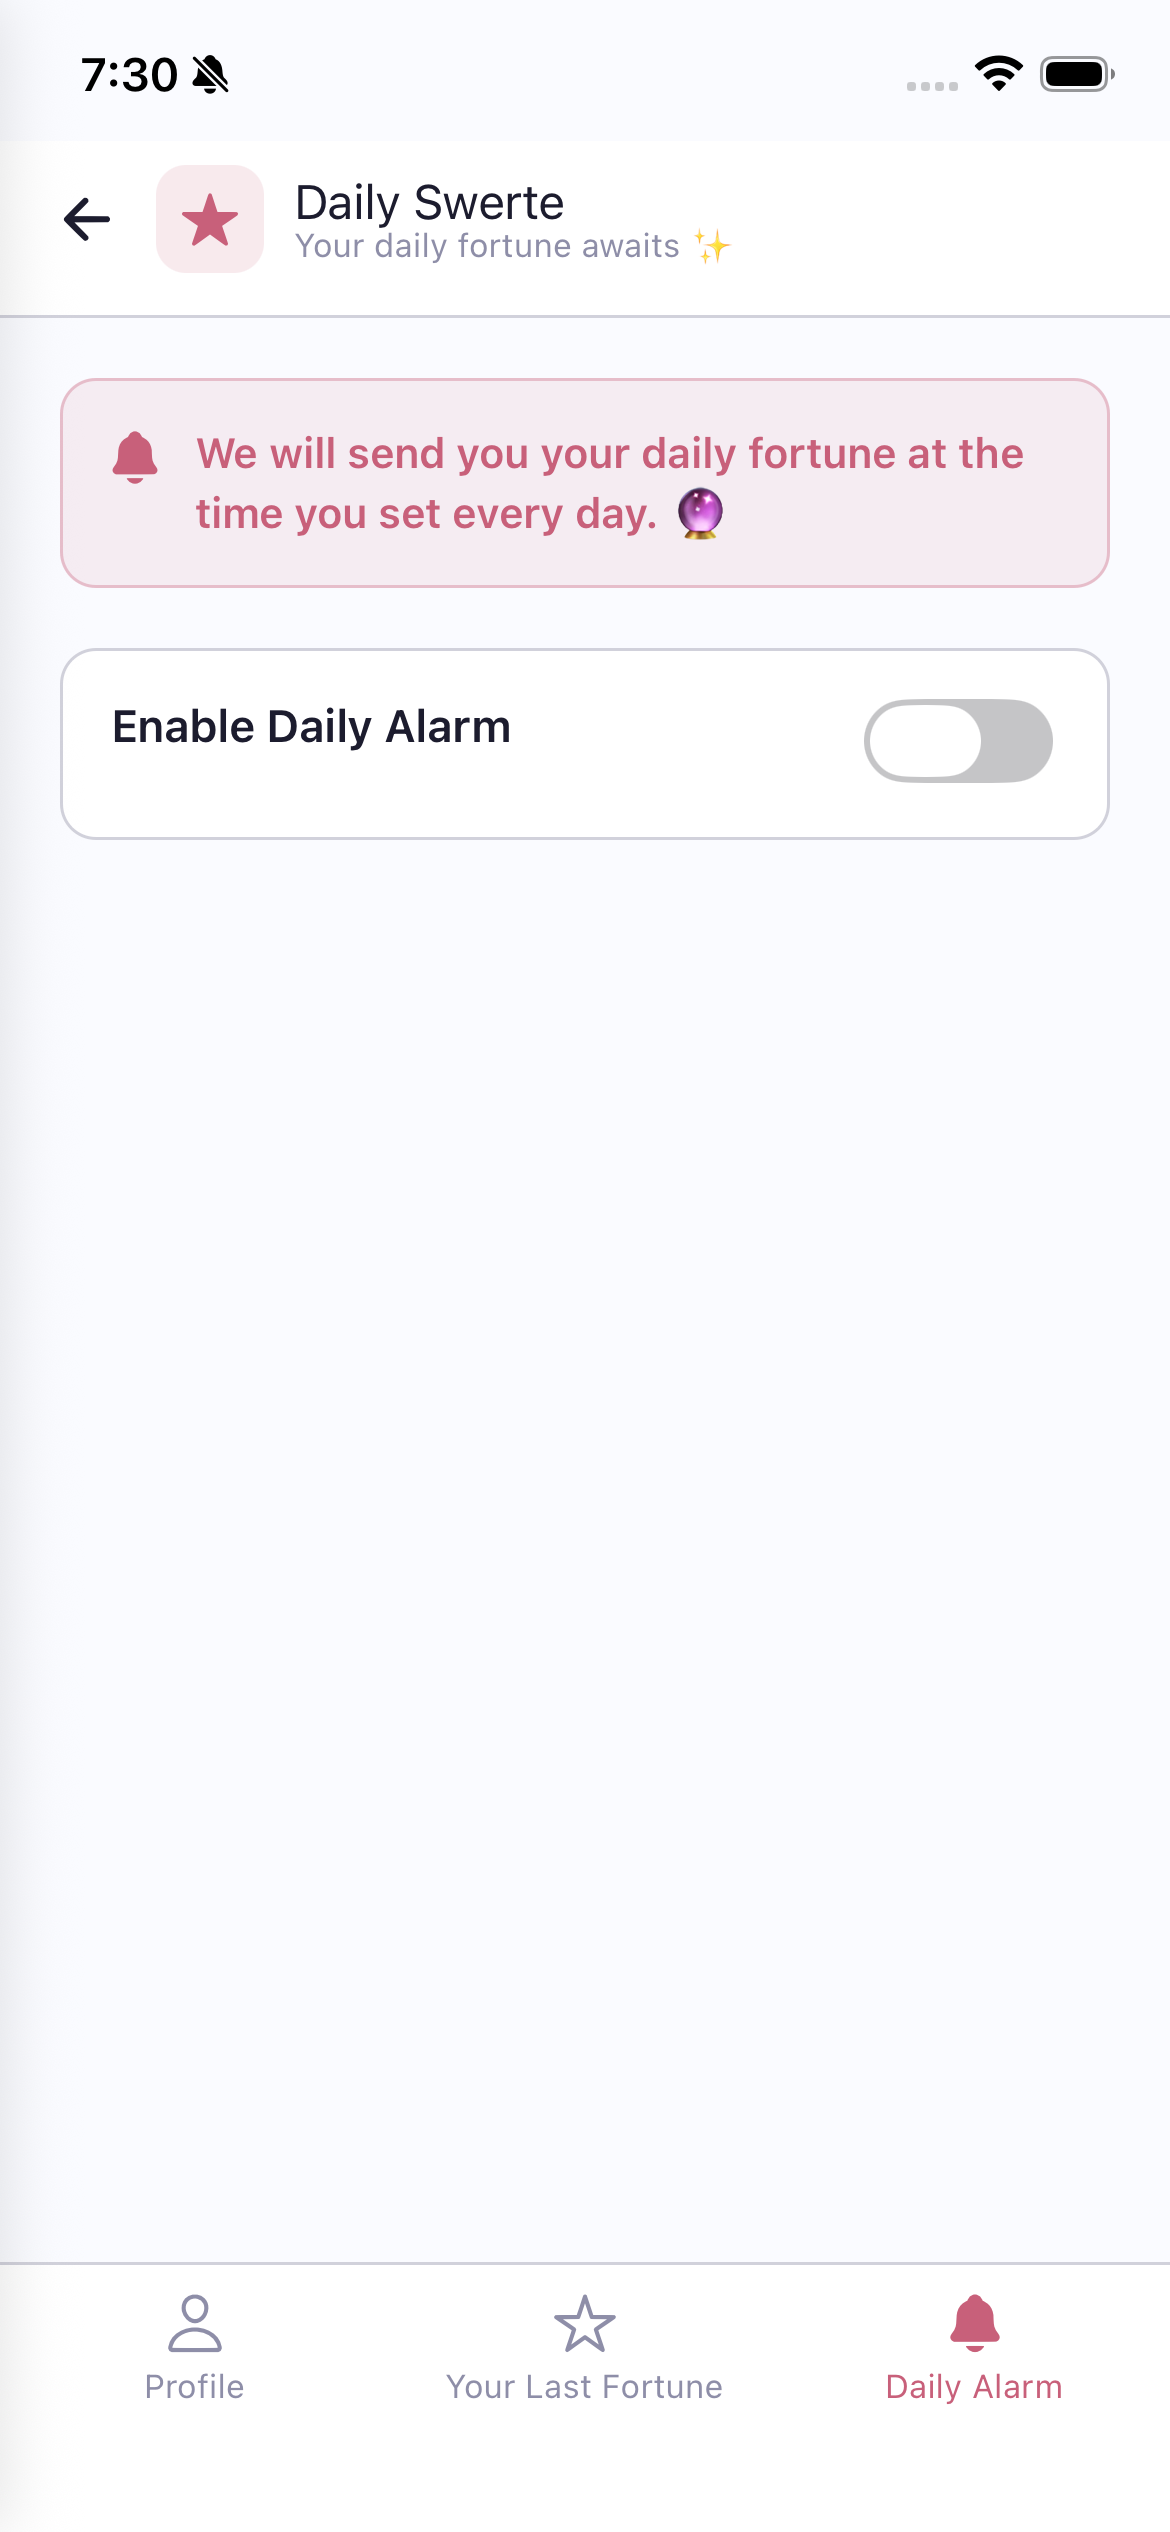
"Your daily fortune awaits" - Get personalized daily horoscope readings.
Kunin ang iyong personalized daily horoscope.
Kuhaa ang imong personalized daily horoscope.
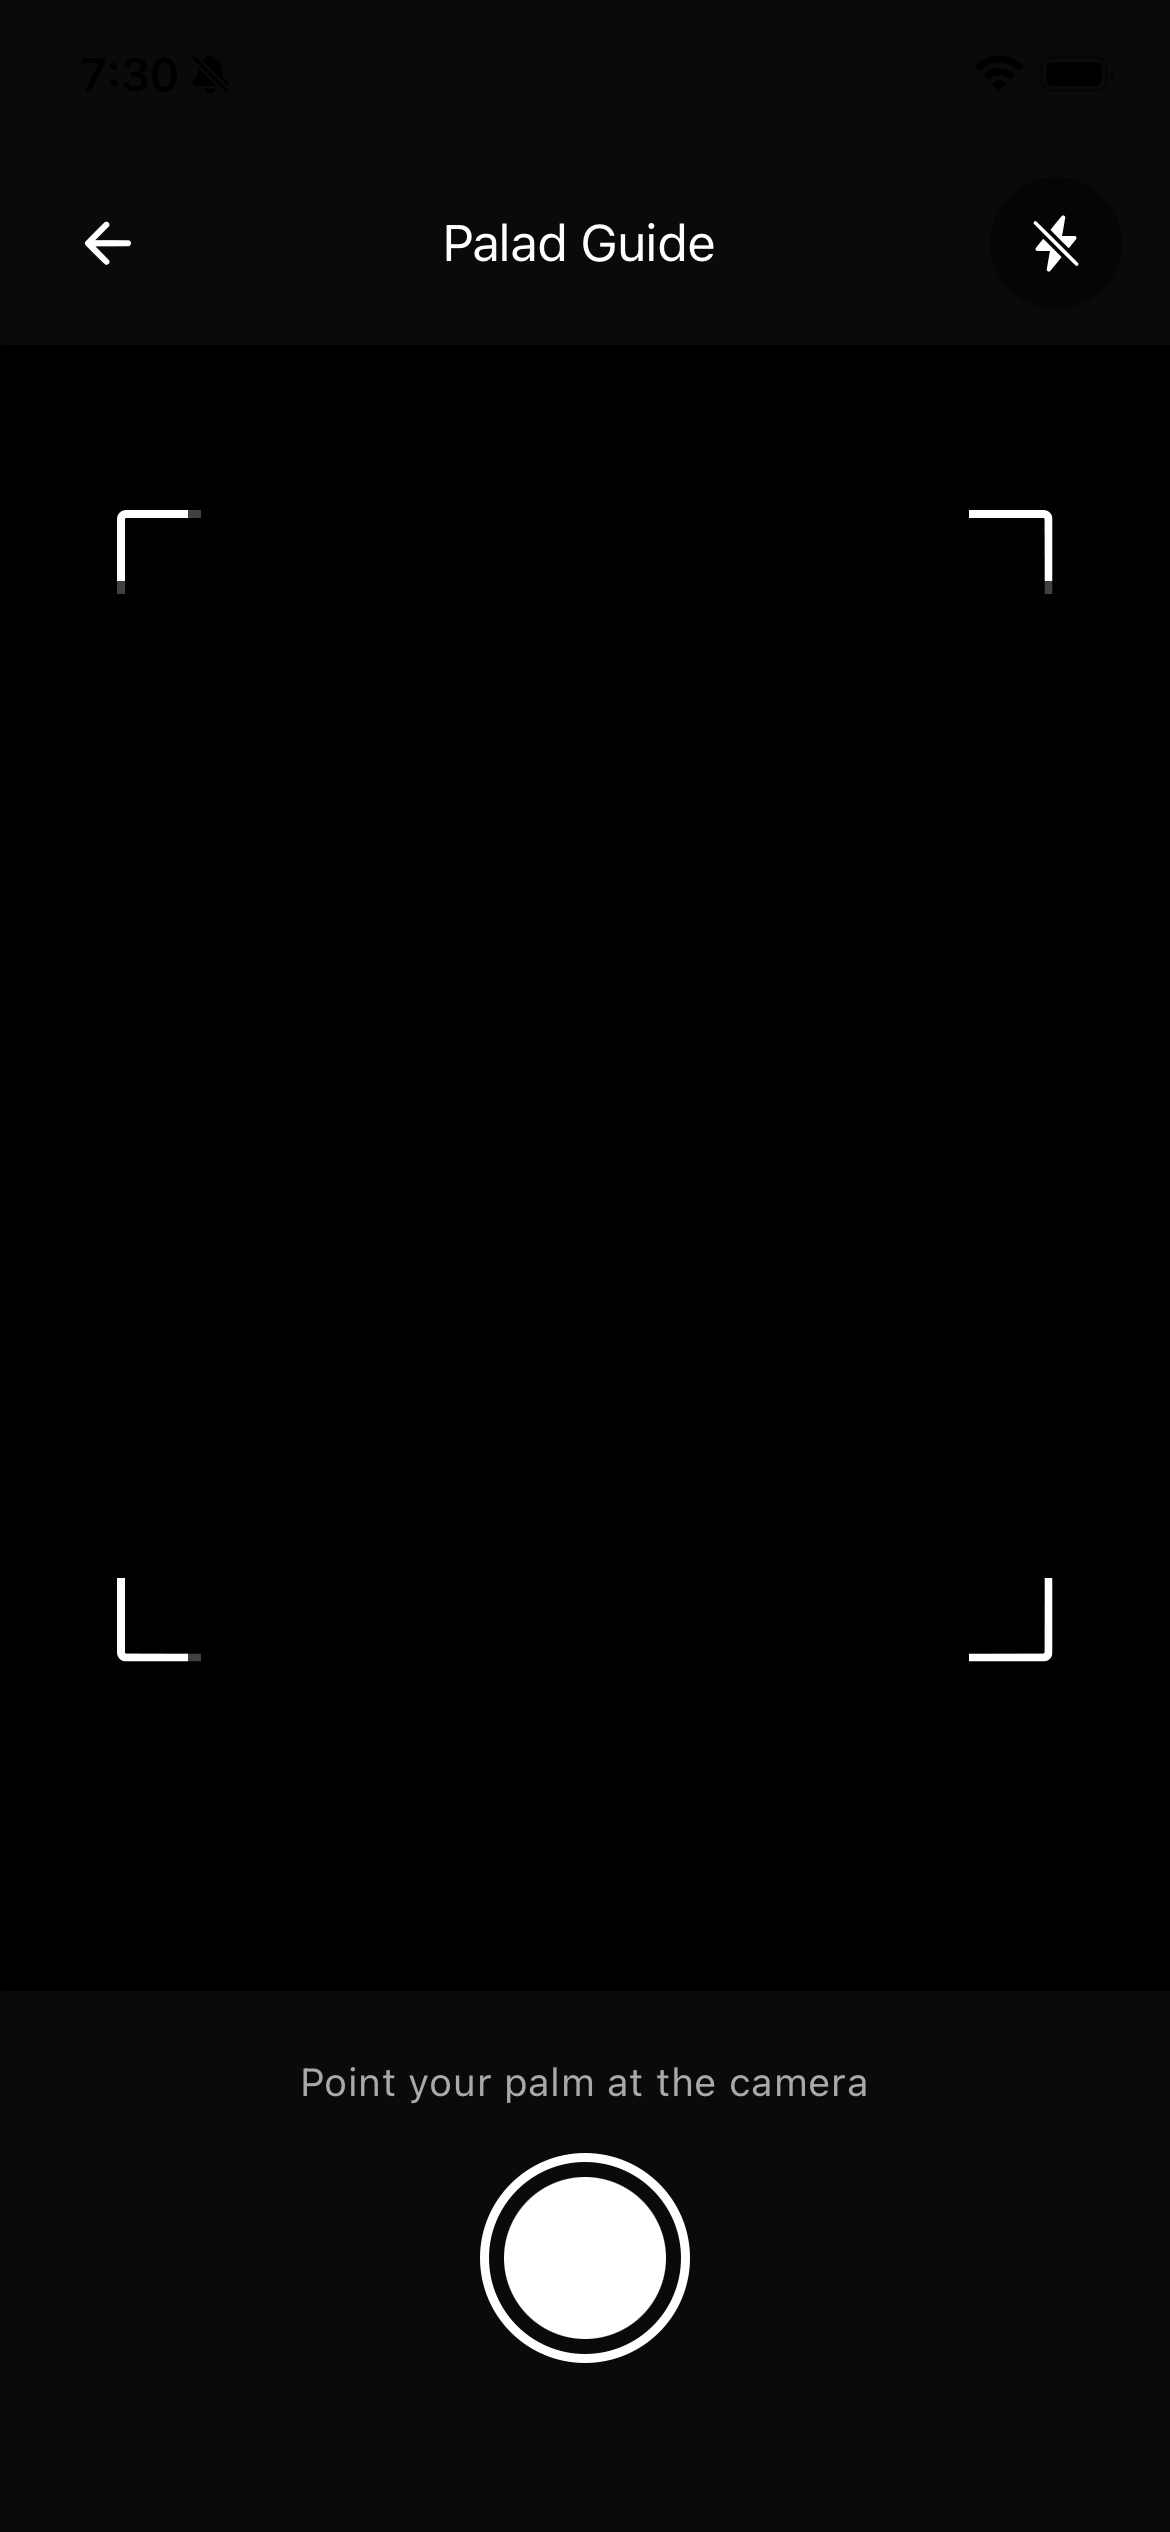
Get your palm read by AI! This fun feature uses your camera and AI to analyze your palm lines.
Note: This feature is limited to once per day. It uses AI (online) to analyze the palm image.
Magpa-palm reading gamit ang AI! I-point ang iyong palad sa camera at kumuha ng litrato.
Tandaan: Limitado sa isang beses bawat araw.
Pagpa-palm reading gamit ang AI! I-point ang imong palad sa camera ug pagkuha og litrato.
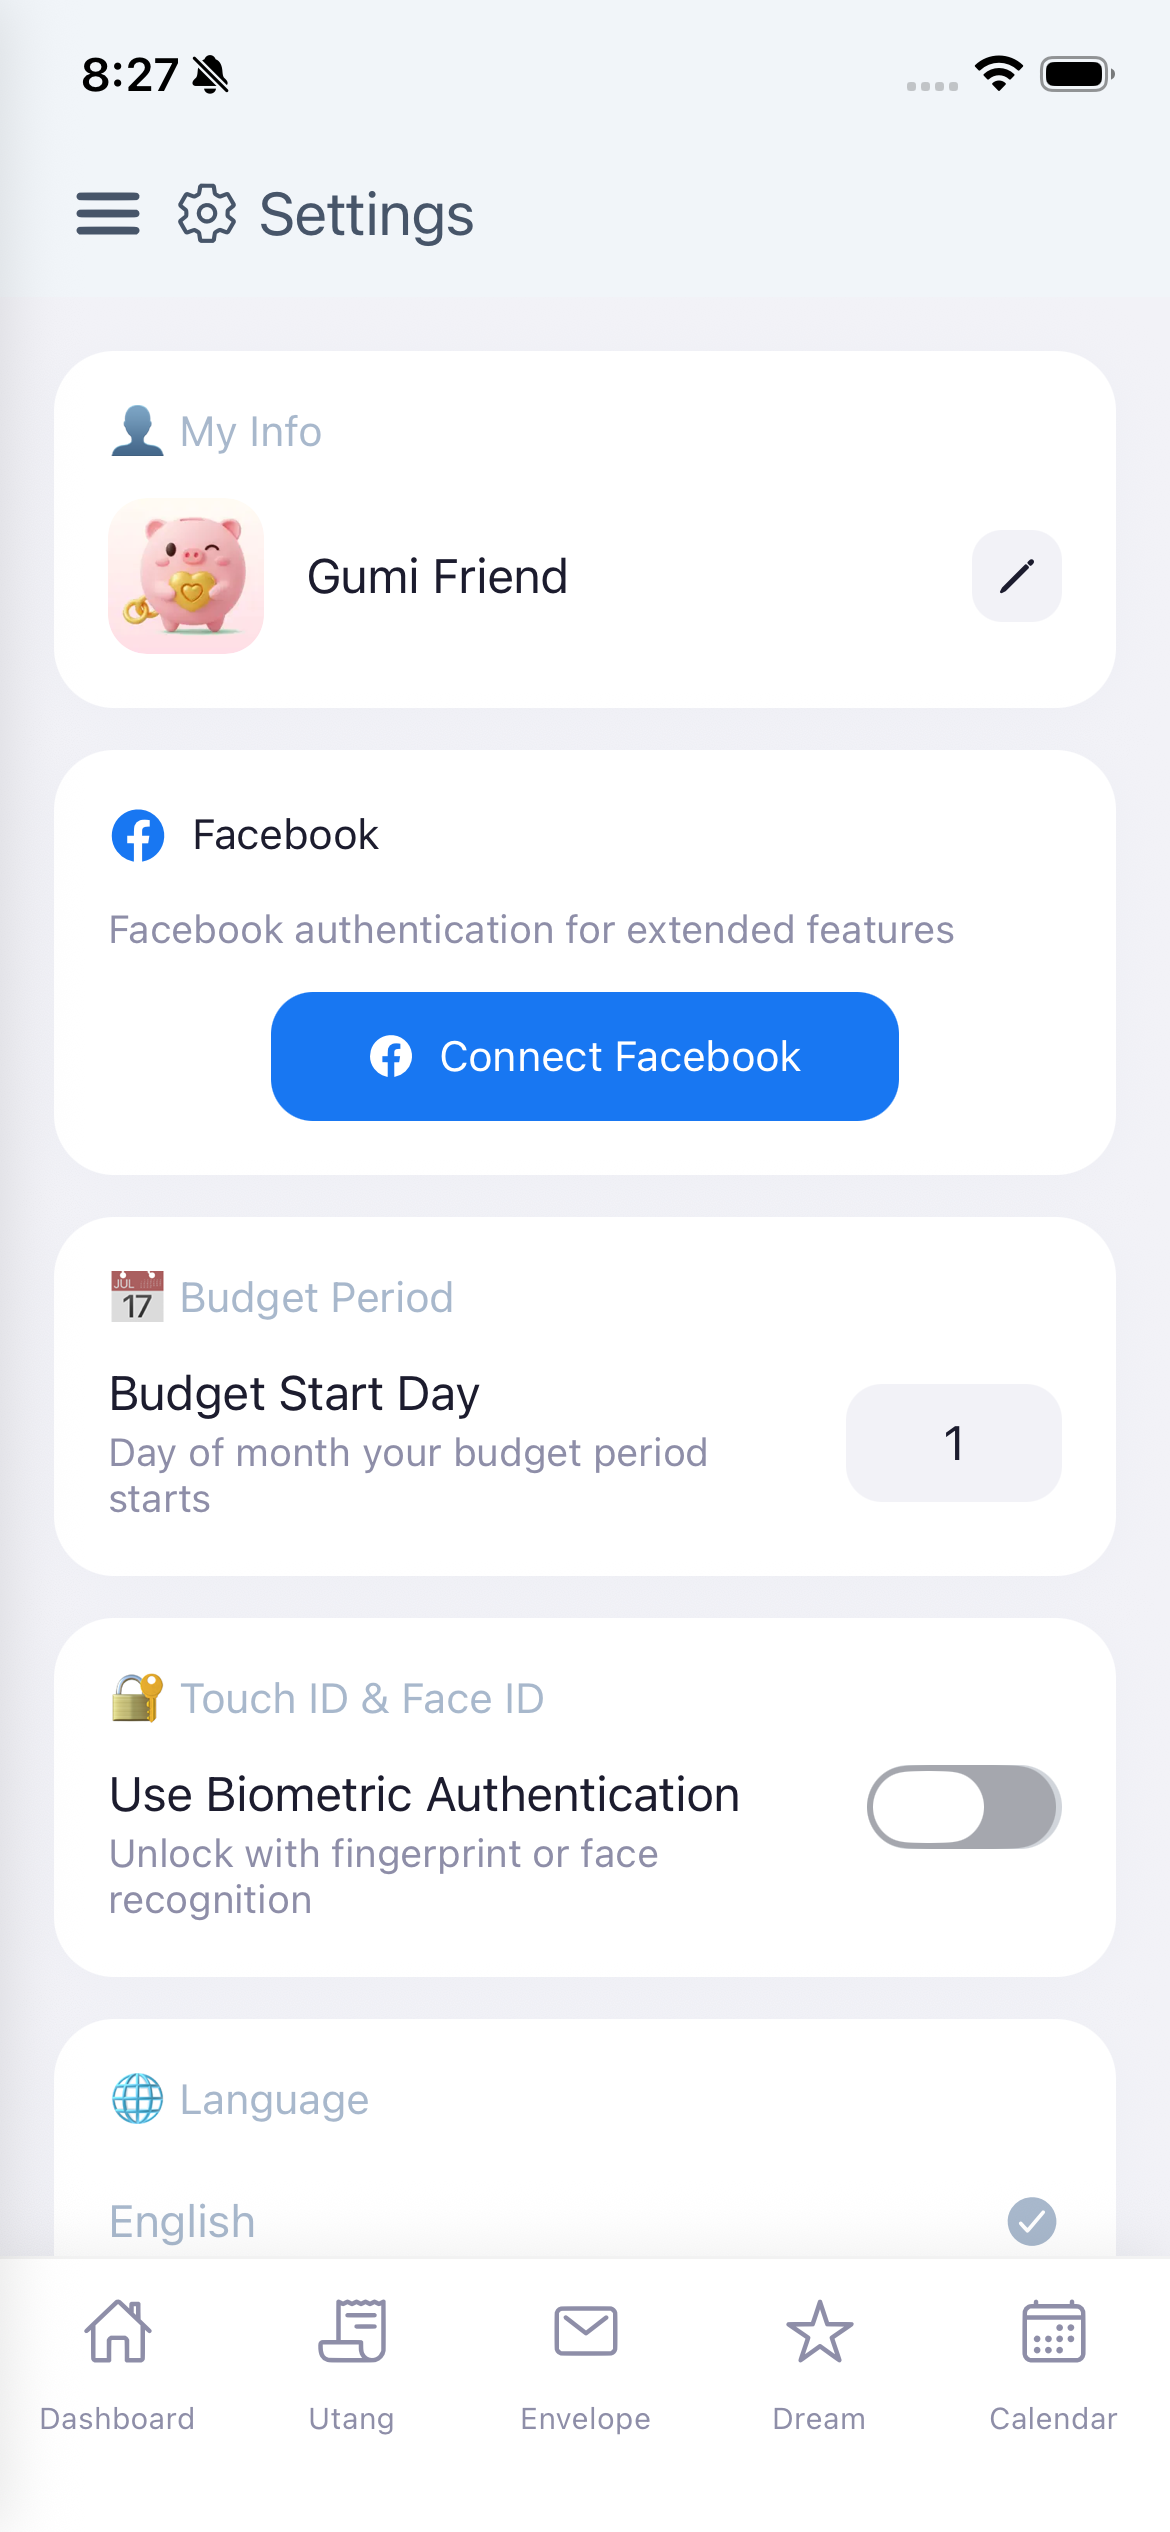
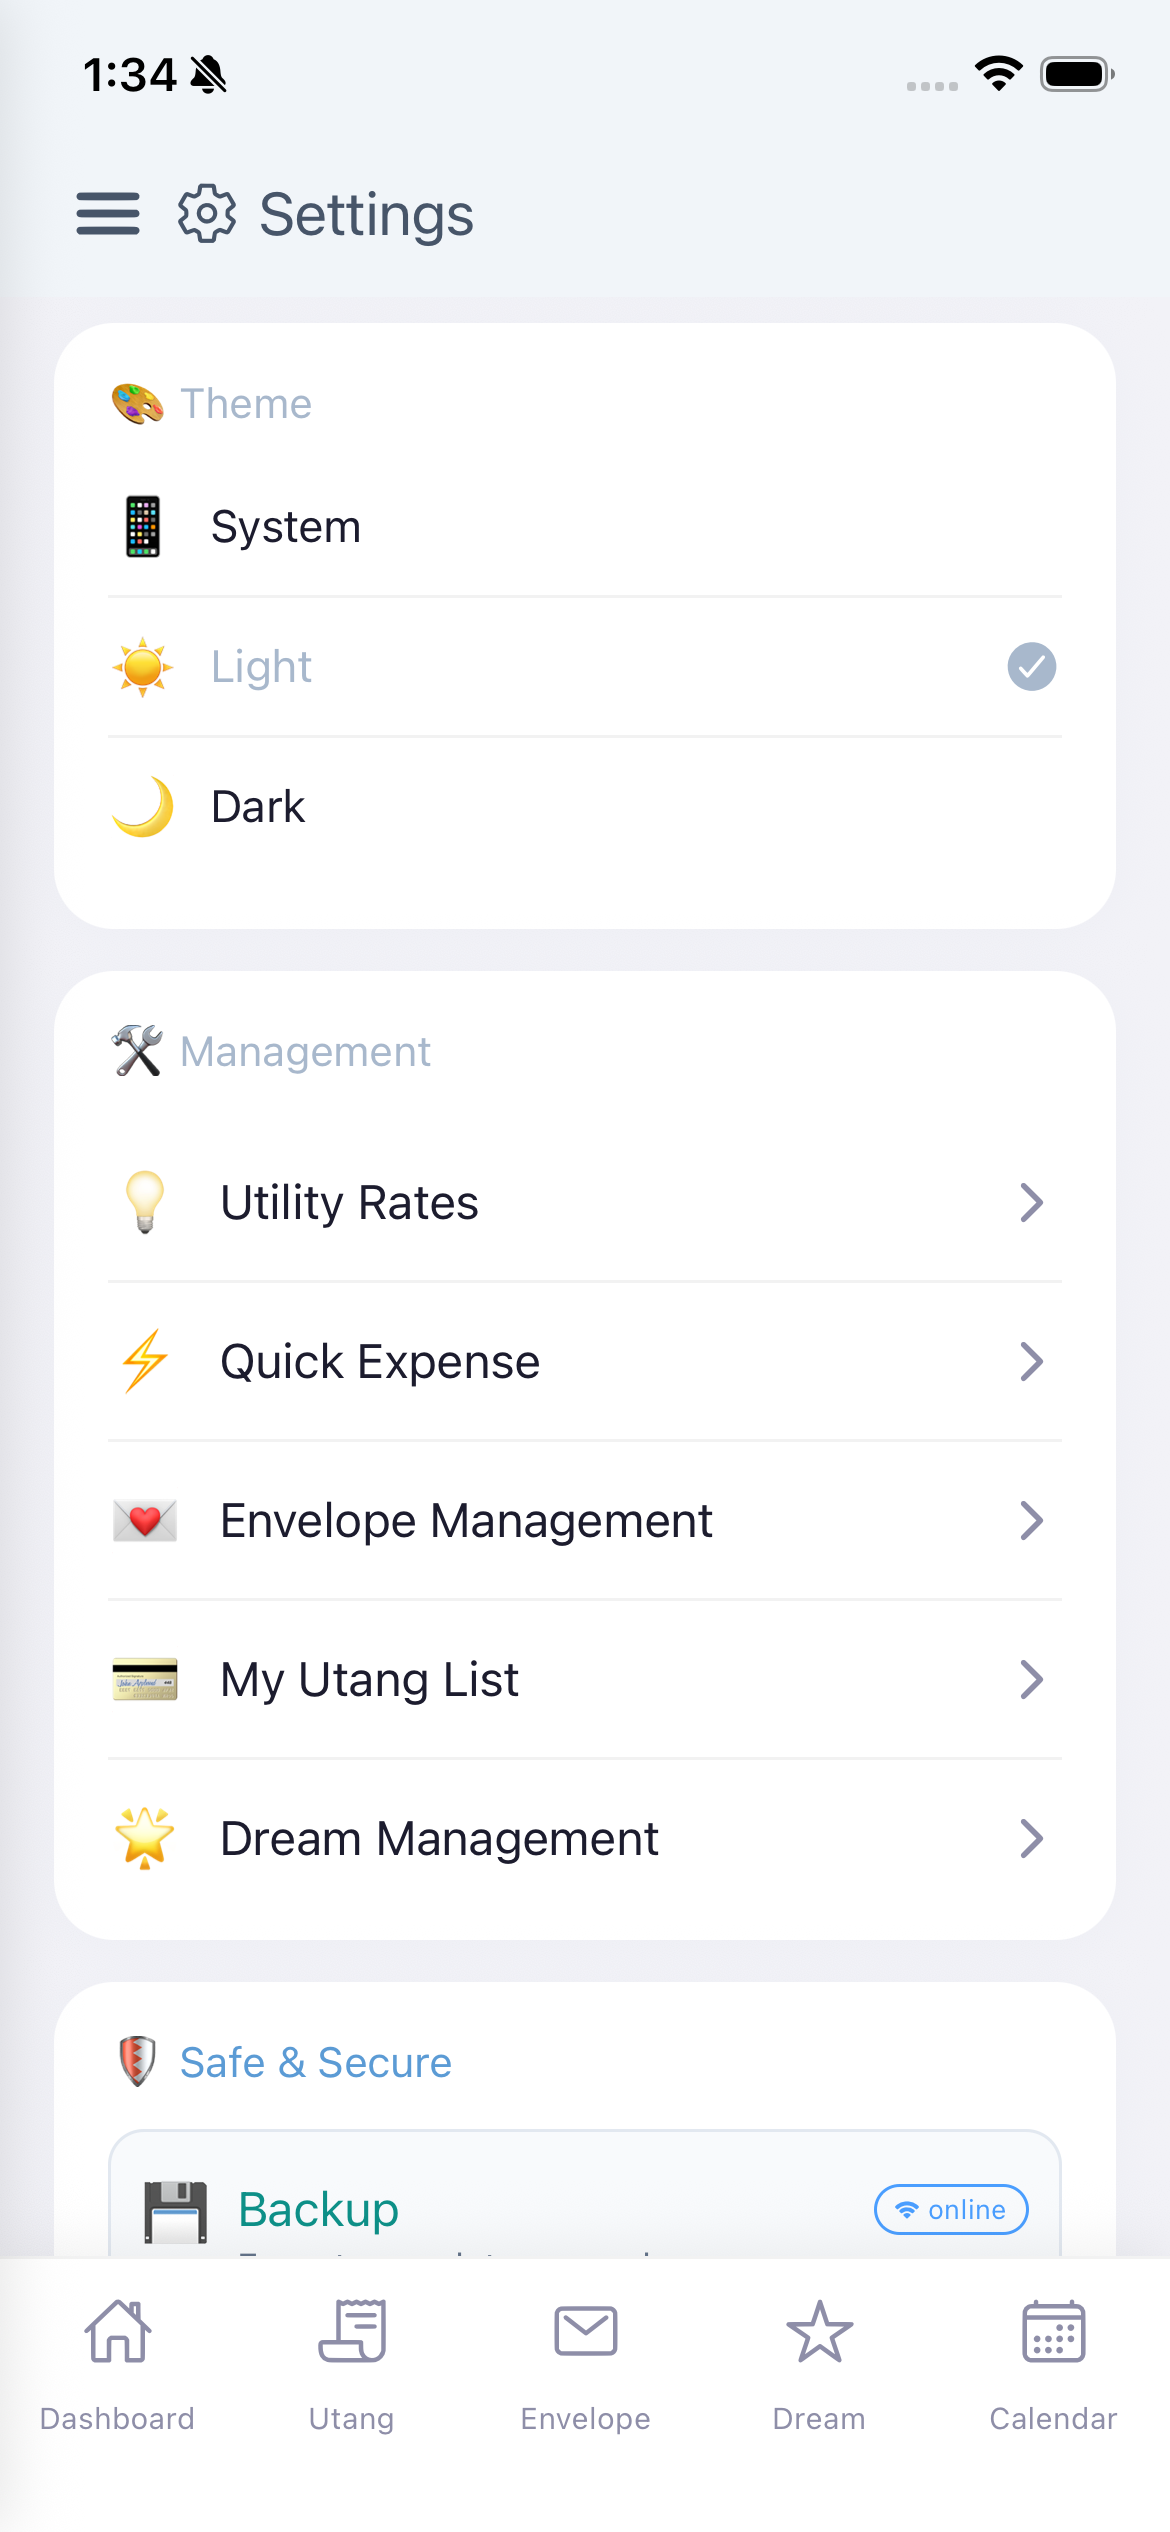
Mga section: Name, Budget Period, Touch/Face ID, Language, Theme, Management (Utility Rates, Quick Expense, Envelope, Utang, Dream), Safe & Secure.
Mga section: Name, Budget Period, Touch/Face ID, Language, Theme, Management (Utility Rates, Quick Expense, Envelope, Utang, Dream), Safe & Secure.
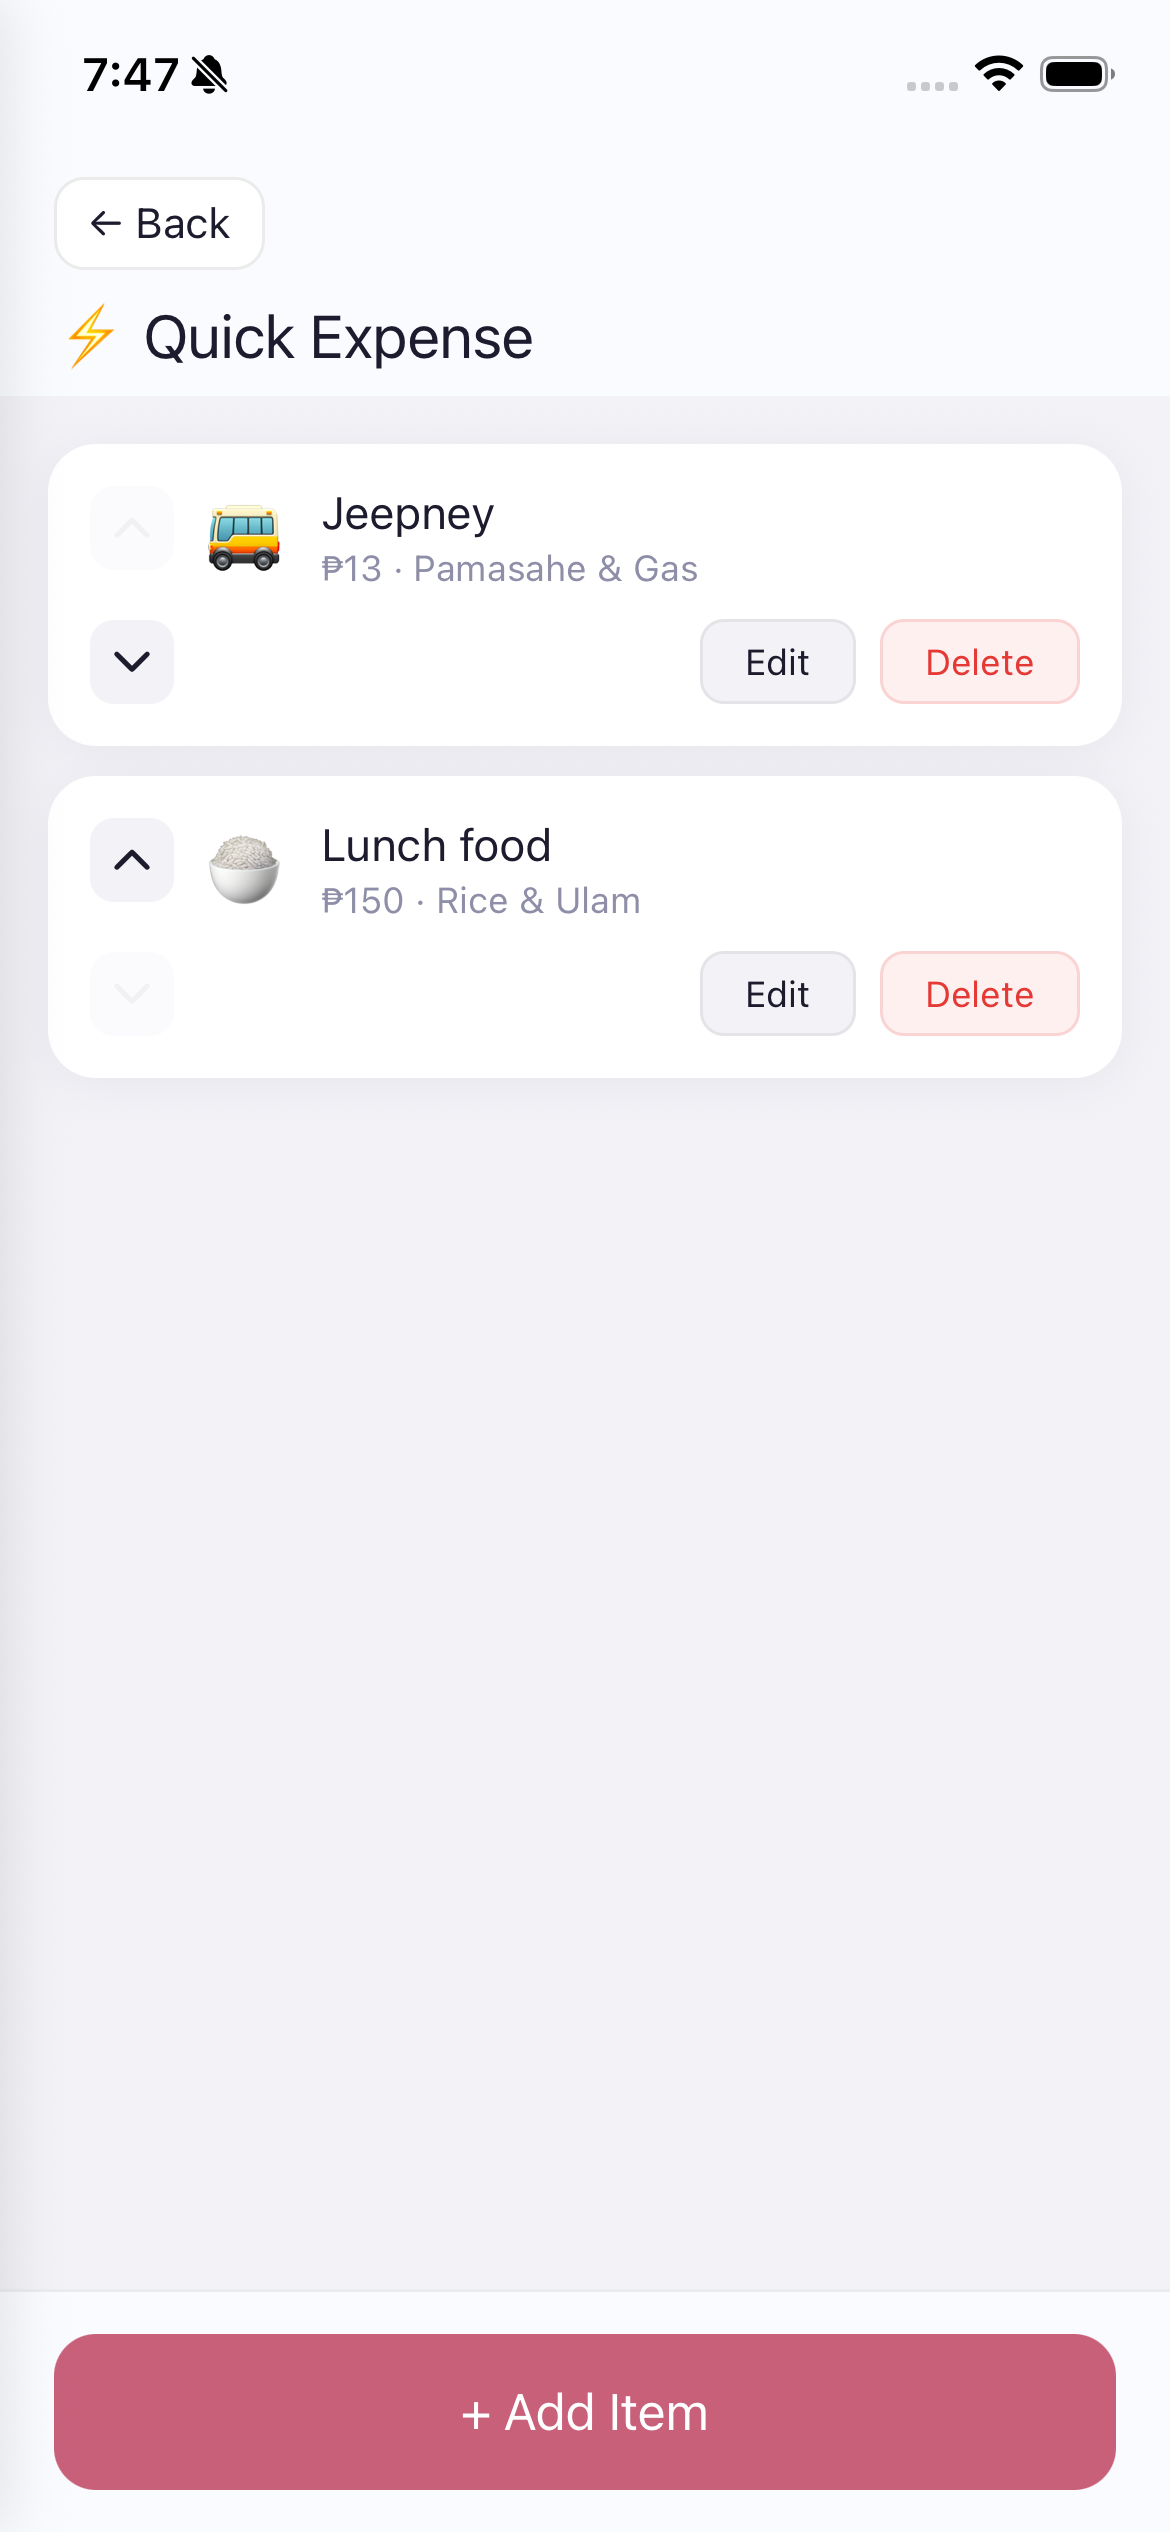
This is where you create and manage your Quick Expense shortcuts that appear on the Dashboard.
Usage Scenario: You ride a jeepney daily for P13. Set it up once. Every day, just tap "Jeepney P13" on the dashboard - done! No need to open the Add Expense form each time.
Dito ka gagawa at magma-manage ng Quick Expense shortcuts na lalabas sa Dashboard.
Dinhi ka maghimo ug mag-manage og Quick Expense shortcuts nga makita sa Dashboard.
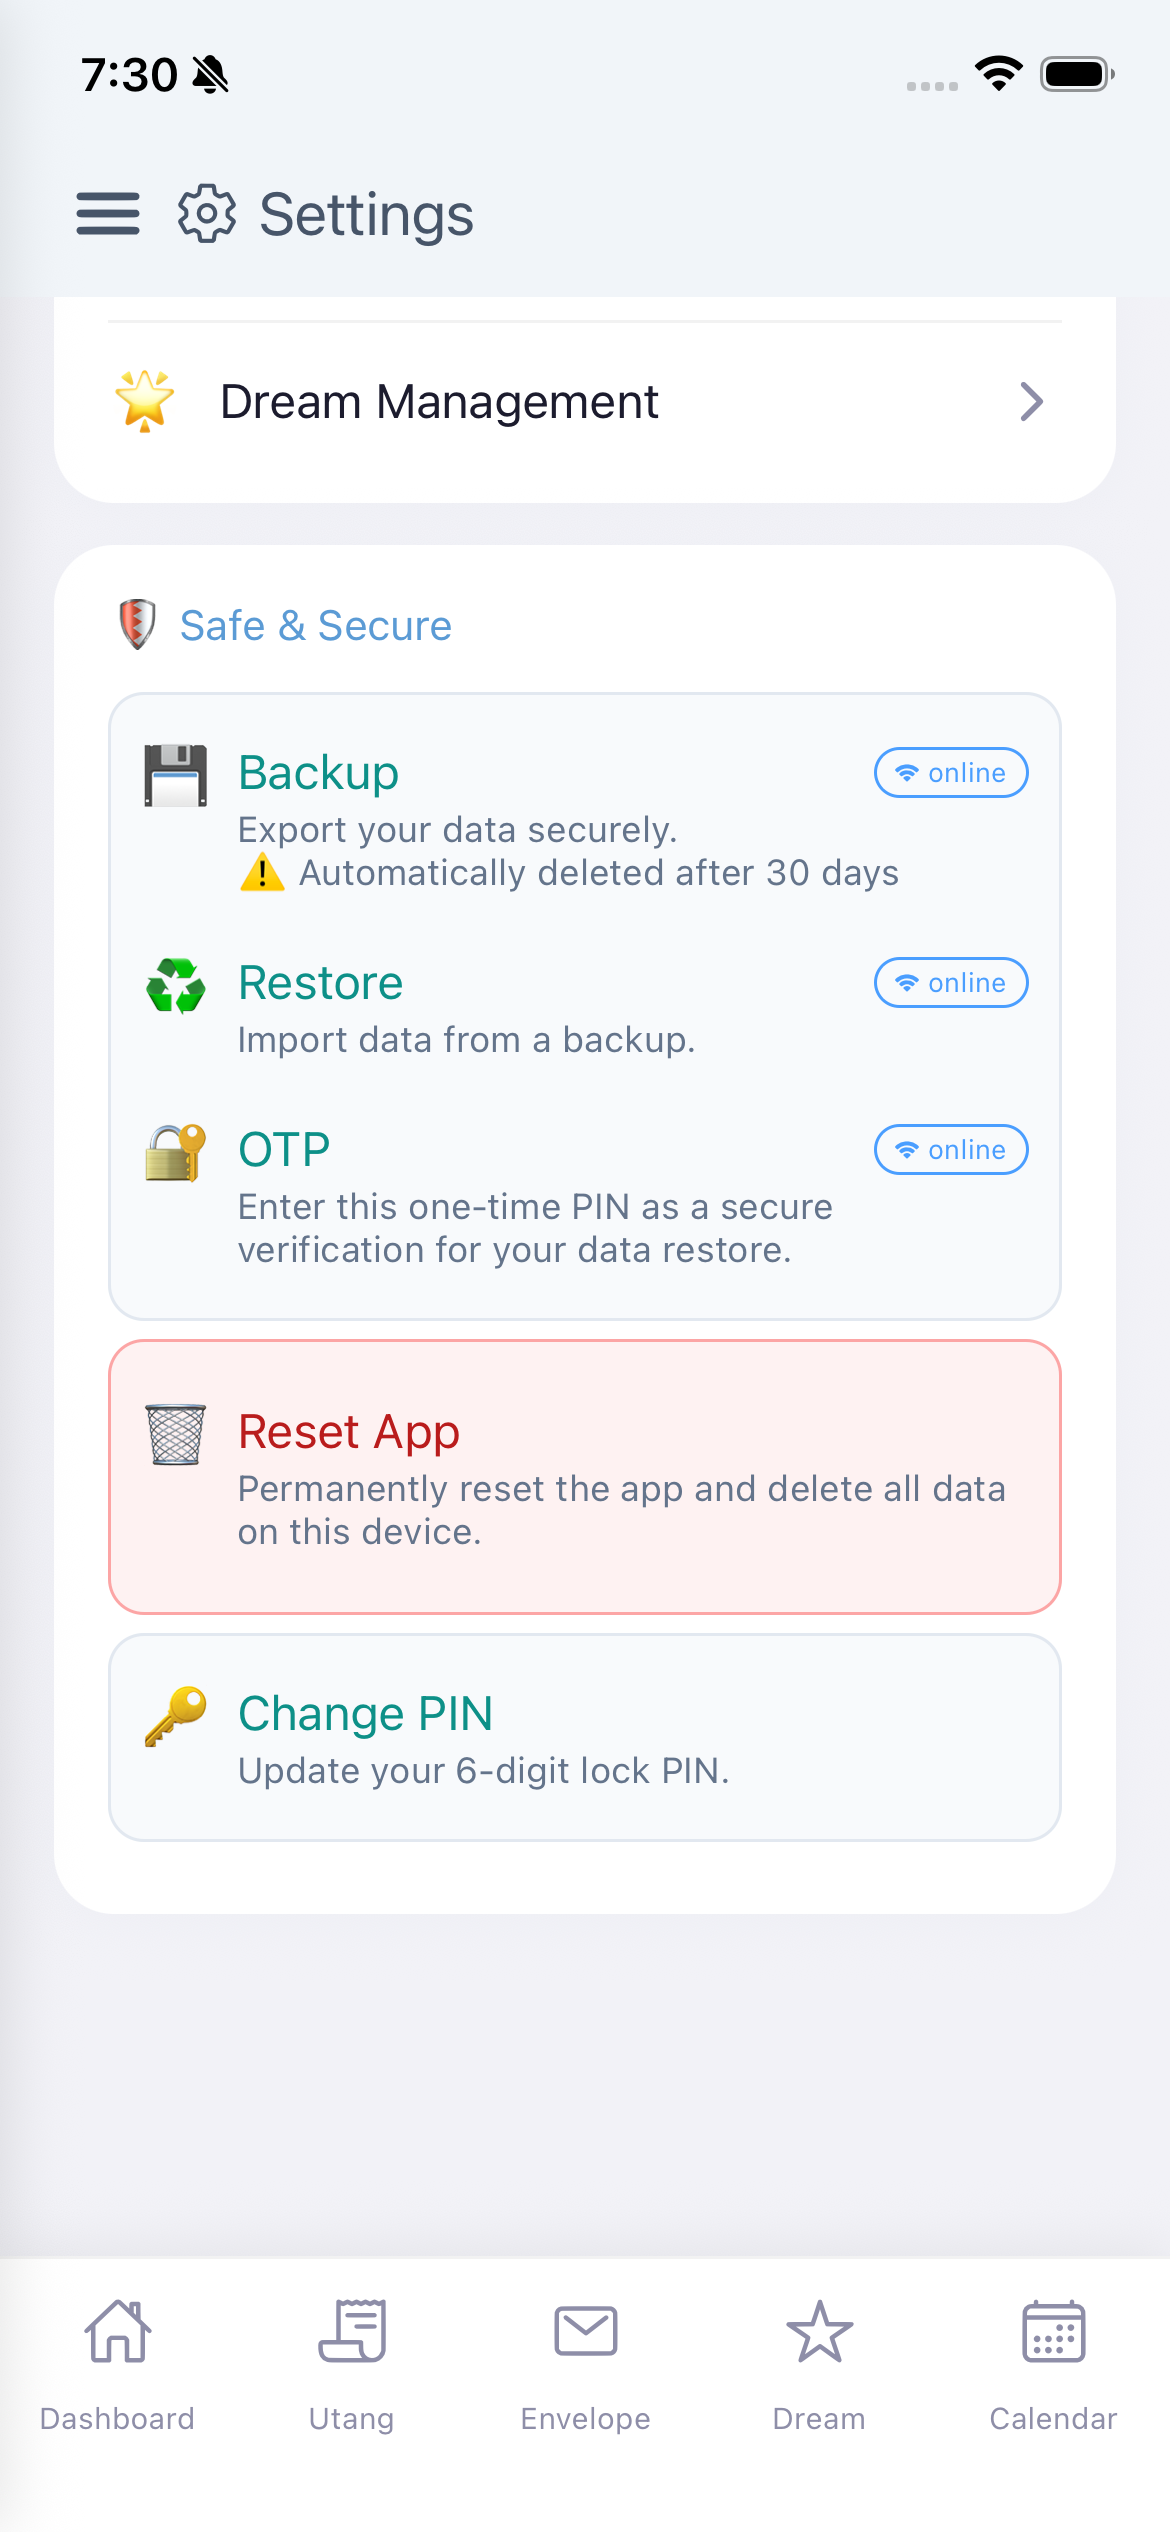
Export your data securely to the cloud.
Import data from a previously created backup.
A secure verification code needed for the data restore process.
Danger Zone! Permanently reset the app and delete ALL data on this device. This cannot be undone.
Update your 6-digit lock PIN.
Kasama ang Backup, Restore, OTP, Reset App, at Change PIN.
Mahalaga: Ang backup files ay awtomatikong nadi-delete pagkalipas ng 30 araw!
Kasama ang Backup, Restore, OTP, Reset App, ug Change PIN.
Importante: Ang backup files awtomatiko nga na-delete human sa 30 ka adlaw!
When you get a new phone and want to keep all your Gumi Save data, follow these steps carefully:
If your old device had Facebook connected, you must follow these steps in order after restoring:
Do NOT reconnect Facebook before resetting the old device. If you do, resetting the old device later will also remove your Facebook connection from the new device.
Kung ang lumang device mo ay nakakonekta sa Facebook, kailangan mong sundin ang mga hakbang na ito ayon sa pagkakasunod pagkatapos mag-restore:
HUWAG ikonekta muli ang Facebook bago i-reset ang lumang device. Kung gagawin mo ito, kapag ni-reset mo ang lumang device, matatanggal din ang Facebook connection mo sa bagong device.
Kung ang imong daang device nakakonekta sa Facebook, kinahanglan nimong sundon kini nga mga lakang sa husto nga pagkasunod pagkahuman sa restore:
AYAW ikonekta balik ang Facebook sa dili pa i-reset ang daang device. Kung buhaton nimo kini, kung i-reset nimo ang daang device sa ulahi, mawala usab ang imong Facebook connection sa bag-ong device.
Facebook Connect lets you link your Facebook account to Gumi Save. This is not the same as logging in — Gumi Save does not use Facebook as a login method. Your app PIN and local data work exactly the same whether or not you connect Facebook. It's simply a way to verify your Facebook identity so you can use extended features.
Connecting your Facebook account unlocks features that involve your Facebook network:
We only get your name and email — nothing else. We will never post anything on your Facebook. Ever.
When you tap "Connect Facebook" in Settings, the app first checks whether you have already agreed to the latest Terms of Service and Privacy Policy. If you haven't, an "Agreement Required" popup will appear before proceeding.
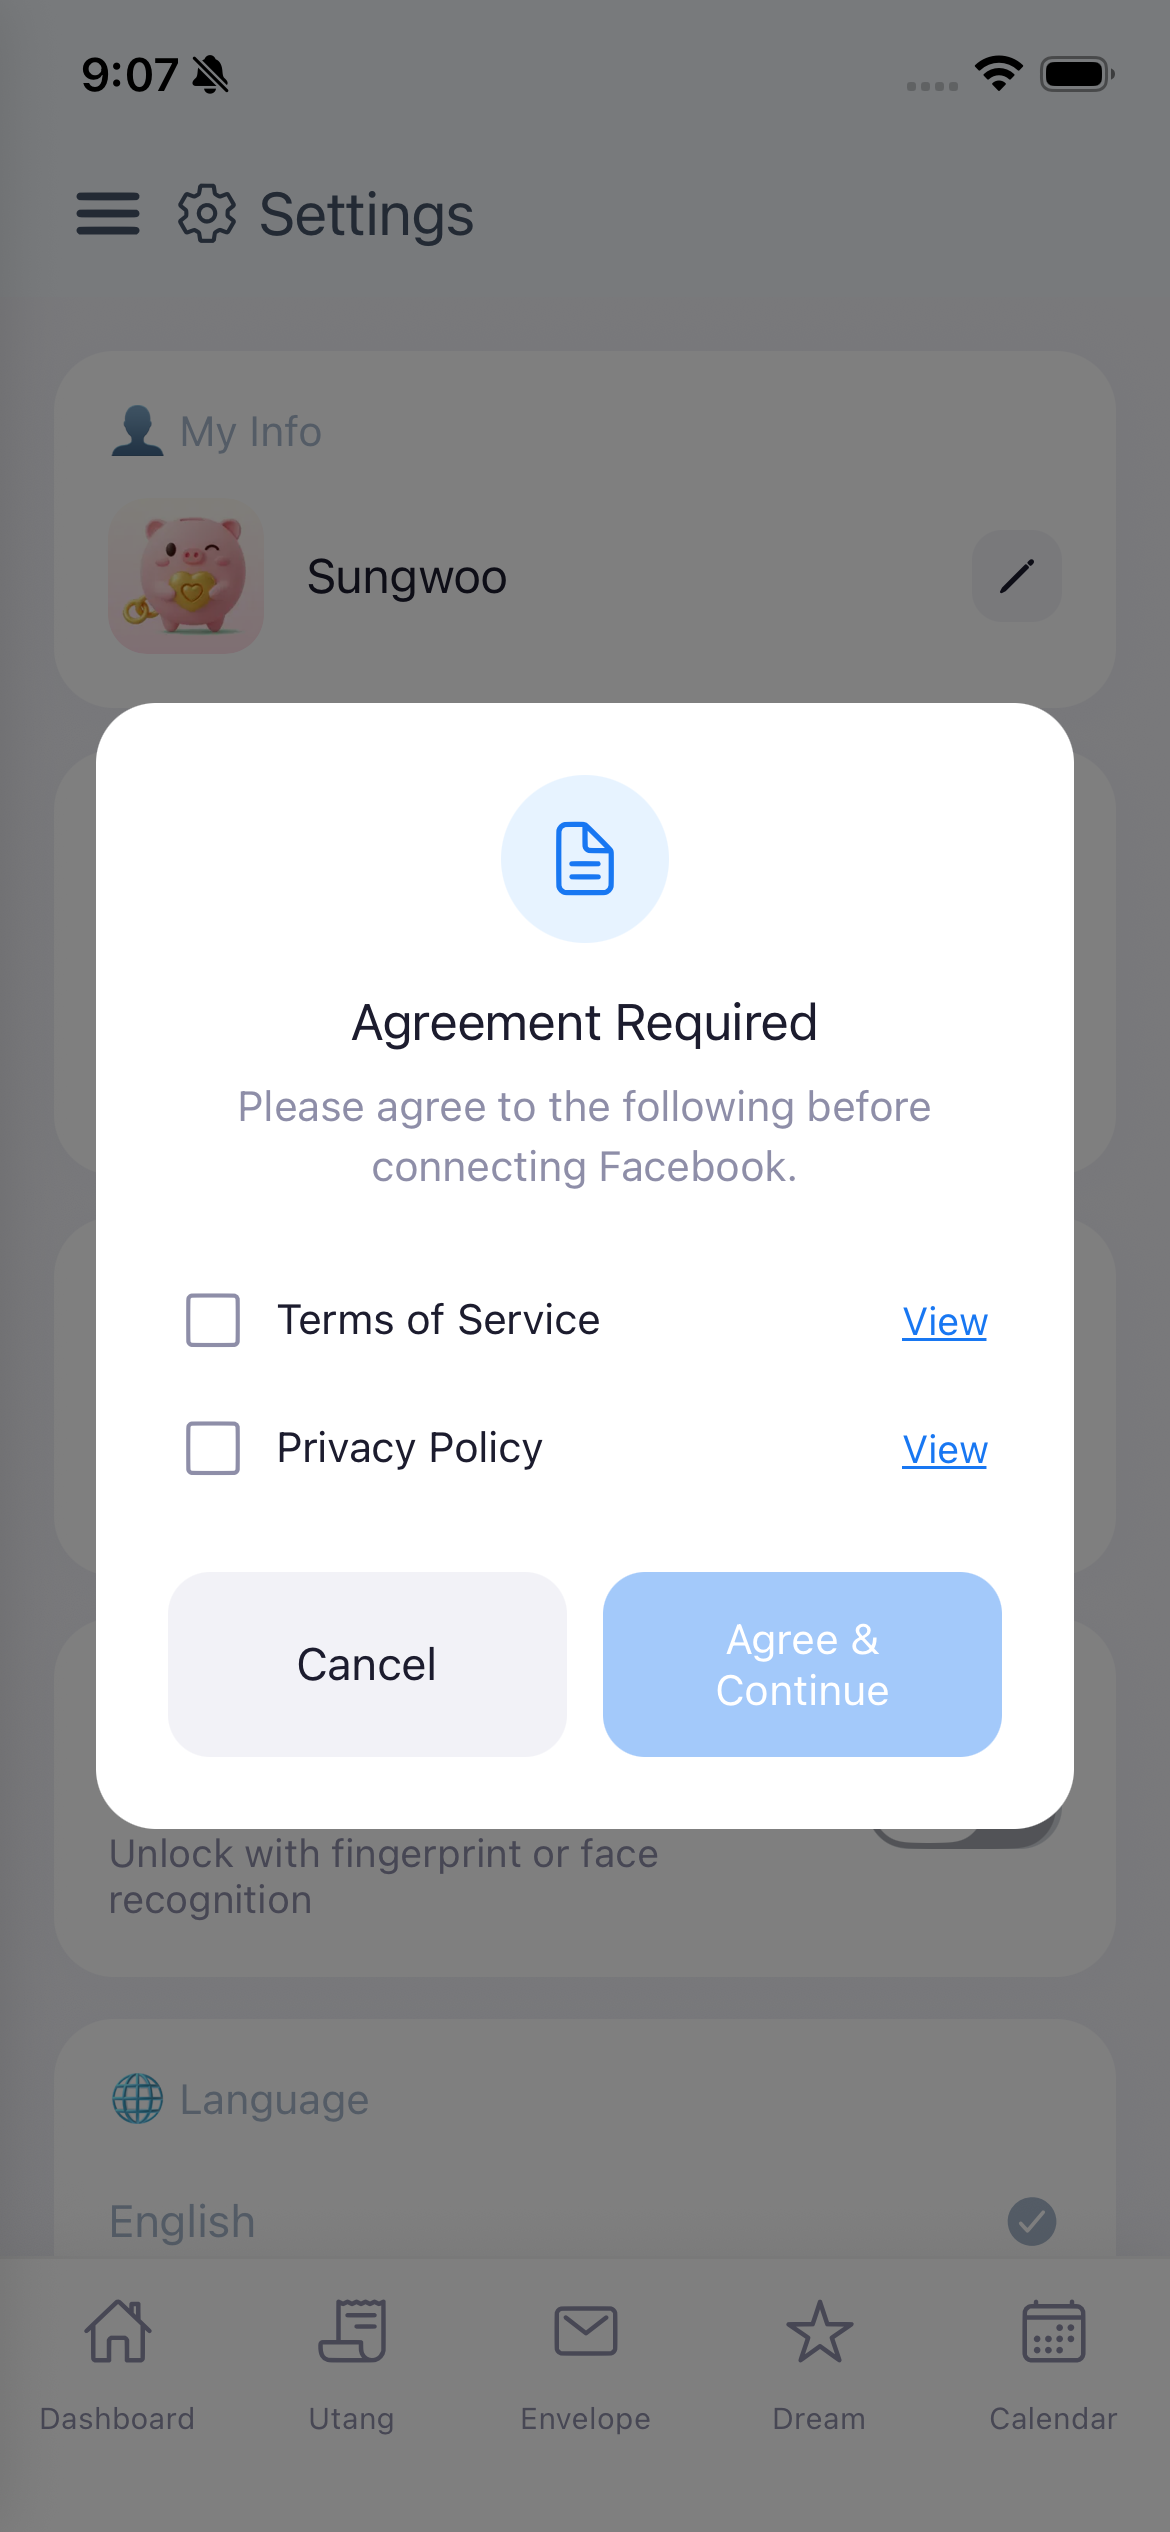
What happens in the popup:
What happens after you agree:
When you connect Facebook, the following information is stored in our secure authentication system:
That's it. None of your financial data (envelopes, transactions, utang, dreams) is sent to Facebook or stored differently because of the connection.
You can disconnect Facebook anytime from the Settings screen. When you do:
If you go to Facebook > Settings > Apps and Websites and remove Gumi Save from there, we automatically receive a notification from Facebook and delete all your Facebook info from our server. Same result — your app data stays safe.
If you use the "Reset App" option in Safe & Secure, it automatically disconnects Facebook and deletes all your local data as well. This action cannot be undone.
Ang Facebook Connect ay nagbibigay-daan sa iyo na i-link ang iyong Facebook account sa Gumi Save. Hindi ito login — hindi ginagamit ng Gumi Save ang Facebook bilang paraan ng pag-login. Ang iyong app PIN at lokal na datos ay gumagana nang eksakto pareho kahit naka-connect o hindi ang Facebook. Ito ay simpleng paraan para ma-verify ang iyong Facebook identity para magamit mo ang mga extended features.
Ang pagkokonekta ng iyong Facebook account ay nagbubukas ng mga feature na may kinalaman sa iyong Facebook network:
Ang kinukuha lang namin ay ang iyong pangalan at email — wala nang iba. Hindi kami kailanman magpo-post ng kahit ano sa iyong Facebook. Kailanman.
Kapag pinindot mo ang "Connect Facebook" sa Settings, titingnan muna ng app kung sumang-ayon ka na sa pinakabagong Terms of Service at Privacy Policy. Kung hindi pa, may lalabas na "Agreement Required" popup bago magpatuloy.
Ano ang mangyayari sa popup:
Ano ang mangyayari pagkatapos mong sumang-ayon:
Kapag nag-connect ka ng Facebook, ang mga sumusunod na impormasyon ay naka-store sa aming secure authentication system:
Iyon lang. Wala sa iyong financial data (envelopes, transactions, utang, dreams) ang ipinapadala sa Facebook o sine-save nang iba dahil sa connection.
Maaari mong i-disconnect ang Facebook anumang oras mula sa Settings screen. Kapag ginawa mo ito:
Kung pupunta ka sa Facebook > Settings > Apps and Websites at aalisin mo ang Gumi Save doon, awtomatiko kaming makakatanggap ng notification mula sa Facebook at tatanggalin lahat ng iyong Facebook info sa aming server. Pareho lang ang resulta — safe pa rin ang iyong app data.
Kung gagamitin mo ang "Reset App" option sa Safe & Secure, awtomatiko nitong nagdi-disconnect ng Facebook at nagde-delete ng lahat ng iyong lokal na datos. Hindi na ito maaaring i-undo.
Ang Facebook Connect nagtugot nimo nga i-link ang imong Facebook account sa Gumi Save. Dili kini login — dili gigamit sa Gumi Save ang Facebook isip paagi sa pag-login. Ang imong app PIN ug lokal nga datos mogana sa parehas nga paagi bisan naka-connect o wala ang Facebook. Kini simpleng paagi para ma-verify ang imong Facebook identity para magamit nimo ang mga extended features.
Ang pagkonekta sa imong Facebook account nag-abli sa mga feature nga may kalabutan sa imong Facebook network:
Ang imong ngalan ug email ra ang among gikuha — wala nay lain. Dili gayud kami mag-post og bisan unsa sa imong Facebook. Dili gayud.
Kung mopindot ka sa "Connect Facebook" sa Settings, susihon una sa app kung miuyon ka na sa pinakabag-o nga Terms of Service ug Privacy Policy. Kung wala pa, mogawas ang "Agreement Required" popup sa dili pa mopadayon.
Unsa ang mahitabo sa popup:
Unsa ang mahitabo pagkahuman nimo mouyon:
Kung mag-connect ka og Facebook, ang mosunod nga impormasyon naka-store sa among secure authentication system:
Mao ra na. Wala sa imong financial data (envelopes, transactions, utang, dreams) ang gipadala sa Facebook o gisave nga lahi tungod sa connection.
Mahimo nimong i-disconnect ang Facebook bisan unsang oras gikan sa Settings screen. Kung buhaton nimo kini:
Kung moadto ka sa Facebook > Settings > Apps and Websites ug tangtangon ang Gumi Save didto, awtomatiko kaming makadawat og notification gikan sa Facebook ug wagtangon tanan nimong Facebook info sa among server. Parehas ra ang resulta — safe gihapon ang imong app data.
Kung gamiton nimo ang "Reset App" option sa Safe & Secure, awtomatiko kining mag-disconnect sa Facebook ug magwagtang sa tanan nimong lokal nga datos. Dili na kini ma-undo.
Gumi Save offers 3 types of home screen widgets so you can access key features without even opening the app. Add them to your phone's home screen for instant access!
All widgets feature a semi-transparent Gumi avatar in the background and automatically sync with your app data. The widgets update whenever you add transactions, modify envelopes, or change your dashboard settings.
Nag-aalok ang Gumi Save ng 3 uri ng home screen widget para ma-access ang mga pangunahing feature nang hindi binubuksan ang app.
Lahat ng widget ay may semi-transparent na Gumi avatar sa background at awtomatikong nag-sync sa data ng iyong app.
Nag-offer ang Gumi Save og 3 ka klase sa home screen widget para ma-access ang mga nag-una nga feature nga dili na mag-abli sa app.
Tanan nga widget adunay semi-transparent nga Gumi avatar sa background ug awtomatiko nga nag-sync sa data sa imong app.

| Widget | Size | Action |
|---|---|---|
| Envelopes Widget | Large (4x2) | Shows your dashboard envelopes with remaining budget at a glance. Tap to open the app. Displays up to 4 envelope rows with icon, name, and remaining amount. |
| Add Expense Widget | Small (2x2) | Opens the Add Expense form directly. Shows today's total spending amount in real time. |
| Scan Receipt Widget | Small (2x2) | Opens the Scan Receipt camera directly. Also shows today's total spending. online |
The Envelopes Widget gives you a real-time view of your budget envelopes directly on your home screen.
Note: The envelopes shown are the ones you've pinned to your Dashboard. To change which envelopes appear, go to Dashboard and manage your envelope display settings.
Ang Envelopes Widget ay nagbibigay ng real-time na view ng iyong mga budget envelope sa iyong home screen.
Paalala: Ang mga envelope na ipinapakita ay ang mga naka-pin sa iyong Dashboard.
Ang Envelopes Widget naghatag og real-time nga view sa imong mga budget envelope sa imong home screen.
Pahinumdom: Ang mga envelope nga gipakita mao ang mga naka-pin sa imong Dashboard.
A compact widget designed for the fastest possible expense recording.
Tip: Place this widget on your main home screen for the fastest expense tracking - record a purchase in seconds right after you make it!
Isang compact na widget na dinisenyo para sa pinakamabilis na pag-record ng gastos.
Usa ka compact nga widget nga gidisenyo para sa pinakadali nga pag-record sa gastos.
Quick access to the AI-powered receipt scanner right from your home screen.
Note: This widget requires an internet connection to process scanned receipts, as it uses AI to extract transaction details. online
Mabilis na access sa AI-powered receipt scanner mula sa iyong home screen.
Paalala: Kailangan ng internet connection para ma-process ang mga scanned receipt. online
Dali nga access sa AI-powered receipt scanner gikan sa imong home screen.
Pahinumdom: Kinahanglan og internet connection para ma-process ang mga scanned receipt. online
Widgets automatically update whenever you make changes in the app (add transactions, modify envelopes, etc.). The sync happens within a few seconds after any change. If a widget appears outdated, simply open the Gumi Save app once to trigger a refresh.
Ang mga widget ay awtomatikong nag-a-update kapag may ginawang pagbabago sa app. Kung mukhang luma ang widget, buksan lang ang Gumi Save app para ma-refresh.
Ang mga widget awtomatiko nga nag-update kung adunay gihimo nga pagbag-o sa app. Kung morag daan ang widget, ablahi lang ang Gumi Save app para ma-refresh.
Tip: Place the small Add Expense widget right on your main home screen for the fastest expense tracking experience!
Gumi Save is designed to work without an internet connection for all core features. Your financial data (transactions, envelopes, utang, dreams, calendar) is stored locally on your device and does NOT require any online connection.
Only features marked with the online badge use internet data. These are mostly AI-powered features, and the data usage is minimal.
Ang Gumi Save ay gumagana nang walang internet connection para sa lahat ng pangunahing feature. Ang mga feature na may online badge lang ang gumagamit ng internet. Minimal ang data usage.
Ang Gumi Save nagagana nga walay internet connection para sa tanan nga nag-una nga feature. Ang mga feature nga adunay online badge ra ang naggamit og internet. Minimal ang data usage.
Backup files stored on the server are automatically deleted after 30 days. This is for security and privacy purposes. Always complete your device transfer within this window. There is no way to recover expired backups.
Ang mga backup file na naka-store sa server ay awtomatikong nadi-delete pagkalipas ng 30 araw. Para ito sa seguridad at privacy. Tapusin ang device transfer sa loob ng 30 araw.
Ang mga backup file nga na-store sa server awtomatiko nga na-delete human sa 30 ka adlaw. Para kini sa seguridad ug privacy.
The AI Coach's most recent report is saved on the server. This is the only personal data stored remotely (besides backup files). The saved report serves as context when generating your next AI coaching session, ensuring continuity and more personalized advice over time.
Ang pinakabagong report ng AI Coach ay naka-save sa server. Ito lang ang personal data na naka-store remotely (bukod sa backup files). Ginagamit ito bilang context kapag gumawa ng bagong AI coaching session.
Ang pinakabag-o nga report sa AI Coach na-save sa server. Mao ra ni ang personal data nga na-store remotely (gawas sa backup files).
The app has 5 main tabs accessible from the bottom navigation:
Ang app ay may 5 pangunahing tab: Dashboard, Utang, Envelope, Dream, Calendar.
Ang app adunay 5 ka nag-una nga tab: Dashboard, Utang, Envelope, Dream, Calendar.
Gumi Save supports three languages:
Change language anytime in Settings > Language or during onboarding.
Sinusuportahan ng Gumi Save ang tatlong wika: English, Tagalog, Cebuano (Bisaya).
Gisuportahan sa Gumi Save ang tulo ka pinulongan: English, Tagalog, Cebuano (Bisaya).
Gumi Save has 3 hidden Easter Eggs tucked away in the app! Can you find them all?
We won't tell you exactly where they are, but here are some hints to get you started:
Hint #1
Try tapping on the number 10 somewhere special... What could the number 10 mean?
Hint #2
The words "Gumi Save" appear in many places throughout the app. But one of them is more than just a label...
Hint #3
You add Income, Expense, and Savings every day... but have you tried tapping on their icons in an unexpected place?
Happy hunting! If you find one, try sharing it with your friends and see if they found the same ones.
May 3 nakatagong Easter Egg ang Gumi Save! Mahahanap mo ba silang lahat?
Hindi namin sasabihin kung saan exacto, pero narito ang mga pahiwatig:
Pahiwatig #1
Subukang i-tap ang number na 10 sa isang espesyal na lugar...
Pahiwatig #2
Ang salitang "Gumi Save" ay lumilitaw sa maraming lugar sa app. Pero isa sa kanila ay higit pa sa isang label...
Pahiwatig #3
Araw-araw kang nagdadagdag ng Income, Expense, at Savings... pero nasubukan mo na bang i-tap ang kanilang icons sa isang hindi inaasahang lugar?
Masayang paghahanap! Kung nakahanap ka ng isa, i-share sa mga kaibigan mo!
Adunay 3 ka natagong Easter Egg ang Gumi Save! Makit-an ba nimo silang tanan?
Dili namo isulti kung asa exacto, pero ania ang mga pahibalo:
Pahibalo #1
Sulayi pag-tap sa numero nga 10 sa usa ka espesyal nga lugar...
Pahibalo #2
Ang pulong "Gumi Save" makita sa daghang lugar sa app. Pero usa kanila labaw pa sa usa ka label...
Pahibalo #3
Adlaw-adlaw ka nagdugang og Income, Expense, ug Savings... pero nasulay ba nimo pag-tap sa ilang icons sa usa ka wala gidahom nga lugar?
Malipayon nga pagpangita! Kung nakit-an nimo ang usa, i-share sa imong mga higala!
A portion of all donations will be used to support children in Tarlac Bamban and Hansonville.
We hope that the time these children spend begging on the streets can instead be spent studying at school. Every small amount helps build a brighter future for them. Your support, no matter how small, can make a real difference in a child's life.
All features in Gumi Save are completely free. This app is built by a single developer in their personal time, with passion and dedication.
The server costs for AI features (AI Coach, Scan Receipt, Bill Estimator, Daily Swerte, Palad Guide, etc.) are all paid out of pocket by one person. Continuous upgrades, bug fixes, and new features require personal time investment every day.
Your generous support directly helps:
You can donate through the "Support Us" menu in the app's side menu. Please only give what you're comfortable with — even the smallest amount is deeply appreciated and makes a difference.
When you donate, you can meet upgraded Gumi characters depending on the amount of your donation!
More than any donation, the greatest support you can give is:
Your continued use and honest feedback is what drives this app forward. Join our community and let your voice be heard:
Join the community, share tips, and give feedback
Send suggestions, bug reports, or just say hi!
Thank you for being part of the Gumi Save family!
Ang isang bahagi ng lahat ng donasyon ay gagamitin para suportahan ang mga bata sa Clark, Tarlac (Bamban) at Hansonville.
Umaasa kami na ang oras na ginugugol ng mga batang ito sa paghingi ng limos sa kalsada ay maaari na nilang gugulin sa pag-aaral sa paaralan. Bawat maliit na halaga ay nakakatulong para sa mas maliwanag na kinabukasan nila.
Lahat ng feature sa Gumi Save ay ganap na libre. Ang app na ito ay ginawa ng isang developer lang sa kanyang personal na oras.
Ang server costs para sa AI features ay binabayaran ng isang tao lang. Ang tuluy-tuloy na upgrade, bug fix, at bagong features ay nangangailangan ng personal na oras at pagsisikap araw-araw.
Maaari kang mag-donate sa pamamagitan ng "Support Us" menu sa side menu ng app. Magbigay lang ng halaga na komportable ka — kahit maliit, lubos na pinapahalagahan.
Kapag nag-donate ka, makikilala mo ang upgraded na Gumi characters depende sa halaga ng iyong donasyon!
Higit sa anumang donasyon, ang pinakamahalagang suporta na maaari mong ibigay ay:
Sumali sa aming komunidad:
Sumali sa komunidad at magbigay ng feedback
Magpadala ng mga suhestyon o bug report
Salamat sa pagiging bahagi ng Gumi Save family!
Usa ka bahin sa tanan nga donasyon gamiton para suportahan ang mga bata sa Clark, Tarlac (Bamban) ug Hansonville.
Naglaum kami nga ang oras nga gigugol niining mga bata sa pagpakilimos sa kadalanan mahimo na nilang gamiton sa pagtuon sa eskwelahan. Bisan gamay nga kantidad makatabang para sa mas hayag nga kaugmaon nila.
Tanan nga feature sa Gumi Save libre kaayo. Kini nga app gihimo sa usa ka developer lang sa iyang personal nga oras.
Ang server costs para sa AI features gibayaran sa usa ka tawo lang. Ang padayon nga upgrade, bug fix, ug bag-ong features nagkinahanglan og personal nga oras ug paningkamot matag adlaw.
Mahimo kang mag-donate pinaagi sa "Support Us" menu sa side menu sa app. Maghatag lang sa kantidad nga komportable ka — bisan gamay, dakong pasalamat namo.
Kung mag-donate ka, makaila ka og upgraded nga Gumi characters depende sa kantidad sa imong donasyon!
Labaw pa sa bisan unsang donasyon, ang pinakamaayong suporta nga imong ikahatag mao:
Apil sa among komunidad:
Apil sa komunidad ug maghatag og feedback
Magpadala og mga suhestyon o bug report
Salamat sa pagka-bahin sa Gumi Save family!